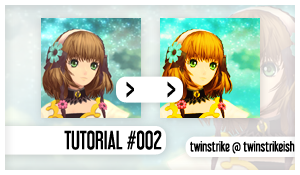
❝ 0066 ❞ → tutorial

✿ Program: Adobe Photoshop CS3
✿ Type: Coloring
✿ Difficult: Medium
✿ PSD: No
before
( tutorial 002 )
result
( image )
( step one )
Crop and prepare your base. Sharpen if necessary.


( step two )
New Adjustment Layer - Channel Mixer
Red +100, 0, 0
Green 0, +100, 0
Blue -20, 5, 105


( step three )
New Adjustment Layer - Curves
Add two new points.
1) Output: 78 Input: 62
2) Output: 220 Input: 119


( step four )
New Adjustment Layer - Hue/Saturation
Masters
Saturation +35


( step five )
New Adjustment Layer - Brightness/Contrast
Brightness: +27
Contrast: +42
Set the Opacity of this Layer to 46%


( step six )
New Adjustment Layer - Vibrance
Vibrance: +79


( step seven )
New Adjustment Layer - Selective Color
Reds C +55 M -15 Y -5 K +5
Yellows C 0 M 0 Y +5 K +10
Neutrals C +15 M 0 Y -8 K 0


( step eight )
New Adjustment Layer - Selective Color
Reds C -35 M +2 Y 0 K +35
Yellows C -55 M -10 Y 0 K +35
Cyans C +35 M -45 Y 0 K -34
Whites C 100 M 0 Y -65 K 0
Neutrals C +20 M 0 Y +25 K +15
Blacks C -10 M 0 Y +25 K +50
Set the Opacity of this Layer to 75%


( step nine )
New Adjustment Layer - Channel Mixer
Red +110, +10, -6
Green -10, +115, -10
Blue +5, -10, +95
Set the Opacity of this Layer to 44%

( other examples )


ICONS FOR JAPAN
my thread here
✿ IF YOU TRY THE TUTORIAL, SHOW ME THE RESULTS! I'D LOVE TO SEE IT. :')
✿ COMMENTS AND CREDITS ARE LOVE; twinstrike or twinstrikeish
✿ RESOURCES ( HERE );
✿ REQUESTS? ( HERE );
✿ AFFILIATE? ( HERE );
✿ LIKED? WANT TO SEE THE UPDATES? ( WATCH ME );