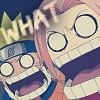
Dead Easy Tut
Go from this (by myrasis) to this 
Step 1: Obviously, crop, resize, sharpen. I cut off their faces a little cuz I'm like that.
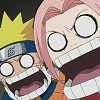
Step 2: New layer. Fill with dark blue (#000c32). Multiply.

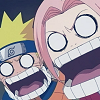
Step 3: Duplicate dark blue layer and set that to exclusion (difference will work just as well or even better).
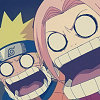
Step 4: Add text on a VECTOR layer (not selection or floating). Use a font that suits the icon (I used Edo size 22, Edo can be found at Dafont.com) and convert it to a raster.
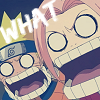
Step 5: Aw, scoops, x-x The font is hard to read, ennit? Cut the font first, then open a new file w/ ctrl+n (dont lose the current one or you're toast). I'd reccoment 200x200 filled black. ctrl+e will make your text float over the black background. Selection>Modify>Expand>1. That will select a one pixle boarder around the text. Selections>Modify>Feather. What your settings will be will vary, i usually just use a random number. Ok when you have what you want. After all that cut your text, close the current picture and go back to your icon. Layer Paste, ctrl+l, the font on move it to were you want. If you want to move the text under the dark blue layers.


Step 1: Obviously, crop, resize, sharpen. I cut off their faces a little cuz I'm like that.

Step 2: New layer. Fill with dark blue (#000c32). Multiply.


Step 3: Duplicate dark blue layer and set that to exclusion (difference will work just as well or even better).

Step 4: Add text on a VECTOR layer (not selection or floating). Use a font that suits the icon (I used Edo size 22, Edo can be found at Dafont.com) and convert it to a raster.

Step 5: Aw, scoops, x-x The font is hard to read, ennit? Cut the font first, then open a new file w/ ctrl+n (dont lose the current one or you're toast). I'd reccoment 200x200 filled black. ctrl+e will make your text float over the black background. Selection>Modify>Expand>1. That will select a one pixle boarder around the text. Selections>Modify>Feather. What your settings will be will vary, i usually just use a random number. Ok when you have what you want. After all that cut your text, close the current picture and go back to your icon. Layer Paste, ctrl+l, the font on move it to were you want. If you want to move the text under the dark blue layers.
