ladyterentia: notes
I've gone through all the pictures you've given me and I've cropped and clustered them together so I can do some notes.
Belt:
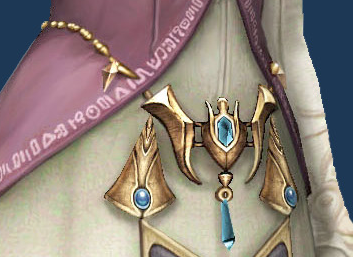
This was the most detailed image provided and I ended up using it for a lot of my references. At this point, I'm still debating with the materials a bit. The beads shouldn't be a problem, but the front kinda is. My first instinct was to attack it with sculpey but that material can be rather heavy and I don't want to weigh down your purple vest, since the bulk of the weight rests on that piece. Resin is a definite possibility, but I would have to wait for warmer weather. As I mentioned to you before, I would use the darker blue gems since I know where to find those pretty readily. I would add jewelry rings to the bottom tips for the fabric to hang down, but that thing is going to need a LOT of interfacing to stay taught. Once I get the belt made, I'll tell you the length from each point so you'll know how wide that piece of fabric needs to be.
::EDIT:: I'm going to need your waist and hip measurements for this, by the way. ^^;
Bust:
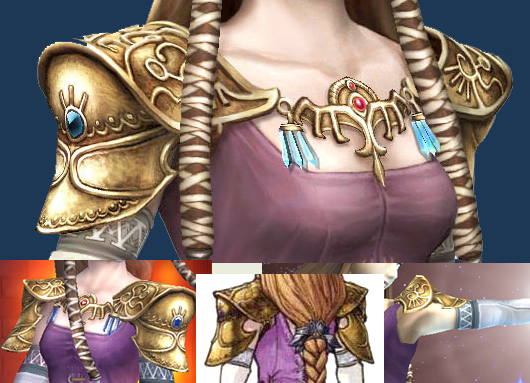
(again, HUZZAH for detailed pictures!!) I decided to clump the necklace and shoulder armor together since they have to cooperate with each other so much. I'm still debating between wonderflex and craft foam with the armor, though I'm starting to lean more towards the craft foam. I'm going to deviate from the lower right image on the movement issue. I'm going to connect the edge of the necklace with the tip of the armor and put a hinge between the two plates for mobility. The top plate will remain stationary and the bottom part is what will move. Though for photos, you might want to pose with your arms down so people won't nit for accuracy. If you think about it, if the shoulder is one solid piece, it would have to connect to the dress, but you can see in the picture that it actually doesn't. Boo for designers who have no concept of working armor!!
Earrings:
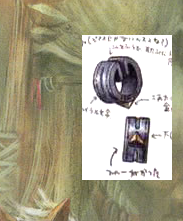
At this time, I have no idea what material to use. It's still a work in progress. I have decided, though, that the red ribbon attaches on the INSIDE EDGE of the hoop, so that's what I'm going to do for that. Perhaps craft foam with really strong magnets?
Tiara:
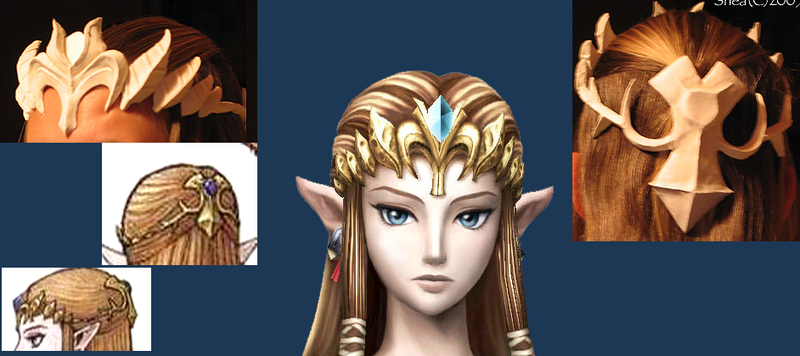
Although in the true reference picture, the back half of the tiara is higher, I think it would be a lot easier to make and wear if it was lower. It would be easier to balance on your head. I will, however, attach a hair clip to the inside of the big knob in the back so it can attach to your wig so it will stay in place. I'm definitely using sculpey on this piece.
Hair clip:
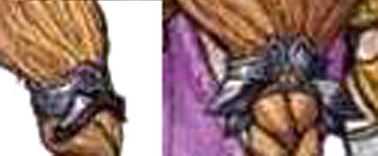
I had to blow up this image quite a bit but I think I have a general idea of what it looks like. This is DEFINITELY going to be made of craft foam and there will be a seam in the back so you can clip it onto your wig and caulk it in place. After working with a wig myself for a bit, the ponytail is NOT going to be as thick as it is in this picture, so I will make it quite a bit smaller, unless you want to use a bunch of packs of extensions to bulk it up, but that would just add way too much weight to the back and that would just not be good.
Belt:

This was the most detailed image provided and I ended up using it for a lot of my references. At this point, I'm still debating with the materials a bit. The beads shouldn't be a problem, but the front kinda is. My first instinct was to attack it with sculpey but that material can be rather heavy and I don't want to weigh down your purple vest, since the bulk of the weight rests on that piece. Resin is a definite possibility, but I would have to wait for warmer weather. As I mentioned to you before, I would use the darker blue gems since I know where to find those pretty readily. I would add jewelry rings to the bottom tips for the fabric to hang down, but that thing is going to need a LOT of interfacing to stay taught. Once I get the belt made, I'll tell you the length from each point so you'll know how wide that piece of fabric needs to be.
::EDIT:: I'm going to need your waist and hip measurements for this, by the way. ^^;
Bust:

(again, HUZZAH for detailed pictures!!) I decided to clump the necklace and shoulder armor together since they have to cooperate with each other so much. I'm still debating between wonderflex and craft foam with the armor, though I'm starting to lean more towards the craft foam. I'm going to deviate from the lower right image on the movement issue. I'm going to connect the edge of the necklace with the tip of the armor and put a hinge between the two plates for mobility. The top plate will remain stationary and the bottom part is what will move. Though for photos, you might want to pose with your arms down so people won't nit for accuracy. If you think about it, if the shoulder is one solid piece, it would have to connect to the dress, but you can see in the picture that it actually doesn't. Boo for designers who have no concept of working armor!!
Earrings:

At this time, I have no idea what material to use. It's still a work in progress. I have decided, though, that the red ribbon attaches on the INSIDE EDGE of the hoop, so that's what I'm going to do for that. Perhaps craft foam with really strong magnets?
Tiara:

Although in the true reference picture, the back half of the tiara is higher, I think it would be a lot easier to make and wear if it was lower. It would be easier to balance on your head. I will, however, attach a hair clip to the inside of the big knob in the back so it can attach to your wig so it will stay in place. I'm definitely using sculpey on this piece.
Hair clip:

I had to blow up this image quite a bit but I think I have a general idea of what it looks like. This is DEFINITELY going to be made of craft foam and there will be a seam in the back so you can clip it onto your wig and caulk it in place. After working with a wig myself for a bit, the ponytail is NOT going to be as thick as it is in this picture, so I will make it quite a bit smaller, unless you want to use a bunch of packs of extensions to bulk it up, but that would just add way too much weight to the back and that would just not be good.