Icon Tutorial
Go from

to

In Photoshop CS4
1. Crop your image, resize, etc etc

2. Duplicate and set the new layer to OVERLAY (100%)

>>

3. Take this texture by phaantasia and set to LIGHTEN (100%). Mine was a bit pale, so added a bit of contrast to the layer.

>>

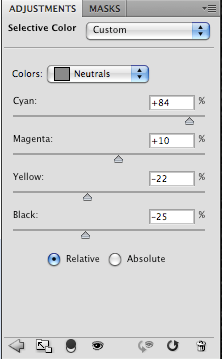
4. Create a new Selective Colour adjustment layer and enter in these values:

and you will get:

Tada!