My first tutorial! :)
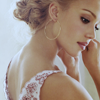
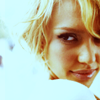
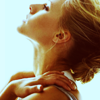
From 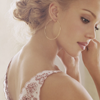
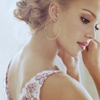
to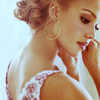
Made in Photoshop 7.0
Probably not translatable because of Channel Mixer and Curves.
1. Prepare your base: crop, resize, sharpen etc.
2. Layer-> New Fill layer-> Solid Color.
Set to Linear Burn 20%.
Click OK.
Choose color #BEBEBE.
Click OK.
3. Layer-> New Adjustment Layer-> Channel Mixer.
Click OK.
Red: +85/0/0/0
Blue: 0/0/+115/0
Click OK.
4. Duplicate your base.
Drag to top and set to Soft Light 100%.
5. Duplicate your base.
Drag to top and set to Screen 30%
6. Duplicate your base.
Drag to top and set to Soft Light 100%.
7. Layer-> New Adjustment Layer-> Curves.
Click OK.
RGB:
1st point: 88/79
2nd point: 169/165
Green:
1st point: 67/62
2nd point: 114/102
3rd point: 169/162
Blue:
1st point: 56/46
2nd point: 118/114
3rd point: 162/169
Click OK.

8. Layer-> New Fill layer-> Solid Color
Set to Exclusion 100%.
Click OK.
Choose color #270300.
Click OK.
9. If you want more contrast:
Duplicate your base.
Drag to top and set to Soft Light 50%.
Finished:)
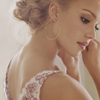
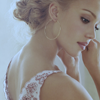
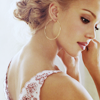
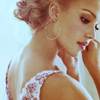
Other examples:
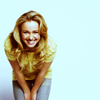
Remember, no image looks the same, so you probably need to change opacities on some layers.
I'd love to see your results^^
Download the .PSD here:)
to
Made in Photoshop 7.0
Probably not translatable because of Channel Mixer and Curves.
1. Prepare your base: crop, resize, sharpen etc.
2. Layer-> New Fill layer-> Solid Color.
Set to Linear Burn 20%.
Click OK.
Choose color #BEBEBE.
Click OK.
3. Layer-> New Adjustment Layer-> Channel Mixer.
Click OK.
Red: +85/0/0/0
Blue: 0/0/+115/0
Click OK.
4. Duplicate your base.
Drag to top and set to Soft Light 100%.
5. Duplicate your base.
Drag to top and set to Screen 30%
6. Duplicate your base.
Drag to top and set to Soft Light 100%.
7. Layer-> New Adjustment Layer-> Curves.
Click OK.
RGB:
1st point: 88/79
2nd point: 169/165
Green:
1st point: 67/62
2nd point: 114/102
3rd point: 169/162
Blue:
1st point: 56/46
2nd point: 118/114
3rd point: 162/169
Click OK.
8. Layer-> New Fill layer-> Solid Color
Set to Exclusion 100%.
Click OK.
Choose color #270300.
Click OK.
9. If you want more contrast:
Duplicate your base.
Drag to top and set to Soft Light 50%.
Finished:)
Other examples:
Remember, no image looks the same, so you probably need to change opacities on some layers.
I'd love to see your results^^
Download the .PSD here:)