New tutorial! --Not translatable at the Moment!--
THIS TUTORIAL ISN'T TRANSLATABLE AT THE MOMENT EXCEPT FOR PS USERS. This tut is for these icons here. Enjoy!
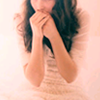
From this
to this
1) Get your base, crop, sharpen, etc. etc.

2) Make a new color balance layer with the following settings:
MIDTONES: 25, -2, -4
SHADOWS: -33, 1, -1
3) Make a new channel mixer layer with these settings:
RED: red: 112 green: 100 blue: 10
GREEN: red: 0 green: 100 blue: 0
BLUE: red: 0 green: 0 blue: 100

4) Now, make a selective coloring layer, and put in these settings:
METHOD: RELATIVE
reds: cyan: -45 black: -15
cyans: cyan: 100
blues: cyan: -100 black: -47
5) Make a color balance layer, and enter in these settings:
MIDTONES: 20, 22, 18
HIGHLIGHTS: 19, 0, 12

6) Now, make a new layer, fill it with #90cdf7, and set it to color burn (burn) 31%.

7) Make a hue/sat layer with these settings:
master sat: 21

8) Finally, make a new layer, fill it with #081925, and set it to exclusion 54%.
And your done! Remember you can always skip certain steps or change the settings to your liking. Every image differs, so your settings probably will, too!
&CREDIT FOR ANYTHING!!
&Comments are awesome! criticism is definitely welcome!
&friend me for updates!
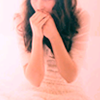
From this
to this
1) Get your base, crop, sharpen, etc. etc.
2) Make a new color balance layer with the following settings:
MIDTONES: 25, -2, -4
SHADOWS: -33, 1, -1
3) Make a new channel mixer layer with these settings:
RED: red: 112 green: 100 blue: 10
GREEN: red: 0 green: 100 blue: 0
BLUE: red: 0 green: 0 blue: 100
4) Now, make a selective coloring layer, and put in these settings:
METHOD: RELATIVE
reds: cyan: -45 black: -15
cyans: cyan: 100
blues: cyan: -100 black: -47
5) Make a color balance layer, and enter in these settings:
MIDTONES: 20, 22, 18
HIGHLIGHTS: 19, 0, 12
6) Now, make a new layer, fill it with #90cdf7, and set it to color burn (burn) 31%.
7) Make a hue/sat layer with these settings:
master sat: 21
8) Finally, make a new layer, fill it with #081925, and set it to exclusion 54%.
And your done! Remember you can always skip certain steps or change the settings to your liking. Every image differs, so your settings probably will, too!
&CREDIT FOR ANYTHING!!
&Comments are awesome! criticism is definitely welcome!
&friend me for updates!