two tutorials
These were requested by famous_divaxo
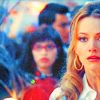
Tutorial #2:

>>
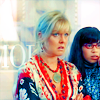
or with a couple of minor adjustments:
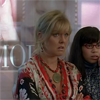
>>
made in Photoshop CS. uses selective color.

>>
After you've cropped your base, duplicate it and set it to screen.

>>
New layer filled with #FFFC00, set to Soft Light at 100% opacity.

>>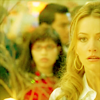
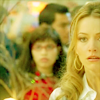
New layer filled with #6377C1, set to Soft Light at 100% opacity.

>>
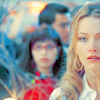
Now comes the fun part. Make a selective color adjustment layer.
Reds:cyan: -100
magenta: 0
yellow: +100
black: +100
Yellows:cyan: -23
magenta: 0
yellow: -20
black: 0
Magentas:cyan: -100
magenta: -100
yellow: -100
black: 0
Neutrals:cyan: +67
magenta: -19
yellow: -80
black: +13

>>
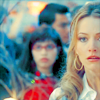
New layer filled with #D3E7E6, set to color burn at 100% opacity.

>>
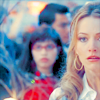
New layer filled with #D984E8, set to soft light at 50% opacity.

>>
Then duplicate your base, bring it to the top and set it to soft light. Opacity at 100%.

>>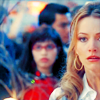
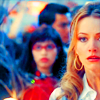
Now a hue/saturation adjustment layer. Saturation at 40%.

>>
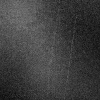
Then I took this texture by unmasked_icons:
>>
and set it on screen at 50% opacity and ta da! you're finished. Your layers should look like this.
now to get:

>>
All you do is omit the texture and instead of one base layer screened, you do two. Does that make sense? The layers look like this.
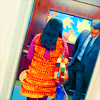
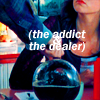
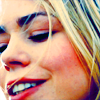
Other icons made using this technique (some with slight variations):

Tutorial #3:
>>
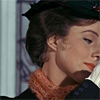
made in Photoshop CS. uses selective color.
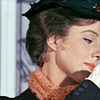
Duplicate your base and screen it.

>>
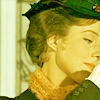
New layer filled with #FFFC00, set to soft light at 100% opacity.

>>
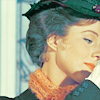
Now comes a selective color adjustment layer. Same settings as the previous tutorial:
Reds:cyan: -100
magenta: 0
yellow: +100
black: +100
Yellows:cyan: -23
magenta: 0
yellow: -20
black: 0
Magentas:cyan: -100
magenta: -100
yellow: -100
black: 0
Neutrals:cyan: +67
magenta: -19
yellow: -80
black: +13

>>
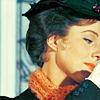
Duplicate your base, bring it to the top and set it to soft light at 100%.

>>
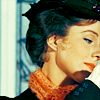
New layer filled with #D3E7E6 set to color burn at 100%.

>>
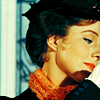
New layer filled with #C6C9B4 set to color burn at 50%.

>>
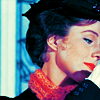
Duplicate the selective color adjustment layer and bring it to the top.

>>
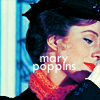
Add text if you wish. I used Tw Cen MT at 14. End result:

this is the layer palette.
I hope these were helpful! I would love to see what you some up with. Please credit if you use the icons.
Tutorial #2:

>>
or with a couple of minor adjustments:

>>
made in Photoshop CS. uses selective color.

>>
After you've cropped your base, duplicate it and set it to screen.

>>

New layer filled with #FFFC00, set to Soft Light at 100% opacity.

>>

New layer filled with #6377C1, set to Soft Light at 100% opacity.

>>

Now comes the fun part. Make a selective color adjustment layer.
Reds:cyan: -100
magenta: 0
yellow: +100
black: +100
Yellows:cyan: -23
magenta: 0
yellow: -20
black: 0
Magentas:cyan: -100
magenta: -100
yellow: -100
black: 0
Neutrals:cyan: +67
magenta: -19
yellow: -80
black: +13

>>

New layer filled with #D3E7E6, set to color burn at 100% opacity.

>>

New layer filled with #D984E8, set to soft light at 50% opacity.

>>

Then duplicate your base, bring it to the top and set it to soft light. Opacity at 100%.

>>

Now a hue/saturation adjustment layer. Saturation at 40%.

>>

Then I took this texture by unmasked_icons:

>>
and set it on screen at 50% opacity and ta da! you're finished. Your layers should look like this.
now to get:

>>
All you do is omit the texture and instead of one base layer screened, you do two. Does that make sense? The layers look like this.
Other icons made using this technique (some with slight variations):
Tutorial #3:

>>
made in Photoshop CS. uses selective color.
Duplicate your base and screen it.

>>

New layer filled with #FFFC00, set to soft light at 100% opacity.

>>

Now comes a selective color adjustment layer. Same settings as the previous tutorial:
Reds:cyan: -100
magenta: 0
yellow: +100
black: +100
Yellows:cyan: -23
magenta: 0
yellow: -20
black: 0
Magentas:cyan: -100
magenta: -100
yellow: -100
black: 0
Neutrals:cyan: +67
magenta: -19
yellow: -80
black: +13

>>

Duplicate your base, bring it to the top and set it to soft light at 100%.

>>

New layer filled with #D3E7E6 set to color burn at 100%.

>>

New layer filled with #C6C9B4 set to color burn at 50%.

>>

Duplicate the selective color adjustment layer and bring it to the top.

>>

Add text if you wish. I used Tw Cen MT at 14. End result:
this is the layer palette.
I hope these were helpful! I would love to see what you some up with. Please credit if you use the icons.