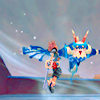
TUTORIALS; #3, #4, #5
to
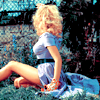
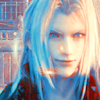
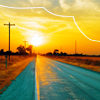
01 Crop your image. Do whatever you usually do to your base. I think I did Auto Color, Contrast and Levels. Not sure, though.
02 Paste this pattern. Set to Soft Light 50% to brighten your image.
03 Make a Selective Color layer.
Reds:-100, 0, 100, 0
Yellows:-100, 0, 100, 0
Cyans: 100, -9, -100, 100
Neutrals: 19, -4, -12, 10
03 Another one.
Reds:-100, 0, 100, 39
Cyans: 100, 27, -100, 16
Blues: 100, -41, -100, -80
Neutrals: 18, 0, 9, -8
04 Make a Hue/Saturation layer. Set the Sat to +20. Done!
EXAMPLES


.PSD file.

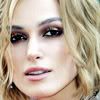
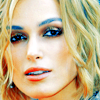
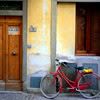
to

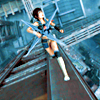
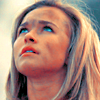
01 Crop. Make a Saturation layer. Set to 60.
02 Flood fill layer with #FFE800. Set to Soft Light at 100%.
03 Make a Selective Color layer.
Reds:-100, 0, 100, 0
Yellows:100, 0, -100, 0
Cyans: 100, 0, -100, 100
Blues: 100, 0, -100, 0
Neutrals: 100, 23, -23, -60
03 Last Selective layer.
Reds:-100, 0, 100, 0
Cyans: 100, 0, -100, 0
Blues: 100, 0, -100, 0
Whites: 0, 0, 0, -100*
Neutrals: 19, 10, 25, 10
*Depends on the image. For the Gwen icon, I made it -100 but for another image you might want -40 or 0. It varies ^^;
EXAMPLES


.PSD file.
to
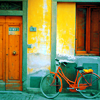
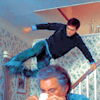
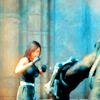
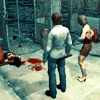
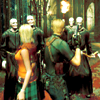
01 Make your base. Auto Contrast it.
02 Make a Selective Color layer.
Reds:-100, 0, 100, 0
Yellows:-100, 0, 100, 0
Neutrals: 43, -13, -20, -22
03 Last Selective layer.
Reds:-100, -24, 100, 0
Yellows:-100, 13, 100, 0
Greens: -100, -100, 100, 0
Cyans: 100, -18, 100, 18
Neutrals: 17, 18, 19, 7
EXAMPLES
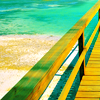


.PSD file.