Icon Tutorial 01
Since I was nicely asked by dark_sephy I'm going to teach you guys how to make this icon:
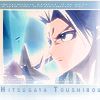
Now take note that I've never made a tutorial before and it requires at least a working knowledge of photoshop. However I'll try to make it as simplistic as possible for beginners as well. This'll probably be the only time I'll so detailed about photoshop's functions so if you've ever wanted to learn how to use it hopefully this will help. I personally use Photoshop CS2, but this will work w/earlier versions of the program. If I lose you guys anywhere feel free to ask questions ^^
Note: Anything I put between "[]" will tell you where to find it via the toolbar on the top. "{}" will be its default hotkey if it has one.
First I took my base image and resized its width to 100px. [Image -> Image Size] {Alt+Ctrl+I}
Then changed its canvas size to 100x100px. Be sure to change the inches to pixels. [Image -> Canvas Size] {Alt+Ctrl+C}
I moved it around using the move tool {V} til I liked its position. It should be looking like this:
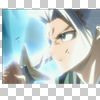
I didn't like the little piece of debris covering some of Shirou's face so I used the eyedropper tool {I} to pick a skin tone from his face. Then used the brush tool {B} to paint it out.
Here were the brush settings I used. Right-click w/the brush to bring these options up. The skin tone I got was #f6e4d0. To change colors click here or the black box in this case. You can pick the color you want or just type in a # here.
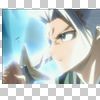
Shirou looks a little blurry here. So I sharpened the image to make it clearer. [Filter -> Sharpen -> Sharpen]
I also want to increase the contrast as it looks a bit light. So I opened my Levels box. [Image -> Adjustments -> Levels] {Ctrl+L} Here is the simple level adjustment I did. It should be looking something like this:
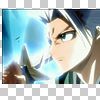
Still w/me? Good. Now we're going to adjust the colors by opening up the Color Balance box and put in these settings. [Image -> Adjustments -> Color Balance] {Ctrl+B} The result should be similar to this more or less:
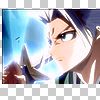
The base is now done. Huzzah. Now on to the borders. This is probably where I'm going to lose a lot of you if you're new to photoshop. Create a new layer [Layer -> New -> Layer] {Shift+Ctrl+N} or you can just click the button at the bottom of the layers window. Use the paint bucket tool {G} to fill this layer w/ white.
Click the add layer mask button. Create this mask in the layer mask. White = what shows and Black = what is hidden. Basically I used this border to cover up the black outlines. I could've deleted them off the original base image, but where the fun in that? Make sure the layer mask is selected when you do this.
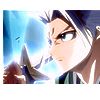
Create a new layer. I used a small text brush made by ewanism, set my color to white and placed it slightly above the bottom white border. I'm too lazy to tell you how to install and load your brushes so read here to learn how.
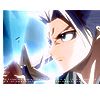
Create a new layer. I picked the color #00101f and filled it in w/my paint bucket. Set the layer properties to exclusion at 100% opacity.
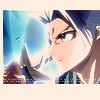
Using this light texture I got from weapon_icons, I drag it in place over Shirou like so and then set the layer to screen at 100% opacity.
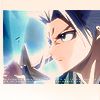
Create a new layer. Using the rectangle marquee tool {M} make 2 rectangle selections and then fill them in w/the color #7caac1.
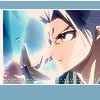
Create a new layer. Fill it w/the color #efcd7b. Set it to multiply at 29% opacity.
Use the same layer mask from the white border you made earlier. To do that select the white border's layer mask and right-click to bring up its properties. Click on the add layer mask selection. Go back up to the yellow layer you just made and hit the add layer mask button. You now should have the same layer mask as the white border. Yay.
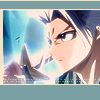
Create a new layer. Fill it w/the color #7b8acc. Set it to hard light at 25% opacity. Use the same layer mask from the white border again.
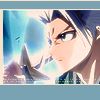
Duplicate the small text layer and drag it above the blue and yellow layers. Place it near the top of the icon.
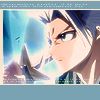
Create a new layer and fill it w/white. Add a new layer mask to this. I used this brush I got from aino_hanako's classroom fan grunge set. Fill in the mask w/black first. Set the brush color to white and paint the mask until it looks like something this.
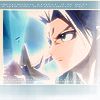
Create a new layer. Switch your paint bucket tool to the gradient tool. I loaded this gradient I got from drave. Set your gradient options to make to create this gradient. Set it to screen at 100% opacity. To learn how to install and load gradients read here. Look through the comments.
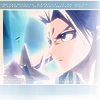
We're almost done. All that's left if the text at the bottom. Using the text tool {T} I typed his name near the bottom. The text I used was FranklinGotTDemCon at size 8, and it's color #8dabcc. Set it's kerning to 430 and have small caps on. To bring up this text box click here. It should now look like this if you didn't get lost somewhere.

And this, my friends, was a very long winded way of showing how I made this icon. If you want to check how your layers should look click here. Hope this helps >.>
Now take note that I've never made a tutorial before and it requires at least a working knowledge of photoshop. However I'll try to make it as simplistic as possible for beginners as well. This'll probably be the only time I'll so detailed about photoshop's functions so if you've ever wanted to learn how to use it hopefully this will help. I personally use Photoshop CS2, but this will work w/earlier versions of the program. If I lose you guys anywhere feel free to ask questions ^^
Note: Anything I put between "[]" will tell you where to find it via the toolbar on the top. "{}" will be its default hotkey if it has one.
First I took my base image and resized its width to 100px. [Image -> Image Size] {Alt+Ctrl+I}
Then changed its canvas size to 100x100px. Be sure to change the inches to pixels. [Image -> Canvas Size] {Alt+Ctrl+C}
I moved it around using the move tool {V} til I liked its position. It should be looking like this:

I didn't like the little piece of debris covering some of Shirou's face so I used the eyedropper tool {I} to pick a skin tone from his face. Then used the brush tool {B} to paint it out.
Here were the brush settings I used. Right-click w/the brush to bring these options up. The skin tone I got was #f6e4d0. To change colors click here or the black box in this case. You can pick the color you want or just type in a # here.

Shirou looks a little blurry here. So I sharpened the image to make it clearer. [Filter -> Sharpen -> Sharpen]
I also want to increase the contrast as it looks a bit light. So I opened my Levels box. [Image -> Adjustments -> Levels] {Ctrl+L} Here is the simple level adjustment I did. It should be looking something like this:

Still w/me? Good. Now we're going to adjust the colors by opening up the Color Balance box and put in these settings. [Image -> Adjustments -> Color Balance] {Ctrl+B} The result should be similar to this more or less:

The base is now done. Huzzah. Now on to the borders. This is probably where I'm going to lose a lot of you if you're new to photoshop. Create a new layer [Layer -> New -> Layer] {Shift+Ctrl+N} or you can just click the button at the bottom of the layers window. Use the paint bucket tool {G} to fill this layer w/ white.
Click the add layer mask button. Create this mask in the layer mask. White = what shows and Black = what is hidden. Basically I used this border to cover up the black outlines. I could've deleted them off the original base image, but where the fun in that? Make sure the layer mask is selected when you do this.

Create a new layer. I used a small text brush made by ewanism, set my color to white and placed it slightly above the bottom white border. I'm too lazy to tell you how to install and load your brushes so read here to learn how.

Create a new layer. I picked the color #00101f and filled it in w/my paint bucket. Set the layer properties to exclusion at 100% opacity.

Using this light texture I got from weapon_icons, I drag it in place over Shirou like so and then set the layer to screen at 100% opacity.

Create a new layer. Using the rectangle marquee tool {M} make 2 rectangle selections and then fill them in w/the color #7caac1.

Create a new layer. Fill it w/the color #efcd7b. Set it to multiply at 29% opacity.
Use the same layer mask from the white border you made earlier. To do that select the white border's layer mask and right-click to bring up its properties. Click on the add layer mask selection. Go back up to the yellow layer you just made and hit the add layer mask button. You now should have the same layer mask as the white border. Yay.

Create a new layer. Fill it w/the color #7b8acc. Set it to hard light at 25% opacity. Use the same layer mask from the white border again.

Duplicate the small text layer and drag it above the blue and yellow layers. Place it near the top of the icon.

Create a new layer and fill it w/white. Add a new layer mask to this. I used this brush I got from aino_hanako's classroom fan grunge set. Fill in the mask w/black first. Set the brush color to white and paint the mask until it looks like something this.

Create a new layer. Switch your paint bucket tool to the gradient tool. I loaded this gradient I got from drave. Set your gradient options to make to create this gradient. Set it to screen at 100% opacity. To learn how to install and load gradients read here. Look through the comments.

We're almost done. All that's left if the text at the bottom. Using the text tool {T} I typed his name near the bottom. The text I used was FranklinGotTDemCon at size 8, and it's color #8dabcc. Set it's kerning to 430 and have small caps on. To bring up this text box click here. It should now look like this if you didn't get lost somewhere.
And this, my friends, was a very long winded way of showing how I made this icon. If you want to check how your layers should look click here. Hope this helps >.>