(no subject)
Hey, look who's updating again!
So here's the thing: I have been working on my ponies. I have been working hard. I have been working badly. And it's only recently that I've realized that for once this isn't my fault.
Basically, I have spent the last couple months beating my head against a wall when it comes to my sculpting. I had ideas in my head, and I had the patience to work them out, but my hands were apparently having none of it. So I'd peel off the new work, curse at the waste of sculpting compound, and try again. Over and over. I could get little things to work, sometimes, but anything big or detailed was out the window. There was a certain amount of despair involved in the process, and a lot of 'what happened to me?'
I now know what happened to me. I was being stubborn because I was being cheap.
As I may or may not have mentioned in a previous post, the stuff I use for almost all my sculpting is Aves Apoxie Sculpt, a two-part clay that cures via chemical reaction rather than heat or air. The advantage of it is that it's very durable, sets up without any outside help (it will even cure underwater), and doesn't crack or shrink as it's curing. The two biggest disadvantages are that you've got a limited working window once you mix it, and the unmixed compound has a shelf life.
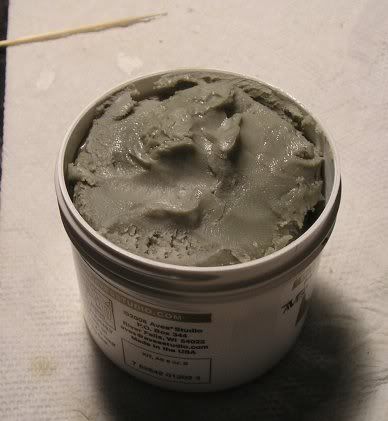
This is what Part B of the two-part mix is supposed to look like: Uniformly gray, with a firm but malleable consistency and a soft texture.
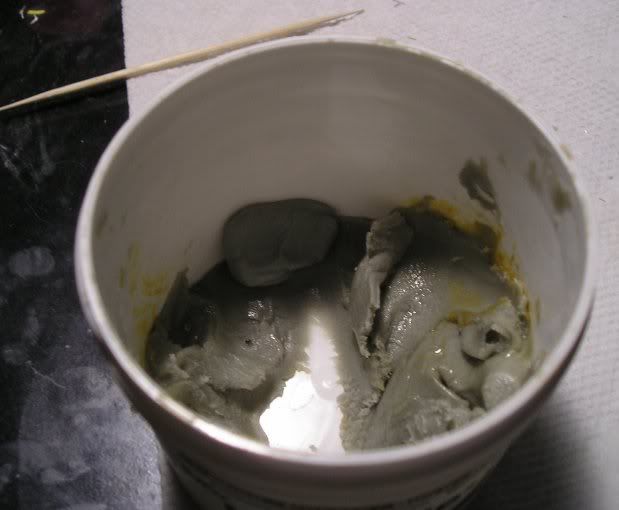
This is what the stuff I was trying to work with looked like: Hard, crusty, and with a yellow film where the various oils separated from each other. And I really thought this was going to mix up properly? I'd say I don't know what I was thinking, but I do: I was thinking, "I don't want to buy another jar!" But I did eventually give in, and God willing I'll be able to make a little quicker progress than I have been.
Let's take a look at the progress I have made, shall we?
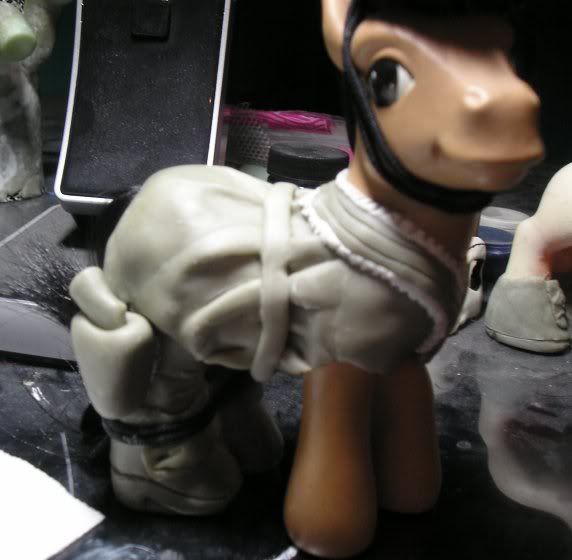
Liz's sculpting is finally completed! In this picture, you can see how the 'belt' illusion turned out: Her top looks like one continuous piece, and since there's very little sculpting under the belt itself it keeps its shape without deforming over the 'fabric' gathers. The trim on her neckline is more of a ruffle than the cord loops on the real costume, which would have looked too busy on something this small and would have been lost in the black-on-black of the outfit.

A closer look at the trim. The only reason for the different color is that I opted for white Apoxie Sculpt rather than neutral this time around; I find it easier to see the fine details on it while I'm working. All Liz needs now is to have her clothing painted and her hair styled, and then I'll sew her cape.
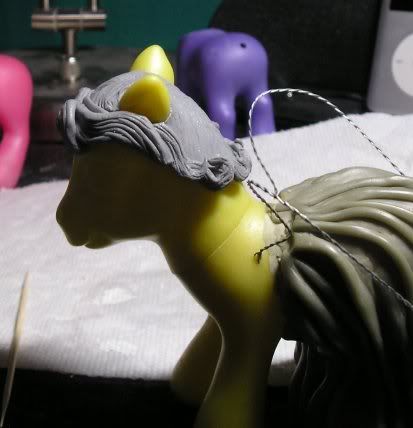
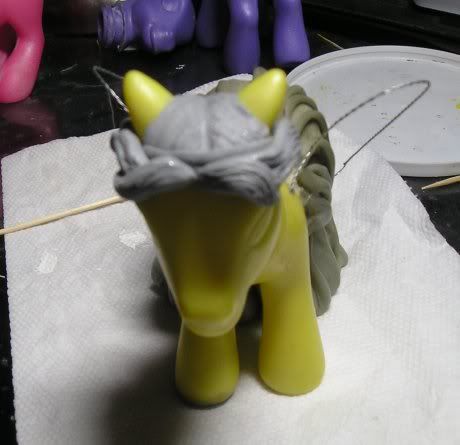
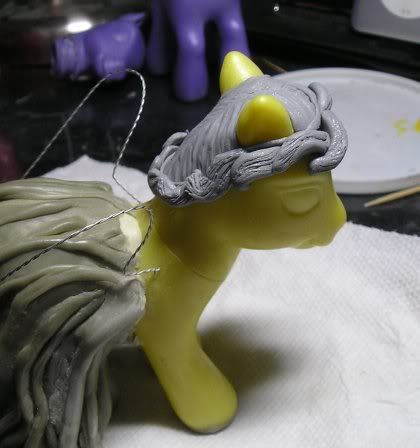
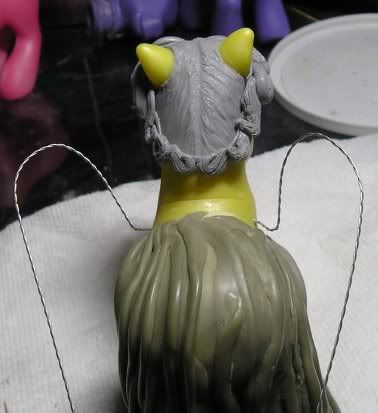
A nice 360 view of the completed hair on the dormant Angel. As I said in my last post, I chose to use Sculpey, which is a polymer clay that requires baking, rather than my usual Apoxie Sculpt. The advantage of Sculpey in this case was that I was able to work on the hair in small chunks over a long period of time, and then bake it all at once so it would be a cohesive unit. Sculpey also requires less babying to get the level of detail necessary for the fine hairs in the curls around the edges, as Apoxie Sculpt starts off much softer than Sculpey and tends to smooth itself out if you aren't vigilant. And yes, if you look closely it is sparkling. The only Sculpey I had on hand was a glittery silver, which doesn't matter as the whole thing will be painted once it's finished anyway.
I'm very pleased with how this came out, and if I can get video to work on my camera I'm considering doing a video tutorial for this particular technique.
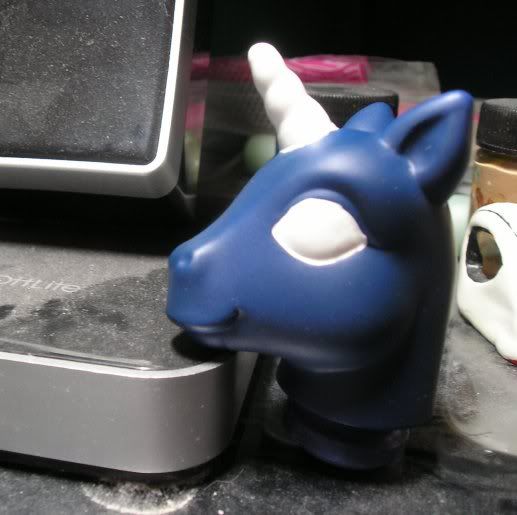
The TARDIS pony is coming along nicely; here you can see that she's got the white base on her eyes and horn. The plan is to go over both with a pale yellow wash so it looks like they're lit up from the inside. There will also be a dark blue line running up the spiral groove of her horn to mimic the 'cage' of the TARDIS' top light.
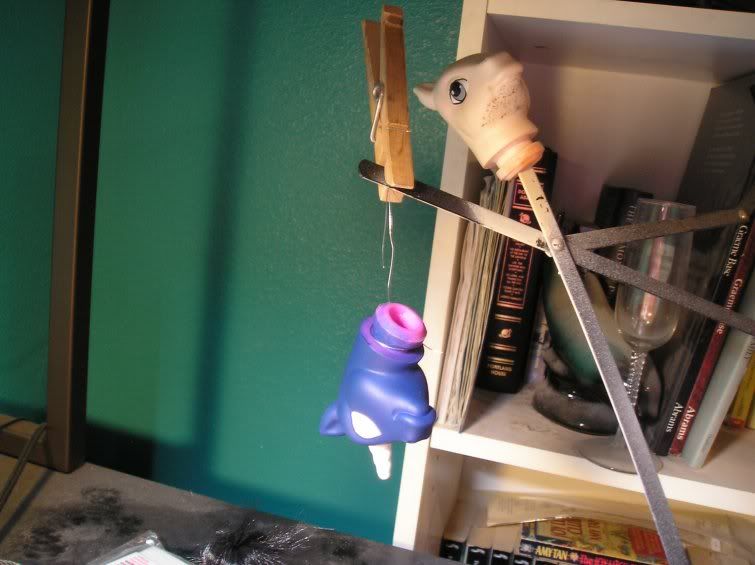
I had to hang her head upside down while her horn was drying so that the paint wouldn't drip down her forehead. Also pictured here is Rory's head, with his soft grey eyes and permanent stubble.

TARDIS' body is also coming along nicely, with the St. John's Ambulance cross represented (in a very simplified form!) on her hoof and the white rectangle that will form the base of her door sign on her flank. Next step is painting the door sign's text, a step that will have to wait until I am feeling very brave.
And just to prove that I do finish these things sometimes:
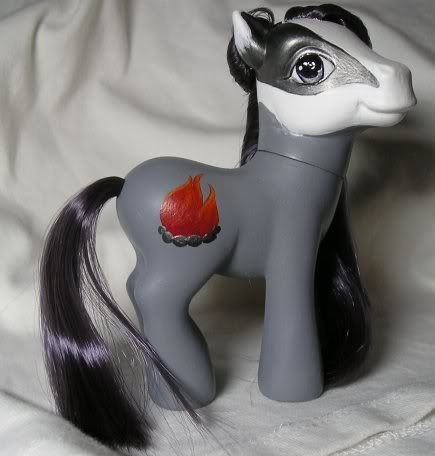
This girl was a gift for Hematitebadger. Metallic badger facial stripes, hematite-colored hair, and a campfire to tell stories around. I think those flames are the best symbol painting I've ever done.
And that's what I've been up to lately. Hopefully the next update won't have to wait quite as long as this one did.
So here's the thing: I have been working on my ponies. I have been working hard. I have been working badly. And it's only recently that I've realized that for once this isn't my fault.
Basically, I have spent the last couple months beating my head against a wall when it comes to my sculpting. I had ideas in my head, and I had the patience to work them out, but my hands were apparently having none of it. So I'd peel off the new work, curse at the waste of sculpting compound, and try again. Over and over. I could get little things to work, sometimes, but anything big or detailed was out the window. There was a certain amount of despair involved in the process, and a lot of 'what happened to me?'
I now know what happened to me. I was being stubborn because I was being cheap.
As I may or may not have mentioned in a previous post, the stuff I use for almost all my sculpting is Aves Apoxie Sculpt, a two-part clay that cures via chemical reaction rather than heat or air. The advantage of it is that it's very durable, sets up without any outside help (it will even cure underwater), and doesn't crack or shrink as it's curing. The two biggest disadvantages are that you've got a limited working window once you mix it, and the unmixed compound has a shelf life.

This is what Part B of the two-part mix is supposed to look like: Uniformly gray, with a firm but malleable consistency and a soft texture.

This is what the stuff I was trying to work with looked like: Hard, crusty, and with a yellow film where the various oils separated from each other. And I really thought this was going to mix up properly? I'd say I don't know what I was thinking, but I do: I was thinking, "I don't want to buy another jar!" But I did eventually give in, and God willing I'll be able to make a little quicker progress than I have been.
Let's take a look at the progress I have made, shall we?

Liz's sculpting is finally completed! In this picture, you can see how the 'belt' illusion turned out: Her top looks like one continuous piece, and since there's very little sculpting under the belt itself it keeps its shape without deforming over the 'fabric' gathers. The trim on her neckline is more of a ruffle than the cord loops on the real costume, which would have looked too busy on something this small and would have been lost in the black-on-black of the outfit.

A closer look at the trim. The only reason for the different color is that I opted for white Apoxie Sculpt rather than neutral this time around; I find it easier to see the fine details on it while I'm working. All Liz needs now is to have her clothing painted and her hair styled, and then I'll sew her cape.


A nice 360 view of the completed hair on the dormant Angel. As I said in my last post, I chose to use Sculpey, which is a polymer clay that requires baking, rather than my usual Apoxie Sculpt. The advantage of Sculpey in this case was that I was able to work on the hair in small chunks over a long period of time, and then bake it all at once so it would be a cohesive unit. Sculpey also requires less babying to get the level of detail necessary for the fine hairs in the curls around the edges, as Apoxie Sculpt starts off much softer than Sculpey and tends to smooth itself out if you aren't vigilant. And yes, if you look closely it is sparkling. The only Sculpey I had on hand was a glittery silver, which doesn't matter as the whole thing will be painted once it's finished anyway.
I'm very pleased with how this came out, and if I can get video to work on my camera I'm considering doing a video tutorial for this particular technique.

The TARDIS pony is coming along nicely; here you can see that she's got the white base on her eyes and horn. The plan is to go over both with a pale yellow wash so it looks like they're lit up from the inside. There will also be a dark blue line running up the spiral groove of her horn to mimic the 'cage' of the TARDIS' top light.

I had to hang her head upside down while her horn was drying so that the paint wouldn't drip down her forehead. Also pictured here is Rory's head, with his soft grey eyes and permanent stubble.

TARDIS' body is also coming along nicely, with the St. John's Ambulance cross represented (in a very simplified form!) on her hoof and the white rectangle that will form the base of her door sign on her flank. Next step is painting the door sign's text, a step that will have to wait until I am feeling very brave.
And just to prove that I do finish these things sometimes:

This girl was a gift for Hematitebadger. Metallic badger facial stripes, hematite-colored hair, and a campfire to tell stories around. I think those flames are the best symbol painting I've ever done.
And that's what I've been up to lately. Hopefully the next update won't have to wait quite as long as this one did.