Snip and twist t-shirt butchering Tutorial
Okay rather than making a new post I ammended mine (*golfclap), so here's the original post:-
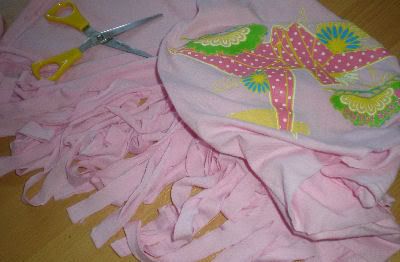
Of course party means snippy!

Front

Back

Sooo,........ I've just taken a kid pirate t-shirt to the scissor shop to see if I can post a tutorial.
I'm pretty damn sure I've seen this before- but the memories appear to hate me some how.....
Snip and Twist T-shirt
Requires:- T-shirt (preferably the errr finer grained type that roll easily when cut), Scissors, something to hold to bottom with (sewing it together, or ribbon or whatever... havent permanantised mine yet! Optional- Ruler and tailor chalk- if you want to cut on lines.
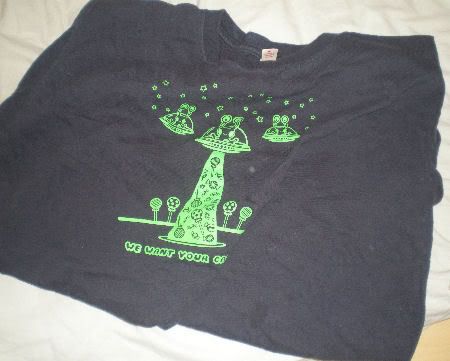
1. The first step I've done is to open out the shoulder area- by cutting it open - you can do this as wide or as closed as you prefer ^.^
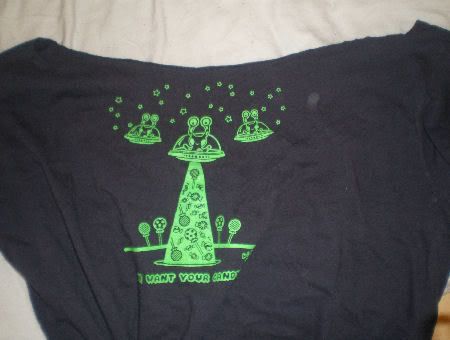
2. Fold the t-shirt so that the back is folded in half vertically (middle of the back is the 'hinge' point as it were)- this allows you to make the cuts in half the number of snips- and allows greater control over ensuring the lengths are right.
( If you want you can mark using tailors chalk the distances between your snips horizontally across the back- and how far across your back you want it to be open- I just snip and see what happens.)
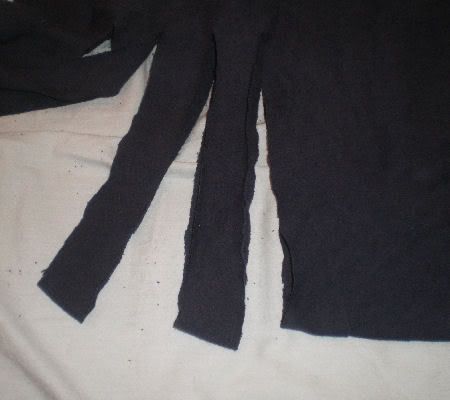
3. Snip horizontally down the back- taking the lengths as far as you want to go (think mine are about 15-20cm in total). I normally make small cuts all the way down first so i can ensure im cutting the same distance each time.
4. Open the T-shit out so the back is facing you - it should look a little like:-
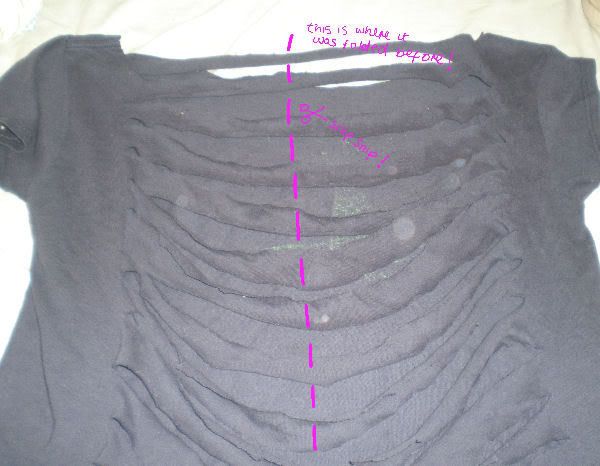
(added a line where it was folded to before)
5. Now comes the time to twist - take the top cut piece in your hand, and loop it over the second piece down- then taking hold of that second piece through the twist you've made, and looping it over the third - then taking the third piece and loop it over the fourth - like this:-
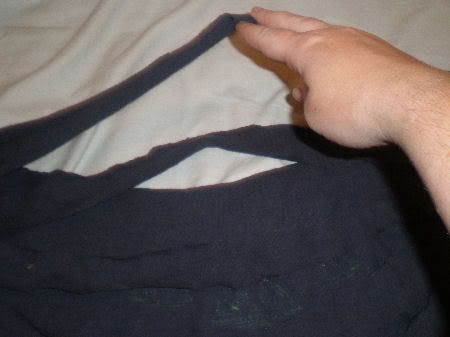
holding the 1st
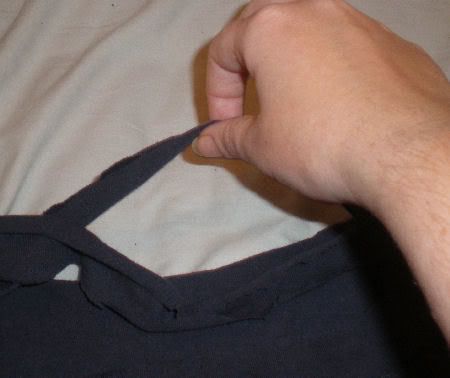
the 1sthas been looped over, iam now holding the 2nd...
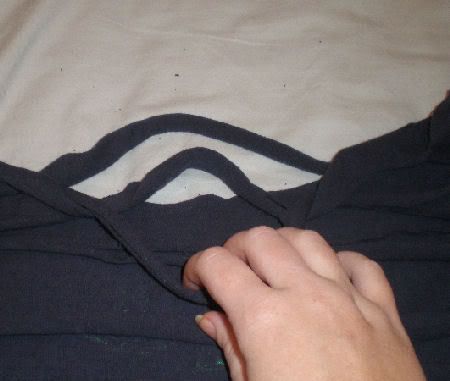
I have looped over the 3rd with the 2nd and am now holding the 3rd- the 4th I am now about to loop over the 3rd
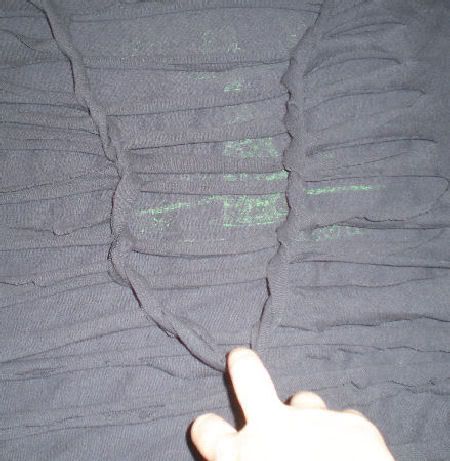
Continuing down.
When you reach the bottom, you will need to somehow stop it unravelling- you can sew it together, or you could just use a ribbon or some such to tie it- I've just hasily used some string.....
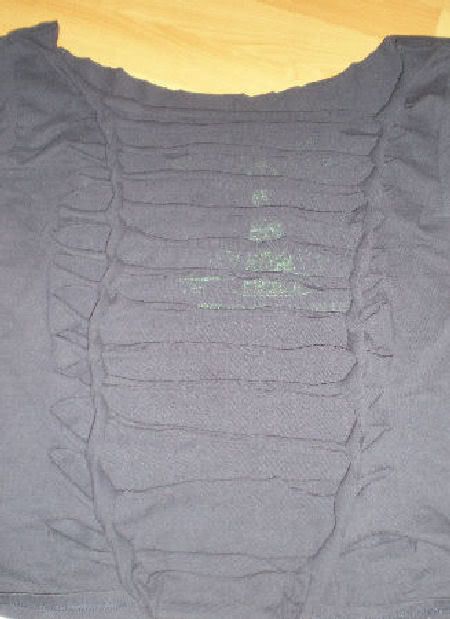
Et Voila... and of course a worn shot...

There's no reason you can't repeat it again to make more detailed patterns- it will decrease the size of the back of the shirt- providing a basic shaping almost!
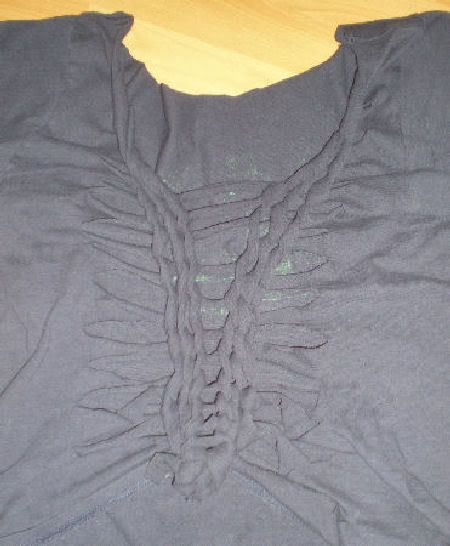
Done 3 times- made the t-shirt look fitted- drew down at the top, and lifted up at the bottom.
And as worn:-

I didnt do it the neatest- but you can seperate them out or bunch them together as you prefer...

and you can do it a lot neater of course :P
I hope that makes some sense, or that you can at least follow the pictures to make some sense!

Of course party means snippy!

Front

Back

Sooo,........ I've just taken a kid pirate t-shirt to the scissor shop to see if I can post a tutorial.
I'm pretty damn sure I've seen this before- but the memories appear to hate me some how.....
Snip and Twist T-shirt
Requires:- T-shirt (preferably the errr finer grained type that roll easily when cut), Scissors, something to hold to bottom with (sewing it together, or ribbon or whatever... havent permanantised mine yet! Optional- Ruler and tailor chalk- if you want to cut on lines.

1. The first step I've done is to open out the shoulder area- by cutting it open - you can do this as wide or as closed as you prefer ^.^

2. Fold the t-shirt so that the back is folded in half vertically (middle of the back is the 'hinge' point as it were)- this allows you to make the cuts in half the number of snips- and allows greater control over ensuring the lengths are right.
( If you want you can mark using tailors chalk the distances between your snips horizontally across the back- and how far across your back you want it to be open- I just snip and see what happens.)

3. Snip horizontally down the back- taking the lengths as far as you want to go (think mine are about 15-20cm in total). I normally make small cuts all the way down first so i can ensure im cutting the same distance each time.
4. Open the T-shit out so the back is facing you - it should look a little like:-

(added a line where it was folded to before)
5. Now comes the time to twist - take the top cut piece in your hand, and loop it over the second piece down- then taking hold of that second piece through the twist you've made, and looping it over the third - then taking the third piece and loop it over the fourth - like this:-

holding the 1st

the 1sthas been looped over, iam now holding the 2nd...

I have looped over the 3rd with the 2nd and am now holding the 3rd- the 4th I am now about to loop over the 3rd

Continuing down.
When you reach the bottom, you will need to somehow stop it unravelling- you can sew it together, or you could just use a ribbon or some such to tie it- I've just hasily used some string.....

Et Voila... and of course a worn shot...

There's no reason you can't repeat it again to make more detailed patterns- it will decrease the size of the back of the shirt- providing a basic shaping almost!

Done 3 times- made the t-shirt look fitted- drew down at the top, and lifted up at the bottom.
And as worn:-

I didnt do it the neatest- but you can seperate them out or bunch them together as you prefer...

and you can do it a lot neater of course :P
I hope that makes some sense, or that you can at least follow the pictures to make some sense!