DONE WITH THE SHOES
Those of you who know my IRL or happen to stalk my facebook may have seen mention of me trying to make a pair of shoes for a cosplay from scratch.
My sister, (cookie_heist ) "commissioned" (I use the term loosely -- she bought most of the materials and I am being paid in crocheted stuffed animals) me to make a Lebreau (FInal Fantasy XIII) costume for her. I finished most of the costume itself over winter break, but the big issue facing me was the shoes.
(and the fact that I just got Pokemon: Heart Gold version omg omg cute things)
WELL, THE SHOES ARE DONE NOW.

I'm not COMPLETELY happy with them, but I'm still glad that I tried and I learned a lot for next time (if there is indeed a next time). I feel like I leveled up or something. XD
None of the process was totally original to me. It's adapted from:
1) the "Making boots from scratch(almost)" tutorial on cosplay.com
2) The sample instructions from Mary Wales Loomis's book "Make Your Own Shoes"
However, I decided I'd take some progress pictures and share them with posterity anyway because all of the links to the pictures in the "Making boots from scratch" thread are dead (because the thread is from like 2006) and other than that, at least a search of cosplay.com didn't turn up much in the way of help.
I wouldn't really consider this a tutorial, since I'm not that consistent in remembering to take pictures and I'm pretty lazy when it comes to descriptions. More like "This is what I did, if you're curious. :D"
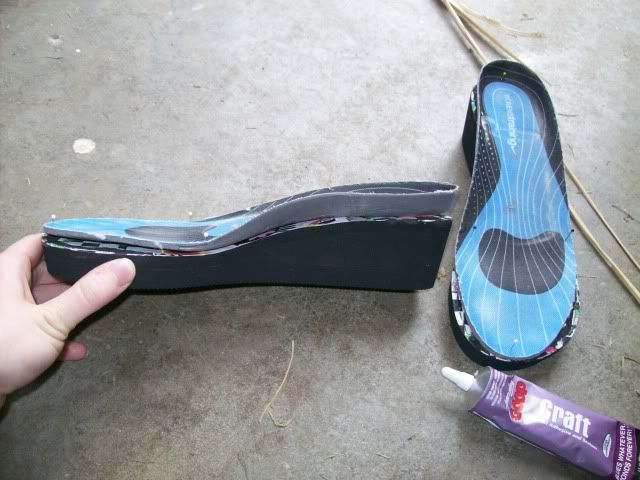
Cut the straps off of a pair of flip-flops. Found a pair of shoe inserts -- these came out of a pair of old tennis shoes, but anything you'd buy at Wal-Mart or wherever would probably be fine. I couldn't find Barge cement like I wanted to-- and that will definitely be a goal if I ever do this again--so I used this "Amazing Goop: CRAFT" glue. It worked fairly well.
I could have sworn Hobby Lobby had Barge but maybe that was Michael's. Anyway, I was lazy and on a time crunch (wanted to get these started before my cookie_heist 's spring break ended) so I didn't end up checking more than one store.
See the ugly flip-flop sole? Fear it.

The thing about that glue was that it didn't try very quickly and it was not the kind of thing that wouldn't move around once you put two surfaces together. And I have no way of clamping things. So, I needed to find heavy objects. Here you see rejected object (a) jar of rocks and successful object (b) Dad's weights.
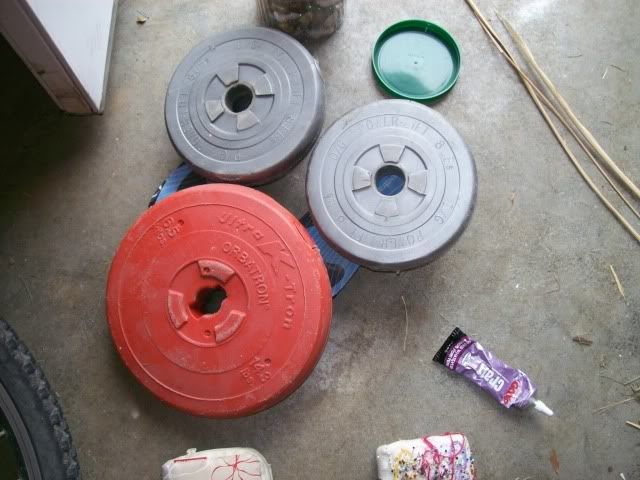
Lots of heavy objects.
Additionally, that glue smells REALLY BAD. As in, it says "USE VENTILATION" and like "USE EXHAUST FAN" on the tube.
So yeah. I'm in the unfinished part of the basement with the back door open. (NOT in my room -- my most sincere apologies, to everyone who was in my room when I did that during attempt #1--NOTE TO VIEWERS AT HOME: READ LABELS)
Yes, this was the day it was snowing. In late March.

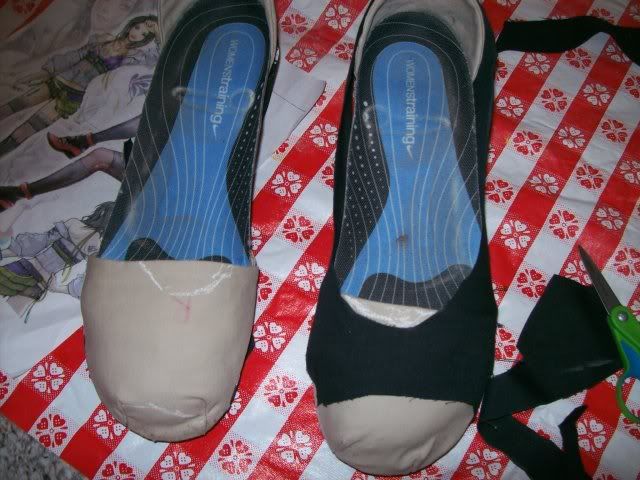
My sneakers had toes shaped close to the way the toes of the shoes in the picture looked, so I used them to make a pattern. Threw some fabric on there, fussed around with it...
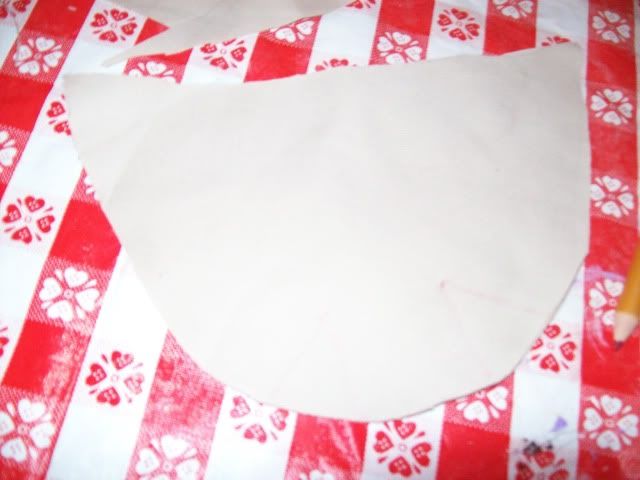
Made the same shape out of a kind-of heavy fabric scrap of some kind I found in my Piles of Junk in my basement. These are going to be the toes of the shoes.

Sewing the darts
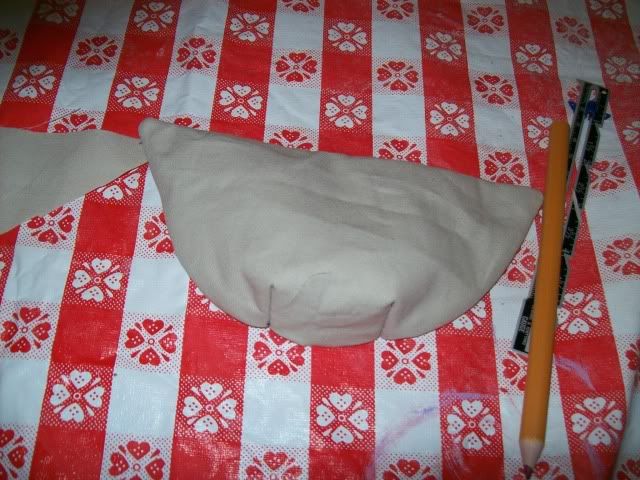
And the final shape. After ironing...
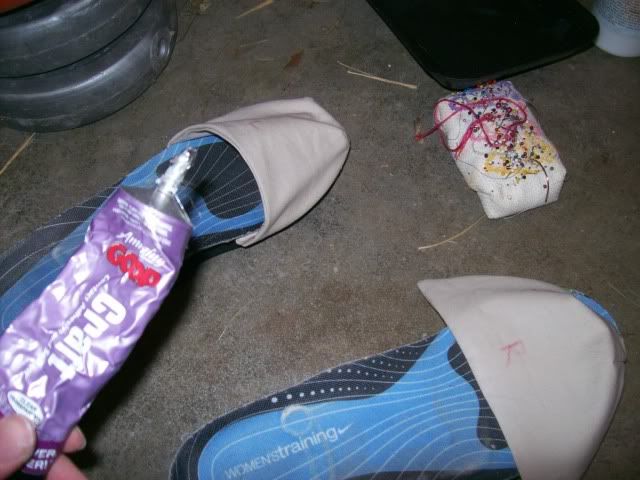
...It's back to the basement to glue the toes on with MORE AMAZING GOOP.
See I have them marked "L" and "R". I'm so clever.

Yeah, clothespins are the closest thing I have to a clamp.
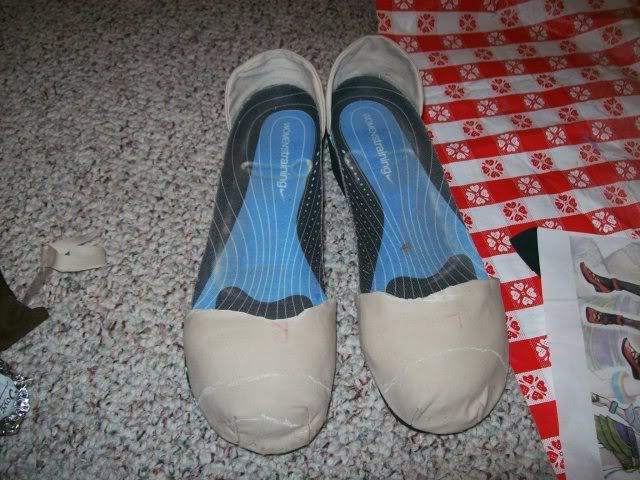
The toes! On cookie_heist ! Seemed like things were going well.
Making the heel piece was pretty simple so I didn't really thing to take pictures. Same basic idea.
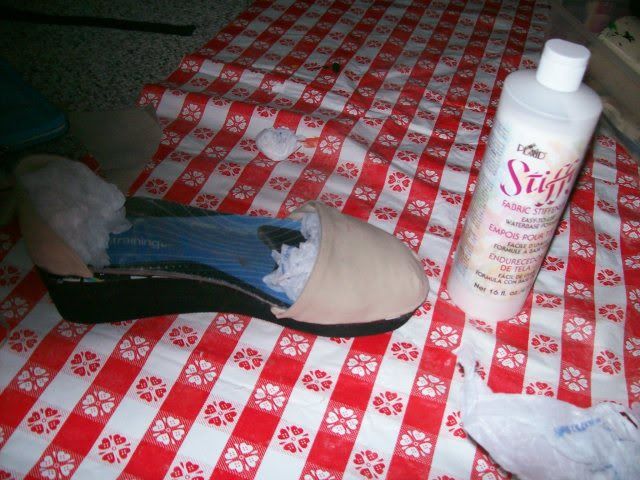
And then I stuffed both the toes and the heels with torn up plastic bags and painted the whole thing with the amusingly-named "Stiffy" fabric stiffener.
Oh, some notes here, when I tried this the first time and screwed up, I realized just one layer of fabric painted with fabric stiffener tore almost horrifyingly easily. So I did a double thickness (makes it less sharp and poke-y, and stronger) with one layer cut on the bias and one cut straight grain. I thought maybe this would make it rip less easily. I don't know. I think with the double thickness it might be a non-issue either way.
After letting the fabric stiffener dry overnight, I start trying to make an upper. Fussing around with scrap fabric and pins and chalk and junk.
I lost my chalk SO MANY TIMES during this process.
And trying the whole thing on cookie_heist again and figuring out changes that needed to be made.
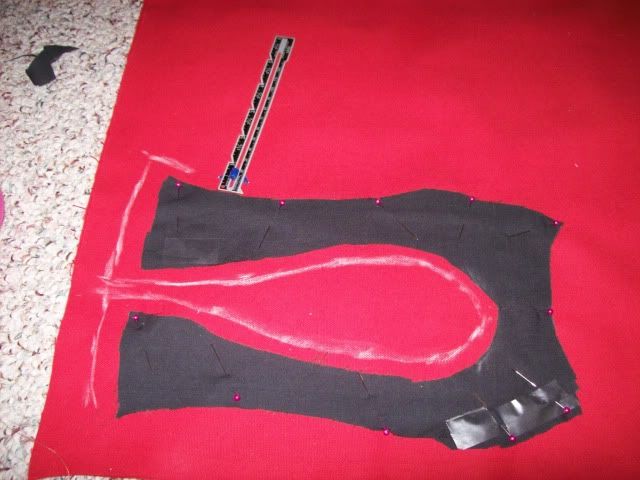
My pattern ended up looking like this. At least in one of its iterations.
The toe was a separate piece I was going to try to figure out later.
I ended up having to cut the toe piece down a little, as you can see by the white chalk lines.
This is the part where you yell across the room "WHICH PAIR OF SCISSORS IS YOUR LEAST FAVORITE?" and wait for your sister to respond.
The shoes with everything all trimmed down and lines for where I want to put the toes.
And now taking my (final!) pattern and cutting it out of the canvas for the shoe uppers. Adding my 3/8" seam allowance.
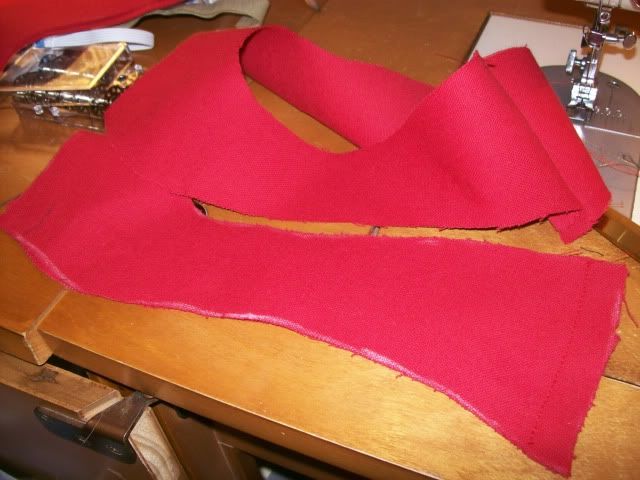
Sewing together the back seams. Each upper is made of a lining and an outside piece of canvas.

Sewing the whole thing together in the middle, the hole that your foot goes into.
After I turned it right side out, I top stitched along the whole thing and sewed the bottom edges.
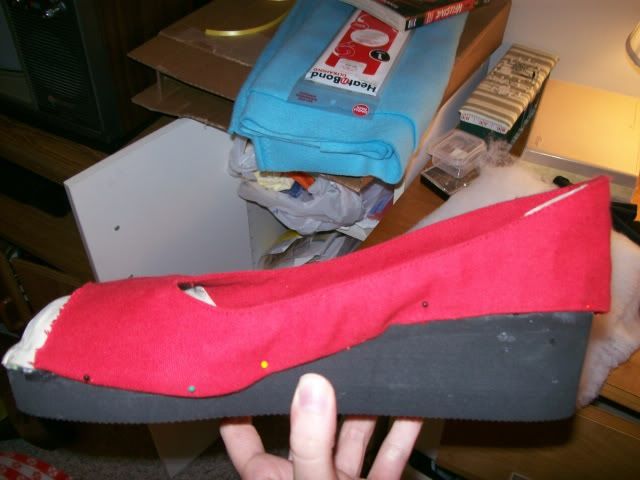
Trying it on the shoe to make sure it fits.
Looking good.
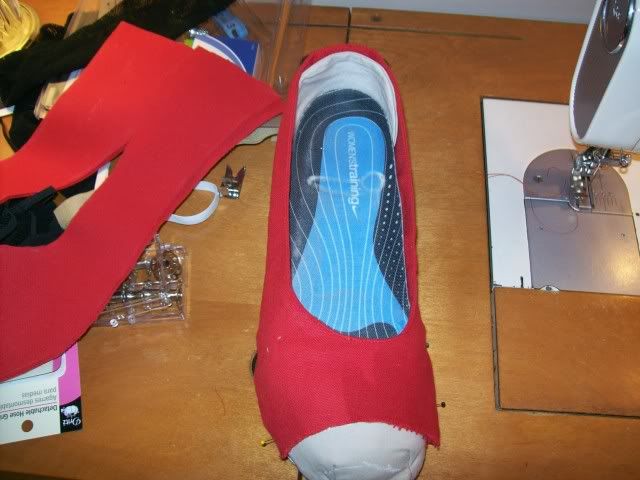
Felt for lining to cover up the inside of the heel and the rough edges of the toe. And to make the shoes more comfortable!
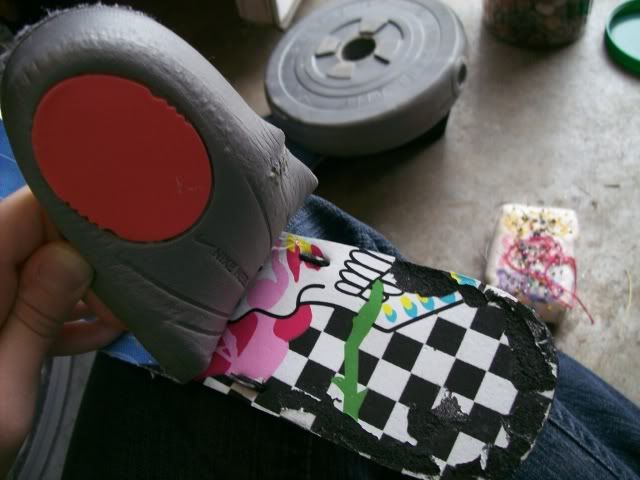
You can see I figured out the toes. Argh. What a process.
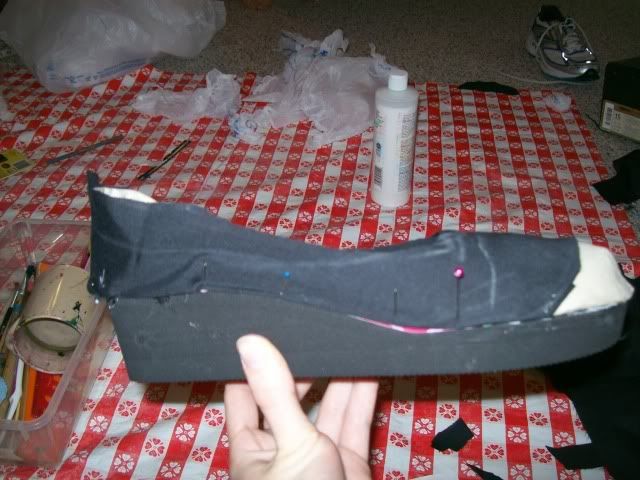
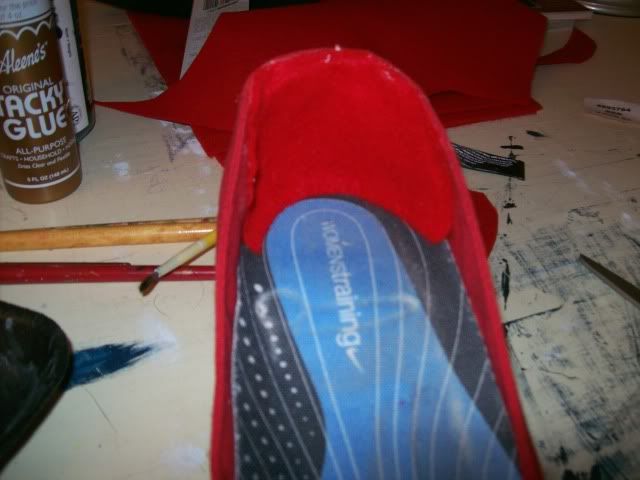
The Amazing Goop was being too much of a hassle because I couldn't figure out any way to clamp it. So, I ended up turning to Super 77 (a spray adhesive I happened to have an unopened can of in the basement) and super glue to finish off the edges. Even though I SWORE no Super Glue would end up in this project because it does weird things to fabric sometimes and it drips and it ALWAYS glues my fingers together.
Oh well.
I just hope everything holds up.
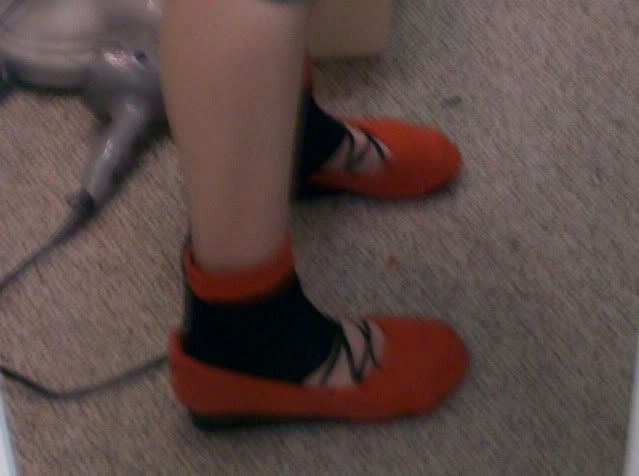
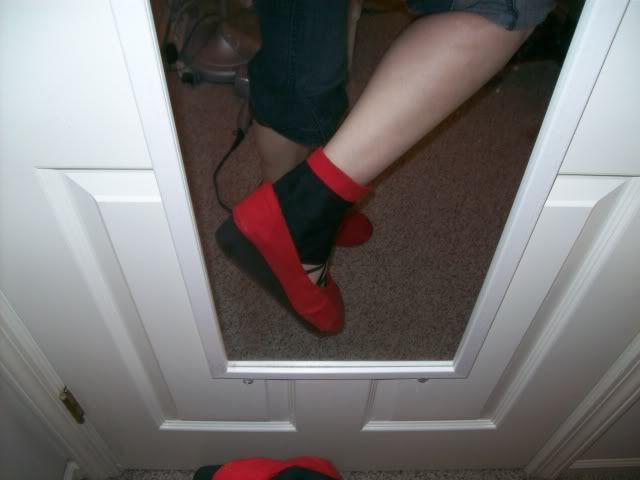
No close-ups on the toes because I'm not happy with the way the edges look. You can see some lumpy bits along the sides where I had issues.
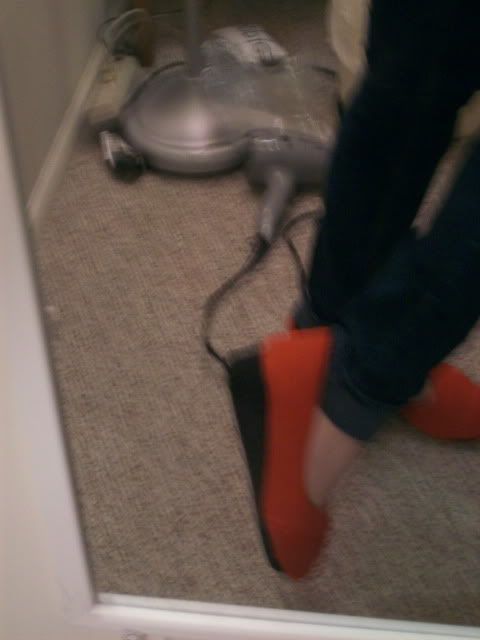
Hey! They look decent when they're blurry!
Now the shoe proper is done, so no pics of me putting together all the other accouterments to make them work for the cosplay.
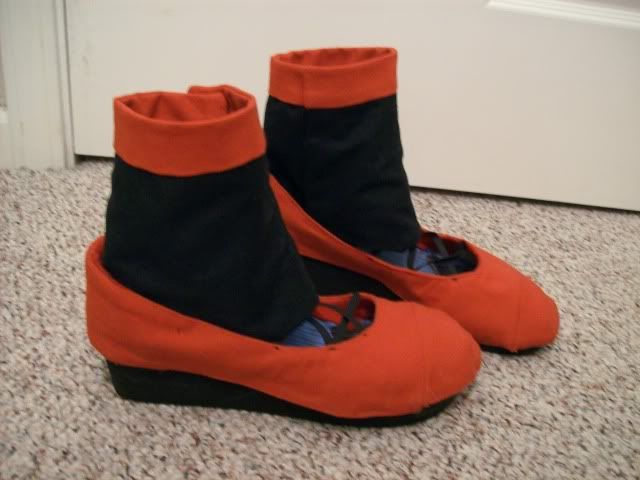
Though I did go over the sole edges with a coat of black paint to cover up the glue drips.
Like I said, they're not perfect, and there's a lot I'm unhappy with, but I'm still proud of myself.
My sister, (cookie_heist ) "commissioned" (I use the term loosely -- she bought most of the materials and I am being paid in crocheted stuffed animals) me to make a Lebreau (FInal Fantasy XIII) costume for her. I finished most of the costume itself over winter break, but the big issue facing me was the shoes.
(and the fact that I just got Pokemon: Heart Gold version omg omg cute things)
WELL, THE SHOES ARE DONE NOW.
I'm not COMPLETELY happy with them, but I'm still glad that I tried and I learned a lot for next time (if there is indeed a next time). I feel like I leveled up or something. XD
None of the process was totally original to me. It's adapted from:
1) the "Making boots from scratch(almost)" tutorial on cosplay.com
2) The sample instructions from Mary Wales Loomis's book "Make Your Own Shoes"
However, I decided I'd take some progress pictures and share them with posterity anyway because all of the links to the pictures in the "Making boots from scratch" thread are dead (because the thread is from like 2006) and other than that, at least a search of cosplay.com didn't turn up much in the way of help.
I wouldn't really consider this a tutorial, since I'm not that consistent in remembering to take pictures and I'm pretty lazy when it comes to descriptions. More like "This is what I did, if you're curious. :D"
Cut the straps off of a pair of flip-flops. Found a pair of shoe inserts -- these came out of a pair of old tennis shoes, but anything you'd buy at Wal-Mart or wherever would probably be fine. I couldn't find Barge cement like I wanted to-- and that will definitely be a goal if I ever do this again--so I used this "Amazing Goop: CRAFT" glue. It worked fairly well.
I could have sworn Hobby Lobby had Barge but maybe that was Michael's. Anyway, I was lazy and on a time crunch (wanted to get these started before my cookie_heist 's spring break ended) so I didn't end up checking more than one store.
See the ugly flip-flop sole? Fear it.
The thing about that glue was that it didn't try very quickly and it was not the kind of thing that wouldn't move around once you put two surfaces together. And I have no way of clamping things. So, I needed to find heavy objects. Here you see rejected object (a) jar of rocks and successful object (b) Dad's weights.
Lots of heavy objects.
Additionally, that glue smells REALLY BAD. As in, it says "USE VENTILATION" and like "USE EXHAUST FAN" on the tube.
So yeah. I'm in the unfinished part of the basement with the back door open. (NOT in my room -- my most sincere apologies, to everyone who was in my room when I did that during attempt #1--NOTE TO VIEWERS AT HOME: READ LABELS)
Yes, this was the day it was snowing. In late March.
My sneakers had toes shaped close to the way the toes of the shoes in the picture looked, so I used them to make a pattern. Threw some fabric on there, fussed around with it...
Made the same shape out of a kind-of heavy fabric scrap of some kind I found in my Piles of Junk in my basement. These are going to be the toes of the shoes.
Sewing the darts
And the final shape. After ironing...
...It's back to the basement to glue the toes on with MORE AMAZING GOOP.
See I have them marked "L" and "R". I'm so clever.
Yeah, clothespins are the closest thing I have to a clamp.
The toes! On cookie_heist ! Seemed like things were going well.
Making the heel piece was pretty simple so I didn't really thing to take pictures. Same basic idea.
And then I stuffed both the toes and the heels with torn up plastic bags and painted the whole thing with the amusingly-named "Stiffy" fabric stiffener.
Oh, some notes here, when I tried this the first time and screwed up, I realized just one layer of fabric painted with fabric stiffener tore almost horrifyingly easily. So I did a double thickness (makes it less sharp and poke-y, and stronger) with one layer cut on the bias and one cut straight grain. I thought maybe this would make it rip less easily. I don't know. I think with the double thickness it might be a non-issue either way.
After letting the fabric stiffener dry overnight, I start trying to make an upper. Fussing around with scrap fabric and pins and chalk and junk.
I lost my chalk SO MANY TIMES during this process.
And trying the whole thing on cookie_heist again and figuring out changes that needed to be made.
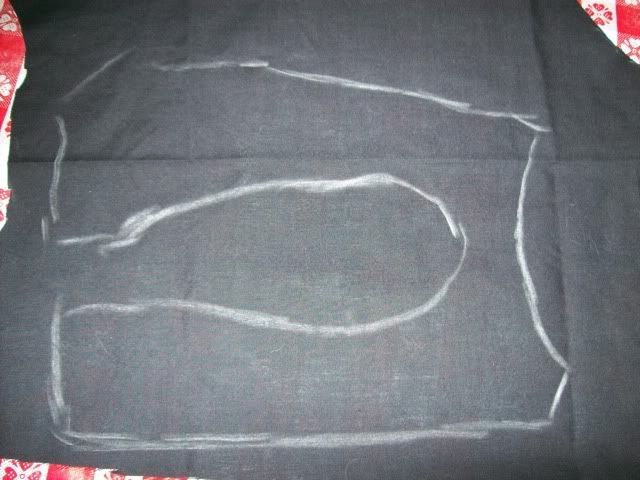
My pattern ended up looking like this. At least in one of its iterations.
The toe was a separate piece I was going to try to figure out later.
I ended up having to cut the toe piece down a little, as you can see by the white chalk lines.
This is the part where you yell across the room "WHICH PAIR OF SCISSORS IS YOUR LEAST FAVORITE?" and wait for your sister to respond.
The shoes with everything all trimmed down and lines for where I want to put the toes.
And now taking my (final!) pattern and cutting it out of the canvas for the shoe uppers. Adding my 3/8" seam allowance.
Sewing together the back seams. Each upper is made of a lining and an outside piece of canvas.
Sewing the whole thing together in the middle, the hole that your foot goes into.
After I turned it right side out, I top stitched along the whole thing and sewed the bottom edges.
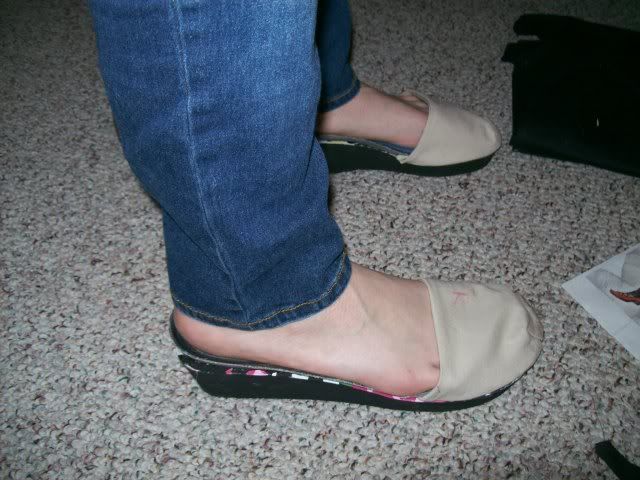
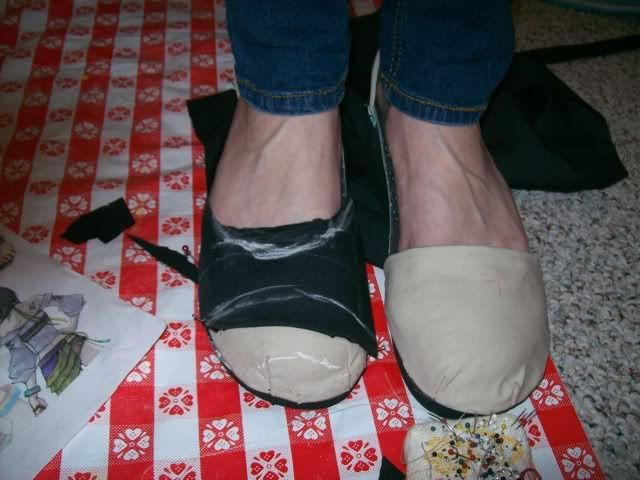
Trying it on the shoe to make sure it fits.
Looking good.
Felt for lining to cover up the inside of the heel and the rough edges of the toe. And to make the shoes more comfortable!
You can see I figured out the toes. Argh. What a process.
The Amazing Goop was being too much of a hassle because I couldn't figure out any way to clamp it. So, I ended up turning to Super 77 (a spray adhesive I happened to have an unopened can of in the basement) and super glue to finish off the edges. Even though I SWORE no Super Glue would end up in this project because it does weird things to fabric sometimes and it drips and it ALWAYS glues my fingers together.
Oh well.
I just hope everything holds up.
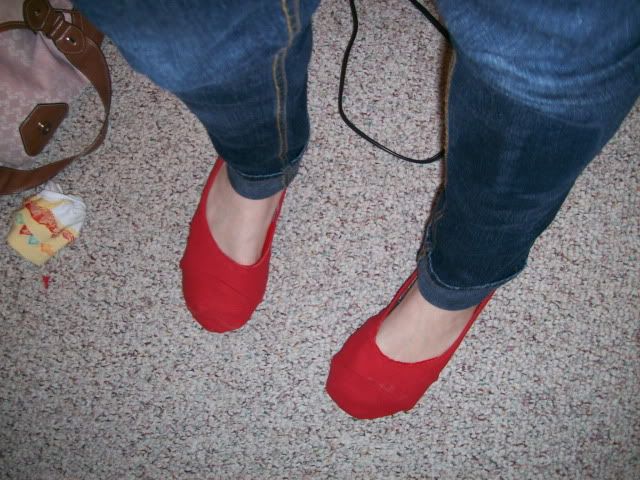
No close-ups on the toes because I'm not happy with the way the edges look. You can see some lumpy bits along the sides where I had issues.
Hey! They look decent when they're blurry!
Now the shoe proper is done, so no pics of me putting together all the other accouterments to make them work for the cosplay.
Though I did go over the sole edges with a coat of black paint to cover up the glue drips.
Like I said, they're not perfect, and there's a lot I'm unhappy with, but I'm still proud of myself.