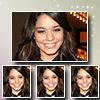
5th Tutorial
Go from this to 
Translatable? Yes
Program: PS CS
1. Resize image (if needed).
2. Rectangular marquee tool. Select the part of your picture you want to use.
3. Open new window (100x100).
4. Put background/brushes (optional).
5. Move the selected picture in the top half of the new window.
6. Go back to your image, resize the picture to a smaller one.
7. Do the same in step 2.
8. Place it below the image you put in step 5. Duplicate it 2 times, move it beside.
9. Merge all except the background (Ctrl+E).
10. Layer -> Layer Style -> Stroke
12. Add brushes/text.
13. Flatten image.
Other icons made with this tut:


Translatable? Yes
Program: PS CS
1. Resize image (if needed).
2. Rectangular marquee tool. Select the part of your picture you want to use.
3. Open new window (100x100).
4. Put background/brushes (optional).
5. Move the selected picture in the top half of the new window.
6. Go back to your image, resize the picture to a smaller one.
7. Do the same in step 2.
8. Place it below the image you put in step 5. Duplicate it 2 times, move it beside.
9. Merge all except the background (Ctrl+E).
10. Layer -> Layer Style -> Stroke
- 1 px
- #FFFFFF (you may choose your own color but dont choose black)
- Opacity 100%
- Angle 126
- Distance 5
- Spread 8
- Size 5
12. Add brushes/text.
13. Flatten image.
Other icons made with this tut:
