How To Do Fog Textures Tutorial 001

This tutorial is( I think) the easiest tutorial to make textures ever,and it can be easily translated since it only uses brushes and Gaussian Blur,which I think every image manipulation program has.
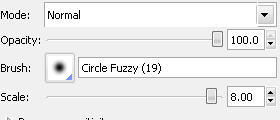
1.-First of all open a new canvas,it can be the size you want but I thought a 500x300 one would be fine,fill it with black colour o #000000 .Next, for this tutorial we are going to chose a brush I suggest to use this one,in size 8.00,but it depends on the size you chose to make your texture,the bigger your texture size the bigger should be your brush.
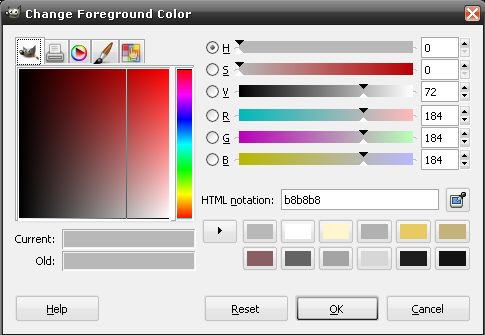
2.-Once you have chosen the brush you´ll use,pick a gray colour like this one,and what we are going to do is just to fill the corner of the future texture as you can see in the image below.

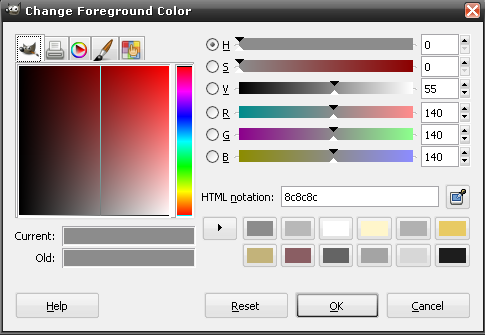
3.-Then we need a darker colour like this one,now draw what I´d call the edge of the previus, colour as you can see in the image below.

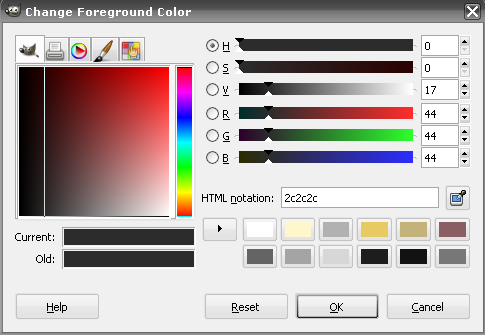
4.-Now we just have to add a much darker colour,almost black,I used this,do the same as in the previus ones.

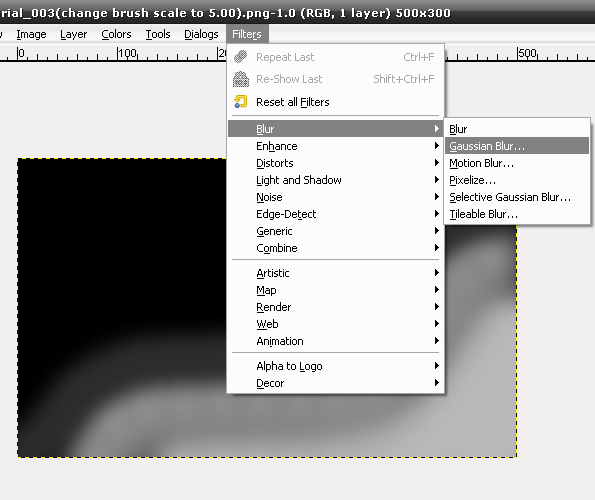
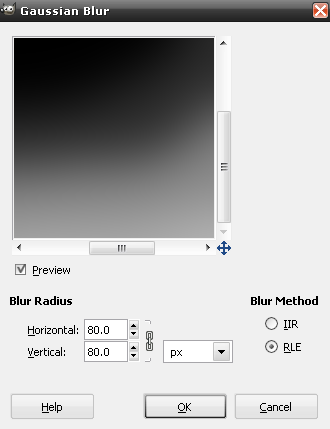
5.-We are going to blur the texture,again it depends on the size of your textures,but I chose this settings.And this is the result:

6.-I didnt like the result so I did the blur again,you don´ need to go to Filters-Blur-Gaussian Blur again ,just press ctrl+f and you´ll repeat the last filter action,in this case my 80.00 pixels blur.Repeat this as you need.You should get something like this.

7.-If you want to do small/icon textures the only thing you need to do is to crop that texture and then resize it so it can be use as an icon texture(100x100) .like this one:

8.-And you´re done!
*If you are too lazy,you can download a pack of 39 fog textures I did some days ago here.
*Feel free to friend me if you like my tutorials/graphics