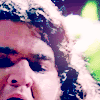
From dark to colorful/PS 7.0
From 
to
I have this picture of Hurley. It's a bit dark, eh?
You need a base. The more unique cropping, the more interesting icon.
I came up with this:

step 1:
Go to Image>Adjustments>Levels... Play around with those settings. Those settings are really up to your pic. I setted them like this:
RGB Input Levels: 0 // 1,81 // 147
result:

step 2:
It looks a bit lame now. Duplicate the base and set it to Soft light, opacity 100%. Merge layers.
result:

step 3:
Add a new layer and fill it with #355868 and set the layer to Exclusion 80%.
result:

step 4:
Add one layer again and fill it with #99CCFF and set the layer to Soft light, opacity 100%. Merge layers.
result:
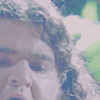
step 5:
Duplicate the base four times (this also depends on you pic). Set the top layer on Color burn, opacity 100%. Set the rest on Soft light, opacity is up to you. Merge layers.
result:
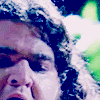
step 6:
Add a layer and fill it with #F48245 and set the layer to Soft light, opacity depends on you, again. Merge layers.
result:
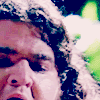
step 7:
If the picture still seems a little darkish, you can do following:
Go to Image>Adjustments>Brightness/Contrast... and play around. I did a very minor change:
Brightness: +5
Contrast: +10
result:

step 8:
For finishing touches add this brush (by me, superbeicons)

and set it to Screen, opacity preferably 100%. You can move it around and place on a suitable spot. (If you don't place it on the side, you should blur the visible line)
But now we're done!


to

I have this picture of Hurley. It's a bit dark, eh?
You need a base. The more unique cropping, the more interesting icon.
I came up with this:

step 1:
Go to Image>Adjustments>Levels... Play around with those settings. Those settings are really up to your pic. I setted them like this:
RGB Input Levels: 0 // 1,81 // 147
result:

step 2:
It looks a bit lame now. Duplicate the base and set it to Soft light, opacity 100%. Merge layers.
result:

step 3:
Add a new layer and fill it with #355868 and set the layer to Exclusion 80%.
result:

step 4:
Add one layer again and fill it with #99CCFF and set the layer to Soft light, opacity 100%. Merge layers.
result:

step 5:
Duplicate the base four times (this also depends on you pic). Set the top layer on Color burn, opacity 100%. Set the rest on Soft light, opacity is up to you. Merge layers.
result:

step 6:
Add a layer and fill it with #F48245 and set the layer to Soft light, opacity depends on you, again. Merge layers.
result:

step 7:
If the picture still seems a little darkish, you can do following:
Go to Image>Adjustments>Brightness/Contrast... and play around. I did a very minor change:
Brightness: +5
Contrast: +10
result:

step 8:
For finishing touches add this brush (by me, superbeicons)

and set it to Screen, opacity preferably 100%. You can move it around and place on a suitable spot. (If you don't place it on the side, you should blur the visible line)
But now we're done!
