Vibrant colors/PS 7.0
From 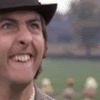
to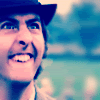
Pick an image and crop it. Because upper class twits are ultimate love, this is my choise:

step 1:
Go to Image>Adjustments>Brightness/Contrast... and play around until you're happy. I got these:
Brightness: +5
Contrast: +20
Remember: the picture shouldn't be dark, it should be quite light at this point.
result:
step 2:
Duplicate the base and set the copy to Soft light, opacity 100%. If the pic is dark(er) now, take the dodge tool and "color" the whole Soft light layer. Then set the contrast to +10. Merge layers.
result:
step 3:
Add a new layer and fill it with #386064 and set the layer to Exclusion, opacity 100%.
result:
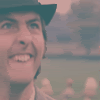
step 4:
Add yet another new layer and fill it with #9BC8E6 and set the layer to Sof light, opacity 100%. Merge layers.
result:
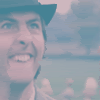
step 5:
Copy the new, merged base four times. Set the top one on Color burn, opacity 100% and the rest to Soft light, opacity 100%. If your pic is too dark now, you should duplicate even more layers and set them to Soft light. If your pic is too light, don't duplicate it so many times. Merge layers.
result:
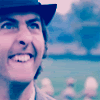
step 6:
Add a new layer and fill it with #002C73 and set it to Exclusion, opacity 100%.
result:
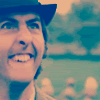
step 7:
Duplicate the base, Set it to Soft light, opacity 100% and drag it on top. If your image still looks a bit yellowish or just not good, duplicate the Soft light -layer. Now you can play with the opacity. Mine was set to 40%. Merge layers.
result:
step 8:
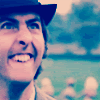
Add contrast again. I added +20. And if your image's shadows looks a bit too sharpened, you can use the blur tool. I blurred the neck's and the cheek's shadows.
result:
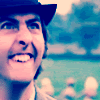
For the finishing touches you can blur the background, if you want to. That gives the effect that makes the image look like a portrait. And if anything loks a bit blurry, you can sharpen the whole image or take the sharpen tool. I sharpened the eyes.
We're done!

Icons made with the same technique:
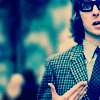
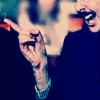
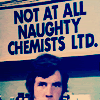
ps. only one word: elitepython

to

Pick an image and crop it. Because upper class twits are ultimate love, this is my choise:

step 1:
Go to Image>Adjustments>Brightness/Contrast... and play around until you're happy. I got these:
Brightness: +5
Contrast: +20
Remember: the picture shouldn't be dark, it should be quite light at this point.
result:

step 2:
Duplicate the base and set the copy to Soft light, opacity 100%. If the pic is dark(er) now, take the dodge tool and "color" the whole Soft light layer. Then set the contrast to +10. Merge layers.
result:

step 3:
Add a new layer and fill it with #386064 and set the layer to Exclusion, opacity 100%.
result:

step 4:
Add yet another new layer and fill it with #9BC8E6 and set the layer to Sof light, opacity 100%. Merge layers.
result:

step 5:
Copy the new, merged base four times. Set the top one on Color burn, opacity 100% and the rest to Soft light, opacity 100%. If your pic is too dark now, you should duplicate even more layers and set them to Soft light. If your pic is too light, don't duplicate it so many times. Merge layers.
result:

step 6:
Add a new layer and fill it with #002C73 and set it to Exclusion, opacity 100%.
result:

step 7:
Duplicate the base, Set it to Soft light, opacity 100% and drag it on top. If your image still looks a bit yellowish or just not good, duplicate the Soft light -layer. Now you can play with the opacity. Mine was set to 40%. Merge layers.
result:

step 8:
Add contrast again. I added +20. And if your image's shadows looks a bit too sharpened, you can use the blur tool. I blurred the neck's and the cheek's shadows.
result:

For the finishing touches you can blur the background, if you want to. That gives the effect that makes the image look like a portrait. And if anything loks a bit blurry, you can sharpen the whole image or take the sharpen tool. I sharpened the eyes.
We're done!

Icons made with the same technique:
ps. only one word: elitepython