ANOTHER TUTORIALLL
WHOO
Another icon tutorial.
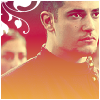
For this:
It won first place at hp_hush. YAYYYY.
First, get your picture. I used this one. Of Krum. Because that was the cap challenge. Yeah.
Crop and resize to 100x100. Or something close. Sharpen if nessecary.

Soften his skin. Sharpen his eyes an lips. Also, the gold buttons on his, umm robes?

Make a new layer. Fill with Dark blue. (#000040) Set to Exclusion. 100%.
Make another new layer. Fill with this gradient. Set to Lighten 100%.


Then use this brush made by (???? tell me and I'll credit) And set it to Screen at 100%.

Then make one more new raster layer and use a white 1px border.
MERGE LAYERS (flatten image.)

Then go to "Brightness Contrast" and select Brightness:0 Contrast:10.

WHOO. And you're done!

------That's the original. Eh. I guess I didn't soften his skin. Oh well. Same thing pretty much.
Another icon tutorial.
For this:
It won first place at hp_hush. YAYYYY.
First, get your picture. I used this one. Of Krum. Because that was the cap challenge. Yeah.
Crop and resize to 100x100. Or something close. Sharpen if nessecary.

Soften his skin. Sharpen his eyes an lips. Also, the gold buttons on his, umm robes?

Make a new layer. Fill with Dark blue. (#000040) Set to Exclusion. 100%.
Make another new layer. Fill with this gradient. Set to Lighten 100%.


Then use this brush made by (???? tell me and I'll credit) And set it to Screen at 100%.

Then make one more new raster layer and use a white 1px border.
MERGE LAYERS (flatten image.)

Then go to "Brightness Contrast" and select Brightness:0 Contrast:10.

WHOO. And you're done!
------That's the original. Eh. I guess I didn't soften his skin. Oh well. Same thing pretty much.