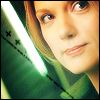
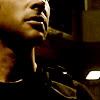
Tutorial | Icon #004 & Icon #005
Today I bring you two relatively easy icon tutorials [For Germans: You can find an English-German translation of the tools etc. here]
In the first one we go from this to
[1] First go to Layer -> New -> Layer from Background because we need to move the image
[2] Then use the Move Tool to move the image around until you find a suitable position (Example)
[3] Use the Crop Tool (Width: 100px, Height: 100px, Resolution: 72 pixels/inch) on the image. This is now your base

[4] Dublicate the base and set it too Screen (Opacity: 100%). Go to Filter -> Blur -> Gaussian Blur (Radius: 1,3)

[5] Dublicate the copy once

[6] Merge layers (Shift+Ctrl+E)
[7] Go to Filter -> Sharpen -> Sharpen and sharpen twice. Then blur with the Blur Tool (Strenght: 12%) over the skin, avoid eyes, lips, ears

[8] Dublicate once, desaturate (Shift+Ctrl+U) and set to Soft Light (Opacity: 100%)

[9] Take this texture
(by kit_katgraphics) and go to Filter -> Blur -> Gaussian Blur (Radius: 15)
[10] Drag now the blurred texture over the janet-icon and set it to Overlay (Opacity: 100%)

[11] Add now text or use a brush and you're finished ^-^
In the second we go from this to
[1] Use the Crop Tool (Width: 100px, Height: 100px, Resolution: 72 pixels/inch), go to Filter -> Sharpen -> Sharpen and sharpen once. Then blur with the Blur Tool (Strenght: 12%) over the skin, avoid eyes, lips, ears

[2] Dublicate your base three times and desaturate (Shift+Ctrl+U) all of them
[3] Set the first two copies to Screen (Opacity: 100%)
Copy One
Copy Two
[4] Set the last copy to Soft Light (Opacity:100%)

[5] Now go to Layer -> New -> Layer and fill it with C2AE7A
. Set to Color Burn (Opacity: 100%)
[6] If your icon looks now to dark, play with the opacity of the different layers
[7] Add text or use a brush and you're finished ^-^
Here are some other icons made with this technique (#14 - #19)
Questions? Just ask ;)
In the first one we go from this to
[1] First go to Layer -> New -> Layer from Background because we need to move the image
[2] Then use the Move Tool to move the image around until you find a suitable position (Example)
[3] Use the Crop Tool (Width: 100px, Height: 100px, Resolution: 72 pixels/inch) on the image. This is now your base

[4] Dublicate the base and set it too Screen (Opacity: 100%). Go to Filter -> Blur -> Gaussian Blur (Radius: 1,3)

[5] Dublicate the copy once

[6] Merge layers (Shift+Ctrl+E)
[7] Go to Filter -> Sharpen -> Sharpen and sharpen twice. Then blur with the Blur Tool (Strenght: 12%) over the skin, avoid eyes, lips, ears

[8] Dublicate once, desaturate (Shift+Ctrl+U) and set to Soft Light (Opacity: 100%)

[9] Take this texture

(by kit_katgraphics) and go to Filter -> Blur -> Gaussian Blur (Radius: 15)

[10] Drag now the blurred texture over the janet-icon and set it to Overlay (Opacity: 100%)

[11] Add now text or use a brush and you're finished ^-^
In the second we go from this to
[1] Use the Crop Tool (Width: 100px, Height: 100px, Resolution: 72 pixels/inch), go to Filter -> Sharpen -> Sharpen and sharpen once. Then blur with the Blur Tool (Strenght: 12%) over the skin, avoid eyes, lips, ears

[2] Dublicate your base three times and desaturate (Shift+Ctrl+U) all of them
[3] Set the first two copies to Screen (Opacity: 100%)
Copy One

Copy Two

[4] Set the last copy to Soft Light (Opacity:100%)

[5] Now go to Layer -> New -> Layer and fill it with C2AE7A

. Set to Color Burn (Opacity: 100%)
[6] If your icon looks now to dark, play with the opacity of the different layers
[7] Add text or use a brush and you're finished ^-^
Here are some other icons made with this technique (#14 - #19)
Questions? Just ask ;)