Tutorial | Icon #035 & Texture | Icon #004
How to make 
For Photoshop CS2. The .psd file can be found here.
I'm using one Color Fill layer.
S T E P : O N E - T H E : B A S E

Crop your image down to 80x32.
Sharpen it once and smooth the skin.
Move it to the upper part of the icon.

S T E P : T W O - B A S E : C O P Y : 0 1

Duplicate your base.
Set the copy to Screen | 50%.

S T E P : T H R E E - B A S E : C O P Y : 0 2

Duplicate your base again.
Drag it on top of all layers.
Desaturate (Ctrl+Shift+U) this copy.
Set the copy to Soft Light.

S T E P : F O U R - C O L O R : F I L L

Go to Layer >> New Fill Layer >> Solid Color.
Select #C1AD83 and set this layer to Overlay.

S T E P : F I V E - B R U S H : M A S K

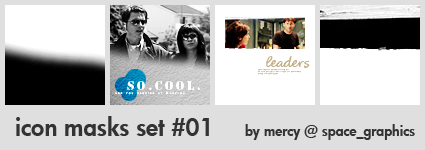
Take one of my brush masks from this set.
Drag it on top of all layers.
Set it to Screen.

S T E P : S I X - T E X T

Write your text in #C1AD83.
CluffHmkBold | Size: 14 pt

S T E P : S E V E N - T I N Y : T E X T

Take a tiny text brush from fangirls_inc.
Place it near the big text in #C1AD83.

T H E : E N D

[Download @ dA]
How to use the .png images: Drag the image over your icon and set it to Screen.
Please, credit me if you use them. Enjoy :D
For Photoshop CS2. The .psd file can be found here.
I'm using one Color Fill layer.
S T E P : O N E - T H E : B A S E
Crop your image down to 80x32.
Sharpen it once and smooth the skin.
Move it to the upper part of the icon.
S T E P : T W O - B A S E : C O P Y : 0 1
Duplicate your base.
Set the copy to Screen | 50%.
S T E P : T H R E E - B A S E : C O P Y : 0 2
Duplicate your base again.
Drag it on top of all layers.
Desaturate (Ctrl+Shift+U) this copy.
Set the copy to Soft Light.
S T E P : F O U R - C O L O R : F I L L
Go to Layer >> New Fill Layer >> Solid Color.
Select #C1AD83 and set this layer to Overlay.
S T E P : F I V E - B R U S H : M A S K
Take one of my brush masks from this set.
Drag it on top of all layers.
Set it to Screen.
S T E P : S I X - T E X T
Write your text in #C1AD83.
CluffHmkBold | Size: 14 pt
S T E P : S E V E N - T I N Y : T E X T
Take a tiny text brush from fangirls_inc.
Place it near the big text in #C1AD83.
T H E : E N D
[Download @ dA]
How to use the .png images: Drag the image over your icon and set it to Screen.
Please, credit me if you use them. Enjoy :D