Tutorial.. what!?!
Yay! My first tutorial! I really like my default icon *points to it proudly* so I thought I'd make a tutorial and show how I did it. It's not going to be exact though, because my PC crashed about a month ago and I lost pretty much everything. It's taking some time for me to go back and find all of the brushes, etc that I had saved. Hope you enjoy it, though!
Made with PS3
Going from
to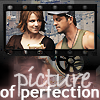
.
Step 1
Start with this picture and crop it down to size (100x100):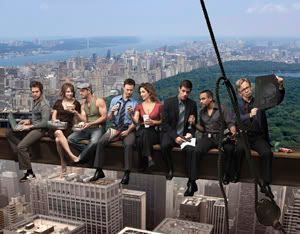

Like this
Step 2
Duplicate image. On the new layer select Filter>Sharpen>Edges

Step 3
To give their faces a bit more definition, duplicate the base layer and move it to the top.
On the new layer select Filter>Other>High Pass Set radius to 10 and okay. Set the layer to Soft Light.

Step 4
Add a selective color layer. I always play around with the settings until I like the picture. The settings I used for this were:
Red: Cyan -46 Yellow: Cyan -75
Magenta -5 Magenta +16
Yellow +33 Yellow +35
Black -11 Black +35
Neutrals: Black -4

Step 5
I took this border brush by mutsie_brushes inverted the colors by selecting Image>Adjustments>Invert

to
I then copied it on top of my layers and set to darken

Step 6
Next, I took a text brush I created and positioned it on a new layer on my icon in a white font.

If you'd like to just copy the text and paste it into photoshop, invert the color so it shows as white text instead of black text.
Step 7
I thought the picture needed a bit more color, so I used a brush already preset on photoshop and resized it much larger. On my version, it was brush #17, resized to 98.
I created a new layer beneath the text layer and added a few light strokes at the bottom of the picture so it would show up behind the text. The color I used was #efa2a2. The texture by itself looks like this:

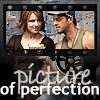
I set the layer's opacity to 60% to soften it up a bit, combined all layers, and voila the finished product:

It's a bit different than the original, but the finish is still the same idea. Let me know what you think!
Made with PS3
Going from
to
.
Step 1
Start with this picture and crop it down to size (100x100):
Like this
Step 2
Duplicate image. On the new layer select Filter>Sharpen>Edges
Step 3
To give their faces a bit more definition, duplicate the base layer and move it to the top.
On the new layer select Filter>Other>High Pass Set radius to 10 and okay. Set the layer to Soft Light.
Step 4
Add a selective color layer. I always play around with the settings until I like the picture. The settings I used for this were:
Red: Cyan -46 Yellow: Cyan -75
Magenta -5 Magenta +16
Yellow +33 Yellow +35
Black -11 Black +35
Neutrals: Black -4
Step 5
I took this border brush by mutsie_brushes inverted the colors by selecting Image>Adjustments>Invert
to
I then copied it on top of my layers and set to darken
Step 6
Next, I took a text brush I created and positioned it on a new layer on my icon in a white font.
If you'd like to just copy the text and paste it into photoshop, invert the color so it shows as white text instead of black text.
Step 7
I thought the picture needed a bit more color, so I used a brush already preset on photoshop and resized it much larger. On my version, it was brush #17, resized to 98.
I created a new layer beneath the text layer and added a few light strokes at the bottom of the picture so it would show up behind the text. The color I used was #efa2a2. The texture by itself looks like this:
I set the layer's opacity to 60% to soften it up a bit, combined all layers, and voila the finished product:
It's a bit different than the original, but the finish is still the same idea. Let me know what you think!