Tutorial #4: Hex (Christina Cole) > coloring [PSP9]
As repeatedly requested by laura4lad. Based off of this icon.
Going from...
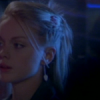
to
.
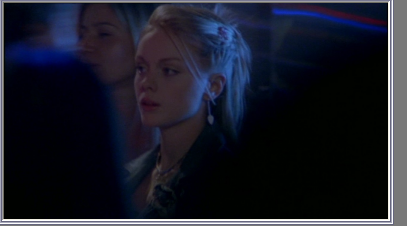
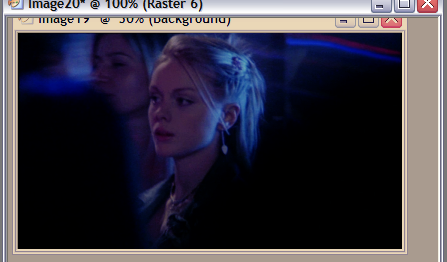
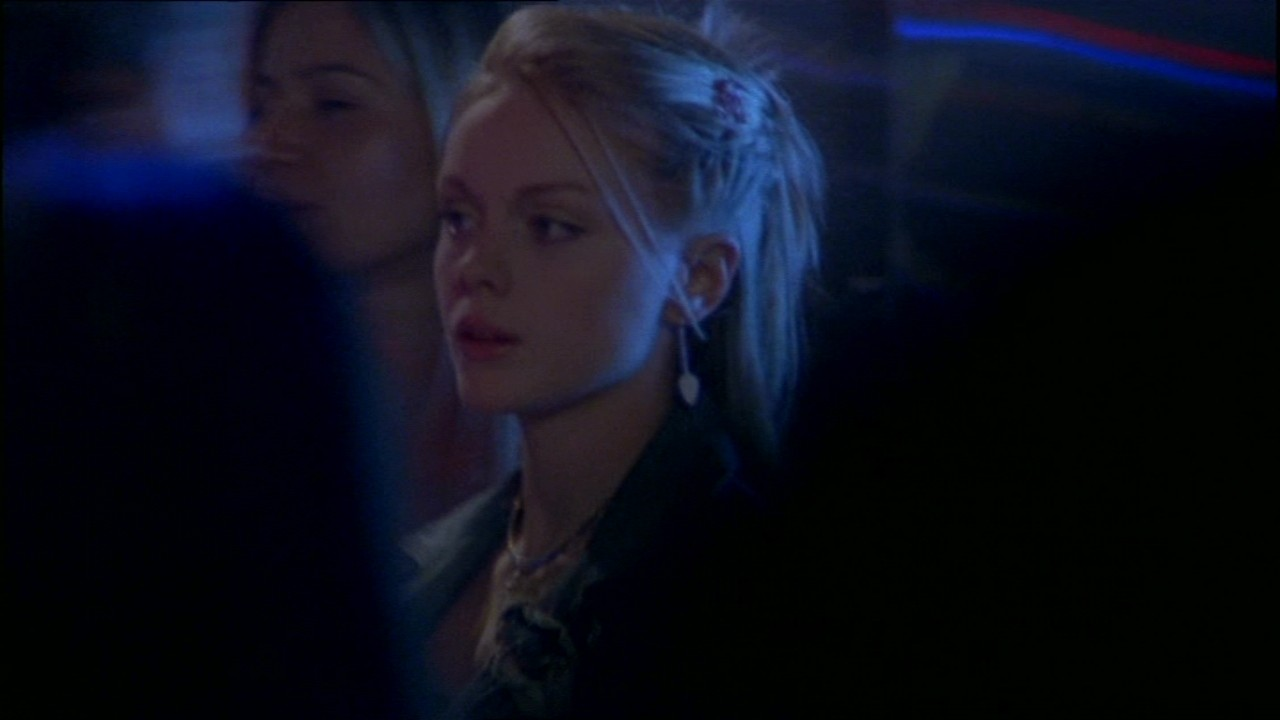
Start with this image from Hex Caps.
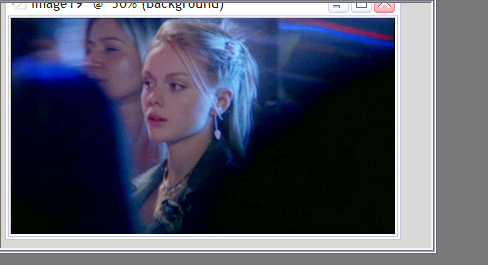
Zoom out to 30%
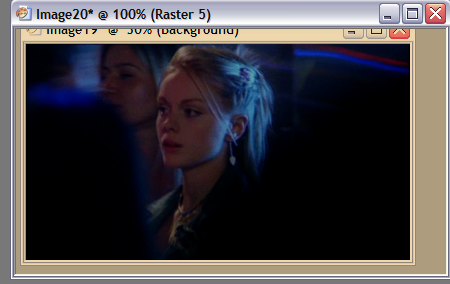
To get this image, I hit PrtSc (Print Screen) and transferred it in as a new image & cropped it down to the above image.
Copy the image, and paste it as a new layer, and set it to Screen (Layers > Properties > Screen):

Repeat (copy as a new layer, set to Screen):
Create a new raster layer, and fill it with #000000 (black), & set it to Soft Light (Layers > Properties > Soft Light)

Then create another new raster layer, and fill it with #eed7ac (tan) & set it to Multiply (Layers > Properties > Multiply)
Then create yet another new raster layer, and fill it with #0000ff & set the opacity to 16%. Then go to Layers > Properties > & set it to Color (Legacy).
Merge all the layers [Layers > Merge > Merge All (Flatten)].
I then went on to do a curves layer.
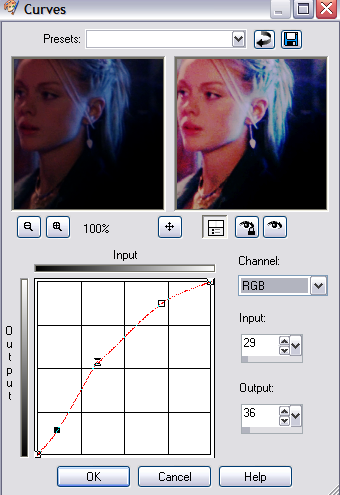
RGB:
point1: input:26, output:36
point2: input:80, output:136
point3: input:183, output: 223
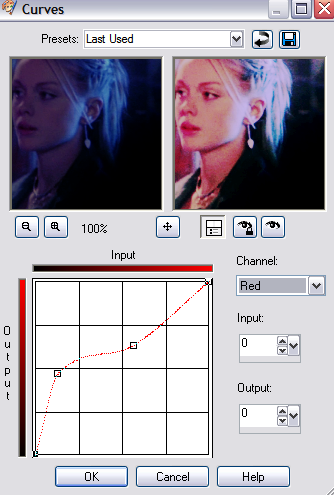
RED:
point1: input:33, output:119
point2: input:144, output:161
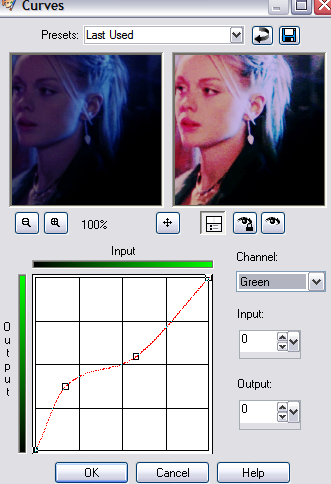
GREEN:
point1: input:44, output:95
point2: input:148, output:139
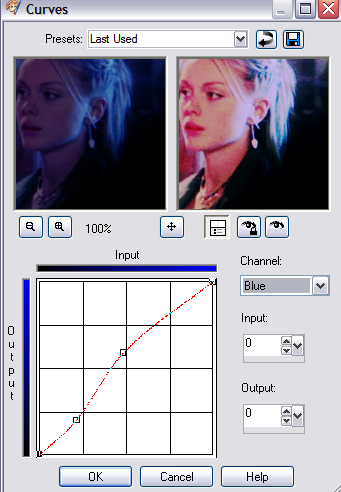
BLUE:
point1: input:54, output:51
point2: input:123, output:150
& you should end up with something like this:
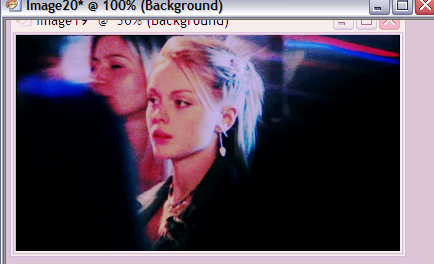
Now I cropped it down to 150x150px:

And resized it to 100x100px:

I then fiddled with the Brightness & Contrast (Adjust > Brightness & Contrast > Brightness & Contrast) to get something like this:
(which you don't have to do, but I did to get it closer to the original icon)
Sharpen if you feel the need to.
If you have any questions or concerns, don't hesitate to ask me via comments. Just be sure to scroll through the comments to see if your question has already been answered, and browse through icon_tutorial for answers to any basic questions.
Feedback & comments are awesome :D
Going from...
to
.
Start with this image from Hex Caps.
Zoom out to 30%
To get this image, I hit PrtSc (Print Screen) and transferred it in as a new image & cropped it down to the above image.
Copy the image, and paste it as a new layer, and set it to Screen (Layers > Properties > Screen):
Repeat (copy as a new layer, set to Screen):
Create a new raster layer, and fill it with #000000 (black), & set it to Soft Light (Layers > Properties > Soft Light)
Then create another new raster layer, and fill it with #eed7ac (tan) & set it to Multiply (Layers > Properties > Multiply)
Then create yet another new raster layer, and fill it with #0000ff & set the opacity to 16%. Then go to Layers > Properties > & set it to Color (Legacy).
Merge all the layers [Layers > Merge > Merge All (Flatten)].
I then went on to do a curves layer.
RGB:
point1: input:26, output:36
point2: input:80, output:136
point3: input:183, output: 223
RED:
point1: input:33, output:119
point2: input:144, output:161
GREEN:
point1: input:44, output:95
point2: input:148, output:139
BLUE:
point1: input:54, output:51
point2: input:123, output:150
& you should end up with something like this:
Now I cropped it down to 150x150px:
And resized it to 100x100px:
I then fiddled with the Brightness & Contrast (Adjust > Brightness & Contrast > Brightness & Contrast) to get something like this:
(which you don't have to do, but I did to get it closer to the original icon)
Sharpen if you feel the need to.
If you have any questions or concerns, don't hesitate to ask me via comments. Just be sure to scroll through the comments to see if your question has already been answered, and browse through icon_tutorial for answers to any basic questions.
Feedback & comments are awesome :D