Graphics 01 - Betterment Challenge
Some people may have noticed I'm on a kick right now, trying to improve some of my graphic skills. I thought this might make a good challenge, since I'm sure others want to as well.
Challenge: Create up to 3 images, with different skills. Skills must be new for you (although improving on previous skills does count; see my examples at the end of this post). Learning! Yay!
This challenge is tailored to accommodate individual levels - whether you are a newbie, fair, or experienced designer. The challenge is not looking for perfection, nor will there be any voting. The goal is simply for you to improve whatever your current graphic skills are :D To be honest, I'm doing this because we have a lot of graphic challenges at universe_the and I think a lot of people don't enter because they either don't know enough about graphics, or they don't think their work is good enough. I think the best way to practice is with others helping, and not all by yourself lost in a sea of "what the heck do I do?"
Ergo, I am hoping this challenge incorporates a "friendly community help" atmosphere. Since I know there are awesome people here, I am hoping you guys will help out and share your knowledge, both if someone asks a question and/or if you see maybe something someone is doing that you can give some improvement advice on. This is not just for the inexperienced; experienced graphers need advice too!
Be sure to be polite, and to take advice the way it's meant: to help gain skills. It's helpful if you note what program you are using, like pixlr, GIMP, photoshop, etc.
You may choose what you want to learn. You will, however, need to justify that you earned 10 points for your image by writing a 1-2 sentence "what I learned" or "what I improved on" explanation.
Points: 10 per image w/ 1-2 sentence "what you learned" explanation (up to 3) + 1 for sigtag. Since gifs are hard for some and easy for others, 1 gif can be worth 15 points. You may do more gifs, but the remainders will only be worth 10 each. Max 31 (no gifs) - 36 (gifs) points.
Deadline: December 1st, 11:59 EST.
Post your images here. You do not need to post all three at once. When you are done with your three images - or less if you are not planning on doing all 3 - link them here with your sigtag.
I hope no one minds, but I'm mainly going to use my own examples as they're easier for me to find and explain. Examples, ranging from simple to medium:

Mine. This is my first text icon. I had to find a font I liked on dafont and learn how to download it and add it to my font folder.

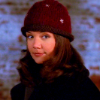
Mine. An attempt to make my own screen capture by hand. I print screened off a DVD. Also, learning contrast, hue, saturation, and light in order to make the colors look more natural.

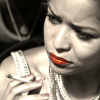
Mine. Isolating different areas for color manipulation. I outlined the lips and deepened the saturation. Then I outlined the rest (being sure to avoid the lips) to treat with the old photo treatment in pixlr.

Mine. Isolated Reid and moved him over, blending with Maeve. Cut out Garcia. (Original pic here)

Mine. I isolated and cut out the image of Reid from this pic, and blended it onto a different background (a model runway).

Mine. My first attempt at a gif. I used picasion to make it, and had to manipulate (transform) the red lightbulbs so they would match the string attachments.

Not mine. A whole lot of color manipulation, adding layers, etc. going on here. Original image
( tutorial)
.

Mine. I had to manipulate, resize, transform, then color and texture match a cap onto the nailpolish bottle (original picture here).

Mine. I used an online font generator (for "Nightmare Before Christmas"), and print screened it. It was a simple black font (with the white surrounding background). I then erased the white background - including inside the letters (like "p"), leaving only the word in black. Then I used the layer styles (I only thought I could use them for pixlr text; I thought I would try them for a layered picture) in pixlr to give it the glow background. Finally, I pasted the word onto a black background.

Mine. Extending a picture. I had to extend the right side (original pic here), and you can tell the greyish/white background isn't a uniform color, so you can't just use paint. It took a lot of playing around with diffuse, gradient, clone, and copy to get it to match that gradation.

Mine. Gif using GIMP. I had to learn to use KMPlayer to get the screencaps (and that it would screencap for a width of 300). Quality sucks.

Mine. Where I learned that when you do contrast, saturation, hue, etc on the first layer, the program saves your settings. I had no idea about the preset tool. Thanks _eyesofpride_! Quality still sucks. Also, I figured out how to crop the top and bottom and make it apply to all the layers.

Mine. Three things here: quality has improved (my goal is to make a quality *color* gif); the name is on every frame so it looks static; and I'm using text layers for the name. I did not know GIMP does not automatically come with layer styles like pixlr does. I had to download and add Script-fu.
As to people who are way more advanced than me, I'm sure you have ideas. Some suggestions might be timing, artistic (trigger warning), or multiple moving images for gifs, but I'm sure there's a ton more skill sets out there for both gif and non gif images.
For those who want them (or need inspiration), here is a list of tutorials I have found:
How to use Pixlr tutorial for Graphics (online graphic program)
Photoshop tutorials
GIMP tutorials
Getting Started with Windows Movie Maker
How to Create an Animated GIF Image with GIMP
[How to Make Screencaps for Gifs]
How to Make Screencaps for Gifs: the program used to screencap is KMPlayer click the link to get it, it should be free.
Ok, the first thing you do after you have completely loaded the setup file, and it is completely on your computer is to open it up and press CTL+G a box will appear like this one, here is what everything means divided up by color:
Once you have all that set up hit the “start” button and let it cap! The only other thing you need to do is hit “stop” if you want to stop it at a certain spot.
Note: for me, capping movies straight from dvd doesn’t work.
Original Source, copied from here.
Auto-Screencapping with VLC for Mac
Icon tutorials:
http://seemslikeaporno.livejournal.com/27817.html
http://tiger-tutorials.livejournal.com/1078.html
http://fan-cicons.livejournal.com/6627.html
GIF tutorials:
http://yeahps.tumblr.com/tutorials
Others:
http://www.gimpology.com/submission/view/how_to_outline_text
good-tutorial
Any others? Add 'em in comments, and I'll edit them into this post.
Challenge: Create up to 3 images, with different skills. Skills must be new for you (although improving on previous skills does count; see my examples at the end of this post). Learning! Yay!
This challenge is tailored to accommodate individual levels - whether you are a newbie, fair, or experienced designer. The challenge is not looking for perfection, nor will there be any voting. The goal is simply for you to improve whatever your current graphic skills are :D To be honest, I'm doing this because we have a lot of graphic challenges at universe_the and I think a lot of people don't enter because they either don't know enough about graphics, or they don't think their work is good enough. I think the best way to practice is with others helping, and not all by yourself lost in a sea of "what the heck do I do?"
Ergo, I am hoping this challenge incorporates a "friendly community help" atmosphere. Since I know there are awesome people here, I am hoping you guys will help out and share your knowledge, both if someone asks a question and/or if you see maybe something someone is doing that you can give some improvement advice on. This is not just for the inexperienced; experienced graphers need advice too!
Be sure to be polite, and to take advice the way it's meant: to help gain skills. It's helpful if you note what program you are using, like pixlr, GIMP, photoshop, etc.
You may choose what you want to learn. You will, however, need to justify that you earned 10 points for your image by writing a 1-2 sentence "what I learned" or "what I improved on" explanation.
Points: 10 per image w/ 1-2 sentence "what you learned" explanation (up to 3) + 1 for sigtag. Since gifs are hard for some and easy for others, 1 gif can be worth 15 points. You may do more gifs, but the remainders will only be worth 10 each. Max 31 (no gifs) - 36 (gifs) points.
Deadline: December 1st, 11:59 EST.
Post your images here. You do not need to post all three at once. When you are done with your three images - or less if you are not planning on doing all 3 - link them here with your sigtag.
I hope no one minds, but I'm mainly going to use my own examples as they're easier for me to find and explain. Examples, ranging from simple to medium:
Mine. This is my first text icon. I had to find a font I liked on dafont and learn how to download it and add it to my font folder.

Mine. An attempt to make my own screen capture by hand. I print screened off a DVD. Also, learning contrast, hue, saturation, and light in order to make the colors look more natural.
Mine. Isolating different areas for color manipulation. I outlined the lips and deepened the saturation. Then I outlined the rest (being sure to avoid the lips) to treat with the old photo treatment in pixlr.

Mine. Isolated Reid and moved him over, blending with Maeve. Cut out Garcia. (Original pic here)

Mine. I isolated and cut out the image of Reid from this pic, and blended it onto a different background (a model runway).
Mine. My first attempt at a gif. I used picasion to make it, and had to manipulate (transform) the red lightbulbs so they would match the string attachments.

Not mine. A whole lot of color manipulation, adding layers, etc. going on here. Original image

( tutorial)
.

Mine. I had to manipulate, resize, transform, then color and texture match a cap onto the nailpolish bottle (original picture here).

Mine. I used an online font generator (for "Nightmare Before Christmas"), and print screened it. It was a simple black font (with the white surrounding background). I then erased the white background - including inside the letters (like "p"), leaving only the word in black. Then I used the layer styles (I only thought I could use them for pixlr text; I thought I would try them for a layered picture) in pixlr to give it the glow background. Finally, I pasted the word onto a black background.

Mine. Extending a picture. I had to extend the right side (original pic here), and you can tell the greyish/white background isn't a uniform color, so you can't just use paint. It took a lot of playing around with diffuse, gradient, clone, and copy to get it to match that gradation.

Mine. Gif using GIMP. I had to learn to use KMPlayer to get the screencaps (and that it would screencap for a width of 300). Quality sucks.

Mine. Where I learned that when you do contrast, saturation, hue, etc on the first layer, the program saves your settings. I had no idea about the preset tool. Thanks _eyesofpride_! Quality still sucks. Also, I figured out how to crop the top and bottom and make it apply to all the layers.

Mine. Three things here: quality has improved (my goal is to make a quality *color* gif); the name is on every frame so it looks static; and I'm using text layers for the name. I did not know GIMP does not automatically come with layer styles like pixlr does. I had to download and add Script-fu.
As to people who are way more advanced than me, I'm sure you have ideas. Some suggestions might be timing, artistic (trigger warning), or multiple moving images for gifs, but I'm sure there's a ton more skill sets out there for both gif and non gif images.
For those who want them (or need inspiration), here is a list of tutorials I have found:
How to use Pixlr tutorial for Graphics (online graphic program)
Photoshop tutorials
GIMP tutorials
Getting Started with Windows Movie Maker
How to Create an Animated GIF Image with GIMP
[How to Make Screencaps for Gifs]
How to Make Screencaps for Gifs: the program used to screencap is KMPlayer click the link to get it, it should be free.
Ok, the first thing you do after you have completely loaded the setup file, and it is completely on your computer is to open it up and press CTL+G a box will appear like this one, here is what everything means divided up by color:
- RED: This is where your caps will be saved, you can click the picture of the folder to save them to a different folder
- GREEN: This is the prefix the name of your caps, for example, I was capping “sisterhood of the traveling pants” so the name of the caps will be “Sisterhood” followed by 4 digit numbers, ex: “Sisterhood5679”
- BLACK: This is the format the caps will be saved in, Bitmap is the fastest, after I will just convert them all to .pngs using batch conversion in paint shop pro
- ORANGE: It just shows you how many caps have been captured in the time the movie was playing, and how many frames the movie went through. This will all appear after you hit the “start” button.
- BLUE: This setting is for how long the movie will be capped. I set mine to “continuously” so that it just caps the whole movie, you can set it to cap a certain number of caps, or for a certain amount of seconds
- PURPLE: this setting is for what size the caps will be saved in, I set mine to “original size” which is just the size the movie is played in, you can stretch the media player if you want them a certain size, then click the “orinal size” button. If you want to type in a certain size do it below
- YELLOW: For GIFs make sure that it’s capping anywhere from 10-30 frames a second and not all frames if you do you will get literally, thousands of caps, I don’t recommend selecting all frame.
Once you have all that set up hit the “start” button and let it cap! The only other thing you need to do is hit “stop” if you want to stop it at a certain spot.
Note: for me, capping movies straight from dvd doesn’t work.
Original Source, copied from here.
Auto-Screencapping with VLC for Mac
Icon tutorials:
http://seemslikeaporno.livejournal.com/27817.html
http://tiger-tutorials.livejournal.com/1078.html
http://fan-cicons.livejournal.com/6627.html
GIF tutorials:
http://yeahps.tumblr.com/tutorials
Others:
http://www.gimpology.com/submission/view/how_to_outline_text
good-tutorial
Any others? Add 'em in comments, and I'll edit them into this post.