Blinkie Tutorial
A bunch of people have asked me about blinkie making lately so here is a tut. I am not a very good writter, I am better at hands on showing so if something doesn't make sense ask and I will try to clarify.
PART 1: Making the box
I use Photoshop Elements 6.0. I know a bit about PSP but not enough to write a good tutorial for it. I do think that most of this will work in both You will just have to move to Animation Shop for the animating.
Making Boxes
1. Open a document. Mine is 13 pixels x 13 pixels with a white background. That is one box.
2. zoom in, I like to be at about 800%
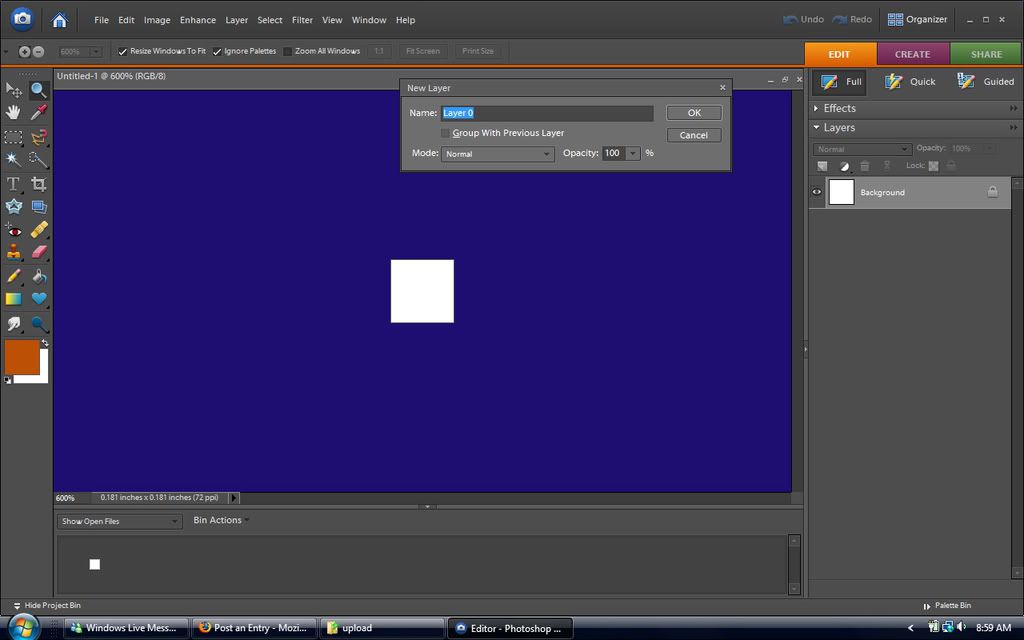
3. unlock your background so that it is editable by double clicking on the layer in the layers pallette. A box pops up asking what you want to name it "Layer 0" is default that is fine click Ok
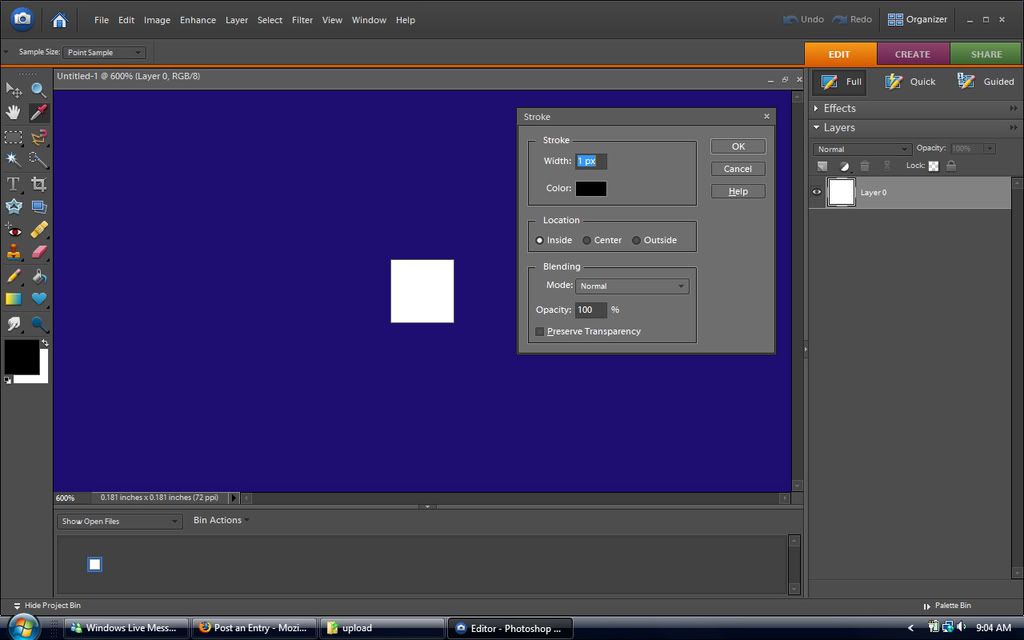
4. Outline your box 1 pixel wide in PSE go to Edit>Stroke (outline) selection a box opens up to set the size and color of your stroke. 1 pixel wide, I used black.
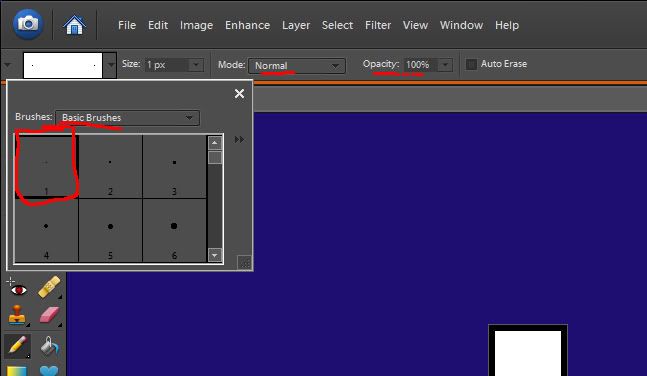
5. Click on your pencil tool PSE press "N" set it "Basic Brushes" 1 Pixel in size, Mode should be Normal and 100% opacity
6. Switch your color to white and draw a dot in each of the four corners of your black outline.
7. Now change your color to a dark gray, I used #343434 and draw a line beside your black outline all the way around the inside of your box. If your line isn't straight press "Ctrl+Z" to erase it and try again. I do it one side at a time so that if I screw up on the last side I don't have to start over completely. You should have this now.
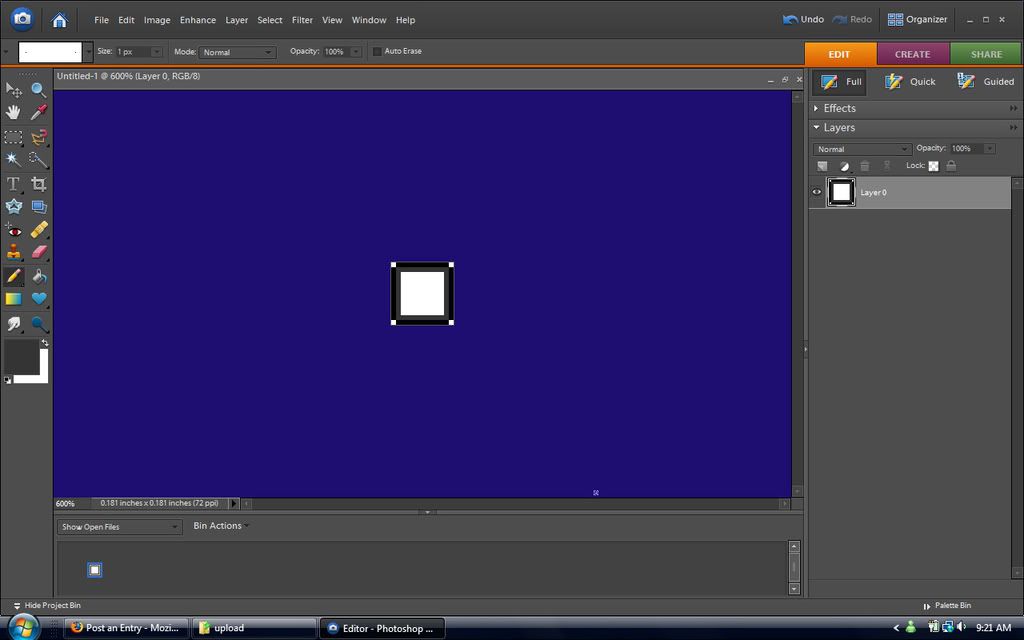
8. Switch back to white and dot the corners of the gray line just like you did the black one.
If you want narrow color bands and a wide center space skip to step 11.
9. Repeat step 7 with a lighter Gray #757474
10. Repeat step 8.
11. Now we are ready to draw what will become our animation. Duplicate your layer twice so you have three layers with the same black and two gray lines. Hide the top two, select the bottom one so that you are working on only it.
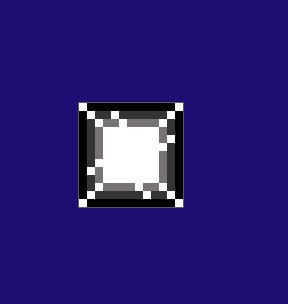
12. make sure your color is white again and use your pencil tool to put white dots on your colored lines. Do not put them in the exact center between the white corners.
This is what I have right now.
13. Made the second layer visible again and select it to work on it. set the opacity to 30% This is only temporary. It is just so we can see the dots on the last layer and make this layer follow naturally.
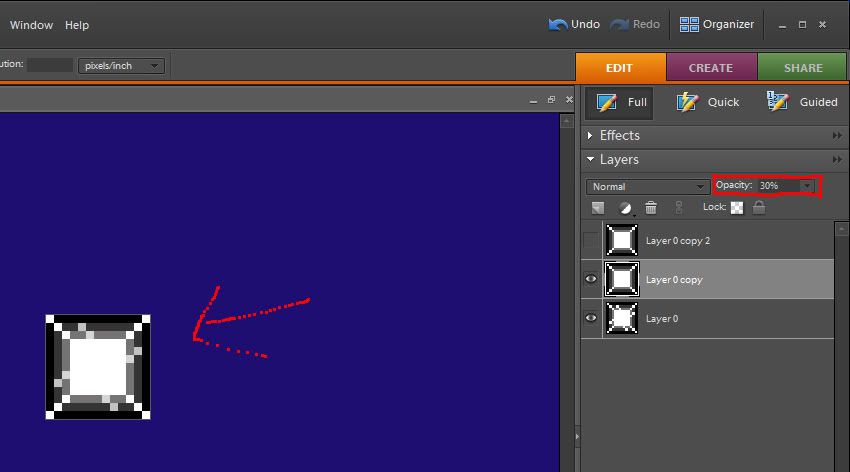
14. Use your pencil tool to make dots just a bit to the one side of your first one, make sure that all of them are one the same side or it will look weird.
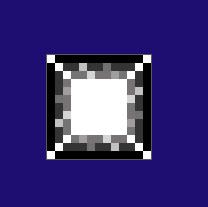
compare it to step 12 and you will see where I put them.
15. Make the third layer visible again and set it's opacity to 30% also.
16. Use your pencil to make dots again. Keep following your pattern. it is tricky if you are doing it where mine are. the ones on the lightest gray layer are now moving around the corner to the next side.
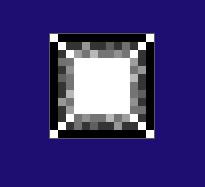
It is difficult to see here but it will make sense when we animate them
18. Set the opacity of the top two layers back to 100%
19. Congratulaions you have a box, to animate it in PSE Go to File>Save For Web on the pop-up check the animate box, the loop box and set the timing to 0.20 secs.
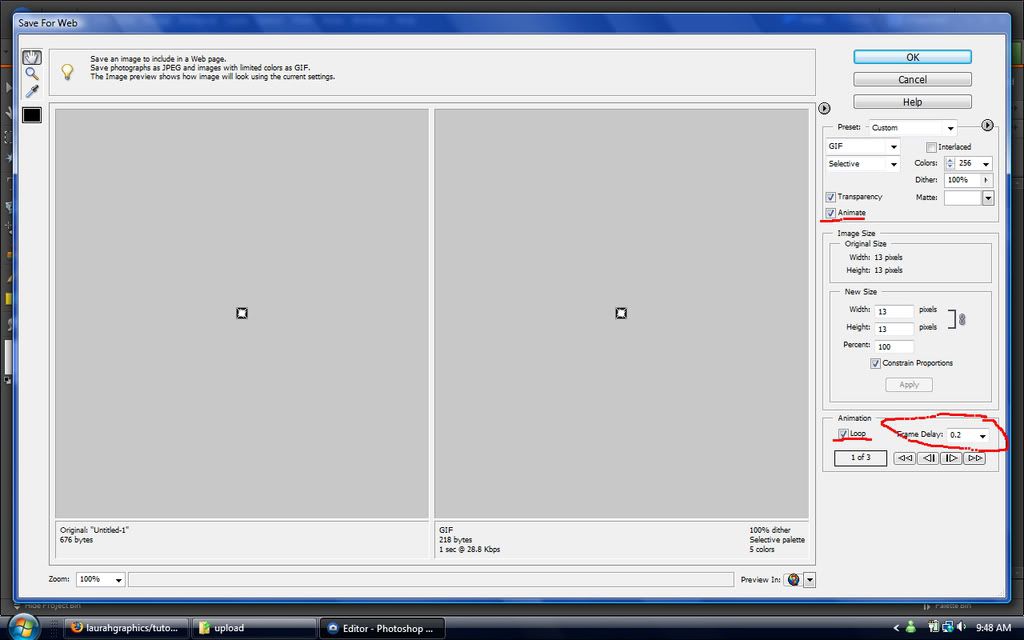
In PSP copy each layer separately starting with the bottom and paste it into AS. Save it with a frame rate of 20 and you are done with one box!
PART 2
1. to make your boxes link together nicely like this
you need a little formula. If your boxes are 13 x 13 like mine and you need boxes for a 5 letter name you do this. The height of your new document is going to 13 pixels. To determine the width subtract one pixel from your single box width (13) because that is how much each box is going to overlap its neighbor, and multiply that number (12) by the number of boxes you need (5) then add 1 for your base box. If you need five boxes you need a width of 61 pixels.
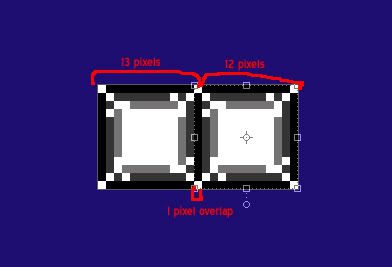
if that doesn't make sense let me know and I'll try to explain it better.
2. create a new document 13 pixels high by 37 wide with a transparent background.
copy and paste all 3 layers of your box into the new document. zoom in to at least 600%
3. Make sure that your layers are named "layer 1" "Layer 2" and "layer 3"
4. select all 3 by pressing "ctrl" and clicking on all of them. Move them over to the very left most edge of your canvas.
now duplicate them and move the copies over to the right until they overlap with the originals by only one pixel.
5. Duplicate the copies and move them to the right until they overlap the middle ones by only one pixel. Now you should not have any of your transparent background showing.
6. In your layer pallette, move the layers around so that "layer 1" "Layer 1 copy" and "layer 1 copy 2" are in that order and the same for layer 2 and it's copies and layer 3 and it's copies.
Your pallette should look like this
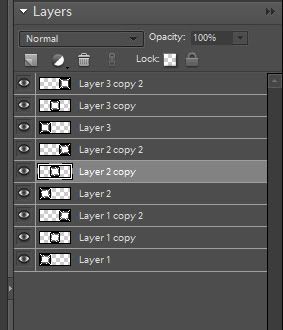
7. Now select the top layer "Layer 3 copy 2" and merge it down PSE press "ctrl+e". Do it twice so you have all of the layer 3's in one layer. DO the same for the layer 2's and the layer 1's now you should have 3 layers with 3 boxes in them.
8. now you can animate it and save and you have a template for 3 boxes.
I Keep templates on my computer like this in sizes from single boxes all the way up to 16 boxes.
9. Now you can repeat this for as many boxes as you need.
PART 3 adding boxes to a pixel.
it is easiest to star with a still doll like this
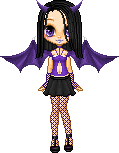
1. Open your doll. look at your layer pallette.
If the layer is named "index" go to Image>Mode>RGB Color. Indexed color is uneditable.
If it says "background" double click on it and rename it "Layer 1."
2. now, look at the bottom of your doll. Does she touch the very bottom of the canvas? This one does. If the doll you use doesn't, you will need to crop her so that there is no transparent grid below her.
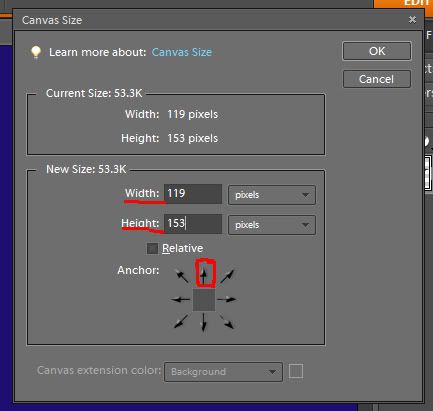
3. Next go to Image>Resize>Canvas Size now you get a pop-up select "pixels" from the drop down box. Check the the number of pixels in the width box is at least as wide as your boxes. If it is too small delete the numbers and put in the width of your box, if it is bigger just leave it.
Now look at the number in the height box and add 13 to it. on the arrow grid click on the top arrow, this will "anchor" the doll so that the pixels you are adding will go below the doll.
4. Now that your canvas is the right size duplicate your doll twice so that you have 3 of them. Remane them to "layer 2" and "layer 3" (it will save you headaches later)
5. now we are going to go the boxes you made and add text.
6. Select your type tool. Choose your font. I like "DoubleOhOne" from dafont.com Size should be 8, and anti-alias should be off. If your text is blurry your anti-alias is on.

7. now type one letter of your name in each box. it helps if you make a new text layer for each letter. Center them in the boxes. Most Pixel fonts work best of you use all CAPS. Make sure your top layer is selecte when you start typing so all of your text is above the boxes and will be visible.
8. Now I am a bit lazy and I don't know if it will work in PSP but in PSE it does. Hide your layer 2 and layer 3 boxes. press "ctrl+a" so that you have everything selected. You will have the "marching ants" around the outer edge of your image. Now press "Ctrl+shift+c" to copy merged.
9. now move back over to your doll. and press "ctrl+v" to paste the boxes onto your doll. They will show up right in the middle of the doll. That is ok, leave them there for now.
10. Go back to your boxes and make "layer 2" visible Press "ctrl+Shift+c" again to copy the second layer. Paste this into your doll, It should like up exactly over the first boxes. Repeat this for "layer 3" of your boxes.
11. Now you have all three layers of the boxes on your doll. Press "ctrl" and select all three box layers in your layer pallette. Now pick the "move tool" and move the boxes down below the doll. In PSE you can use the arrow keys to move them one pixel at a time. Move them clear to the bottom and center them by using the left and right arrow keys. It looks best if you center them with the doll rather than the canvas. It helps if you zoom in a bit.
12. When you pasted the boxes into the doll they should have automatically named themselves "Layer 4" and so on. Now move the first box layer down in the layer pallette so that it is above teh first doll layer and second box layer so it is above the 2nd doll layer.
13. select the top layer and press "ctrl+e" to merge the boxes with the doll, now select the next box layer and repeat until you have each box layer merged with the correct doll layer.
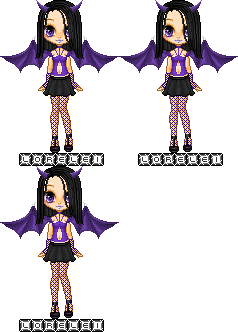
14. Now repeat step 19 of the first section and you have a blinkie.
I know it seems overwhelming, but it really isn't. If you have any questions at all please ask and I will do my best to answer them.

Made by winterfantasia @ ruby_jewelzz
PART 1: Making the box
I use Photoshop Elements 6.0. I know a bit about PSP but not enough to write a good tutorial for it. I do think that most of this will work in both You will just have to move to Animation Shop for the animating.
Making Boxes
1. Open a document. Mine is 13 pixels x 13 pixels with a white background. That is one box.
2. zoom in, I like to be at about 800%
3. unlock your background so that it is editable by double clicking on the layer in the layers pallette. A box pops up asking what you want to name it "Layer 0" is default that is fine click Ok

4. Outline your box 1 pixel wide in PSE go to Edit>Stroke (outline) selection a box opens up to set the size and color of your stroke. 1 pixel wide, I used black.

5. Click on your pencil tool PSE press "N" set it "Basic Brushes" 1 Pixel in size, Mode should be Normal and 100% opacity

6. Switch your color to white and draw a dot in each of the four corners of your black outline.
7. Now change your color to a dark gray, I used #343434 and draw a line beside your black outline all the way around the inside of your box. If your line isn't straight press "Ctrl+Z" to erase it and try again. I do it one side at a time so that if I screw up on the last side I don't have to start over completely. You should have this now.

8. Switch back to white and dot the corners of the gray line just like you did the black one.
If you want narrow color bands and a wide center space skip to step 11.
9. Repeat step 7 with a lighter Gray #757474
10. Repeat step 8.
11. Now we are ready to draw what will become our animation. Duplicate your layer twice so you have three layers with the same black and two gray lines. Hide the top two, select the bottom one so that you are working on only it.
12. make sure your color is white again and use your pencil tool to put white dots on your colored lines. Do not put them in the exact center between the white corners.
This is what I have right now.

13. Made the second layer visible again and select it to work on it. set the opacity to 30% This is only temporary. It is just so we can see the dots on the last layer and make this layer follow naturally.

14. Use your pencil tool to make dots just a bit to the one side of your first one, make sure that all of them are one the same side or it will look weird.

compare it to step 12 and you will see where I put them.
15. Make the third layer visible again and set it's opacity to 30% also.
16. Use your pencil to make dots again. Keep following your pattern. it is tricky if you are doing it where mine are. the ones on the lightest gray layer are now moving around the corner to the next side.

It is difficult to see here but it will make sense when we animate them
18. Set the opacity of the top two layers back to 100%
19. Congratulaions you have a box, to animate it in PSE Go to File>Save For Web on the pop-up check the animate box, the loop box and set the timing to 0.20 secs.

In PSP copy each layer separately starting with the bottom and paste it into AS. Save it with a frame rate of 20 and you are done with one box!
PART 2
1. to make your boxes link together nicely like this

you need a little formula. If your boxes are 13 x 13 like mine and you need boxes for a 5 letter name you do this. The height of your new document is going to 13 pixels. To determine the width subtract one pixel from your single box width (13) because that is how much each box is going to overlap its neighbor, and multiply that number (12) by the number of boxes you need (5) then add 1 for your base box. If you need five boxes you need a width of 61 pixels.

if that doesn't make sense let me know and I'll try to explain it better.
2. create a new document 13 pixels high by 37 wide with a transparent background.
copy and paste all 3 layers of your box into the new document. zoom in to at least 600%
3. Make sure that your layers are named "layer 1" "Layer 2" and "layer 3"
4. select all 3 by pressing "ctrl" and clicking on all of them. Move them over to the very left most edge of your canvas.
now duplicate them and move the copies over to the right until they overlap with the originals by only one pixel.
5. Duplicate the copies and move them to the right until they overlap the middle ones by only one pixel. Now you should not have any of your transparent background showing.
6. In your layer pallette, move the layers around so that "layer 1" "Layer 1 copy" and "layer 1 copy 2" are in that order and the same for layer 2 and it's copies and layer 3 and it's copies.
Your pallette should look like this

7. Now select the top layer "Layer 3 copy 2" and merge it down PSE press "ctrl+e". Do it twice so you have all of the layer 3's in one layer. DO the same for the layer 2's and the layer 1's now you should have 3 layers with 3 boxes in them.
8. now you can animate it and save and you have a template for 3 boxes.
I Keep templates on my computer like this in sizes from single boxes all the way up to 16 boxes.
9. Now you can repeat this for as many boxes as you need.
PART 3 adding boxes to a pixel.
it is easiest to star with a still doll like this

1. Open your doll. look at your layer pallette.
If the layer is named "index" go to Image>Mode>RGB Color. Indexed color is uneditable.
If it says "background" double click on it and rename it "Layer 1."
2. now, look at the bottom of your doll. Does she touch the very bottom of the canvas? This one does. If the doll you use doesn't, you will need to crop her so that there is no transparent grid below her.
3. Next go to Image>Resize>Canvas Size now you get a pop-up select "pixels" from the drop down box. Check the the number of pixels in the width box is at least as wide as your boxes. If it is too small delete the numbers and put in the width of your box, if it is bigger just leave it.
Now look at the number in the height box and add 13 to it. on the arrow grid click on the top arrow, this will "anchor" the doll so that the pixels you are adding will go below the doll.

4. Now that your canvas is the right size duplicate your doll twice so that you have 3 of them. Remane them to "layer 2" and "layer 3" (it will save you headaches later)
5. now we are going to go the boxes you made and add text.
6. Select your type tool. Choose your font. I like "DoubleOhOne" from dafont.com Size should be 8, and anti-alias should be off. If your text is blurry your anti-alias is on.

7. now type one letter of your name in each box. it helps if you make a new text layer for each letter. Center them in the boxes. Most Pixel fonts work best of you use all CAPS. Make sure your top layer is selecte when you start typing so all of your text is above the boxes and will be visible.
8. Now I am a bit lazy and I don't know if it will work in PSP but in PSE it does. Hide your layer 2 and layer 3 boxes. press "ctrl+a" so that you have everything selected. You will have the "marching ants" around the outer edge of your image. Now press "Ctrl+shift+c" to copy merged.
9. now move back over to your doll. and press "ctrl+v" to paste the boxes onto your doll. They will show up right in the middle of the doll. That is ok, leave them there for now.
10. Go back to your boxes and make "layer 2" visible Press "ctrl+Shift+c" again to copy the second layer. Paste this into your doll, It should like up exactly over the first boxes. Repeat this for "layer 3" of your boxes.
11. Now you have all three layers of the boxes on your doll. Press "ctrl" and select all three box layers in your layer pallette. Now pick the "move tool" and move the boxes down below the doll. In PSE you can use the arrow keys to move them one pixel at a time. Move them clear to the bottom and center them by using the left and right arrow keys. It looks best if you center them with the doll rather than the canvas. It helps if you zoom in a bit.
12. When you pasted the boxes into the doll they should have automatically named themselves "Layer 4" and so on. Now move the first box layer down in the layer pallette so that it is above teh first doll layer and second box layer so it is above the 2nd doll layer.
13. select the top layer and press "ctrl+e" to merge the boxes with the doll, now select the next box layer and repeat until you have each box layer merged with the correct doll layer.
14. Now repeat step 19 of the first section and you have a blinkie.

I know it seems overwhelming, but it really isn't. If you have any questions at all please ask and I will do my best to answer them.

Made by winterfantasia @ ruby_jewelzz