(icons) ✩ entry #03
Some new icons + a tut, yay!


game of thrones x5

battleship | game of thrones x2 | once upon a time x2

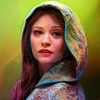
once upon a time x3 | random (theiconquest) | merlin (theiconquest)
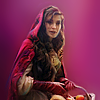
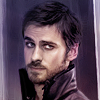
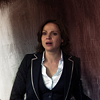
beauty and the beast | the wizard of oz | game of thrones x3 (all for theiconquest)


the vampire diaries | avengers | supernatural | lost | borgias (all for theiconquest)


random | game of thrones | the walking dead | supernatural x2


pretty little liars | sherlock | avengers | brokeback mountain | the hollow crown


supernatural | the fall | beastly


Ok guys, I wrote this tut in Italian and tried to translate it in English too, so you have both versions, Italian AND English. I hope you'll understand even though my English is SO DAMN BAD! Unfortunately my screenshots are all in Italian, but I guess you can figure out what there's written on them thanks to my WONDERFUL explanations, can't you?
In questa guida vi spiegherò come ho ottenuto quest'icon:
In this guide I'll try to explain you how I made this icon:

Prima però una nota: tutti gli stamp misurano 1440*900px, ma qui sono ridotti a 450px di larghezza, quindi per vederli a grandezza naturale cliccate con il tasto destro del mouse e scegliete apri in un'altra scheda!
First of all a note: all the screenshots are 1440*900; to see the full version you just have to right click on the image and select open in a new tab.
Bene! Ora, il primo passo è stato ovviamente scegliere la cap. Io ho scelto questa. L'ho tagliata a 100*100px lasciando dello spazio vuoto sopra - che, avendo lasciato l'immagine su Sfondo, da me si vede in nero. Ok.
Ok! First thing to do is: choose the cap, of course. I choosed this one and I cropped it at 100*100px, leaving some empty space in the upper part.
Poi cosa ho fatto? Be', volevo fare una mezza negative space, così ho "continuato" il cielo (era il cielo?) prendendo il colore con il contagocce, di modo che fosse uguale, e ho creato un nuovo livello di riempimento > tinta unita con quel colore. Poi con una buona spennellata sulla maschera di livello ho cancellato il beige dove non mi serviva, quindi sul soggetto e sulla parte di sfondo che pensavo di tenere.
My idea was to do some sort of center-cropped-negative-space, so I added a new fill layer > color fill/solid color with the same colour of the sky (? is it the sky?), applied a layer mask and painted over the black part of my icon with a solid white brush.

Carino, ma non mi convinceva, così ho aggiunto un nuovo livello di riempimento > tinta unita con un altro colore, questa volta che desse davvero l'idea di cielo, e sempre con la maschera ho cancellato la parte che copre il soggetto. Oh che bello, il mio bandito ha lo sfondo azzurro, adesso!
Nice, but I wasn't convinced. Therefore (?) I added a new fill layer > color fill/solid color with a light blue who reminded me of a real sky and using another layer mask I hid the parts over Roy/the Bandit. How nice, my Bandit has a light blue background now!

Io non sono mai contenta, e gli sfondi così... piatti non mi piacciono, trovo non sappiano di nulla. Quindi ho applicato questa texture di introspecticism, l'ho impostata su luce soffusa al 100% e anche qui ho cancellato la zona che copriva il soggetto.
I don't like flat backgrounds, so I added this texture by introspecticism, set it on soft light at 100% and with my all-present layer mask I hid it over the subject.

Fantastico, ma continua a non essere neanche a metà di quel che avevo in mente di fare. Innanzitutto, è troppo scura e piatta... quindi ho creato un nuovo livello VUOTO e sono andata su immagine > applica immagine, in modo da ottenere una copia dei livelli uniti (? vabbè, fatelo e capirete!) e ho sfruttato una scorciatoia a volte molto utile, ovvero sono andata su immagine > tono automatico. Nel mio caso ha funzionato benone, ma in altri non è proprio ottimale perché altera troppo i colori; in quel caso potete optare anche per contrasto automatico, che modifica solo luci e ombre ;D
Great! So what did I do next? I added a new (empty) layer and used the apply image feature (you know, right? image > apply image and on your empty layer you get a merged copy of all your layers... ok, I don't know how to explain it, sorry!) - uh yes, what was I saying? I applied the image (?) and went on image > auto tone wich I guess in the oldest versions of photoshop is auto levels? I'm not sure, actually. Anyway you can use auto contrast too, it works fine for me and doesn't change too much the colours.

Va bene, andiamo avanti. Volevo dare una leggera sfumatura con luci e ombre, ma non con i soliti gradienti, così ho usato un'altra texture - per la precisione questa sempre di introspecticism, sempre su luce soffusa al 100%, ho applicato una maschera - sì, uso tantissime maschere! - e ho cancellato un po' sul soggetto, dove mi sembrava troppo scuro o troppo chiaro. Di questo non vi serve lo stamp, vero? No, certo che no, quindi passiamo oltre e arriviamo al mio strumento (?) preferito: vividezza! In realtà non è uno strumento, è una regolazione che trovate sotto livello > nuovo livello di regolazione > vividezza, anche se non so se tutti i photoshop ce l'hanno... sorry! D: Comunque, ho impostato la vividezza al massimo, +100. Esageriamo, yeeeeeh! Be', d'altra parte la volevo bella colorata... bene. Poi che ho fatto? Ho dato un altro po' di luci e ombre semplicemente spennellando sul soggetto con bianco e nero e impostando il livello su luce soffusa, sempre al 100%. Era ancora troppo scura e spenta, così ho aggiunto un nuovo livello di riempimento > tinta unita con un marroncino non troppo scuro e l'ho messo su - indovinate? - luce soffusa al 100%. Dopodiché ho creato un nuovo livello di regolazione > luminosità e contrasto e ho cliccato su automatico.
Let's go on. I added this texture by introspecticism (again, yes) to give some depth and set it on soft light 100%. I added a layer mask and hid the texture where I thought it turned my icon too dark or too light. Does it make any sense what I'm saying? Anyway, after adding the texture and deleting it where needed I added a new adjustement layer > vibrance and moved the arrow (?) until +100 without touching the hue value. Yes, I wanted my icon to be VERY bright and colorful. So what now? Lights and shadows again! This time I took a soft round brush and brushed here and there and set the layer on soft light 100% - yes, again. The icon was still too dark and dull, that's why I added a new fill layer > color fill/solid color with a light brown and again I set it on soft light 100&. Then new adjustment layer > brightness and contrast and auto, et voilà, it's brighter!

Bene! Ora è il momento di giocare! Questa è la parte che preferisco in assoluto, perché ci spendo tipo... due secoli e mezzo solo sperimentando colori e pennellate? Vabbè, comunque, ho creato tanti nuovi livelli vuoti tutti impostati su luce soffusa e su ognuno ho spennellato alcune parti dell'icon con un colore diverso. I lati del viso per scurirlo e farlo più viola, i contorni del corpo per scurire, le parti basse dello sfondo per scurire anche quello... e via dicendo. Visto come basti poco per cambiare i toni di un'icon? Prima era itterico, ora non più! Be'... non più così tanto, almeno!
And now, let's play! I added a new (empty) layer, set it on - guess what? - soft light and started painting on it with a soft round brush (about 7px big) and sooooo many colours. Violet on his face, some dark blue around the body and on his shoulders, some orange, some green, like a rainbow, yay! Just go and paint, try, add as many layers as you wish with as many colours as you want. It's your icon, so do whatever you feel or think would fit better.

Siccome i contorni del viso non mi sembravano ben definiti - afeastforme è colpa tua, mi hai fatto venire i complessi! XD - ho disegnato una linea scura sul lato esterno e una chiara sulla mascella e sul contorno, appena più dentro della linea scura, così da definire i contorni. E poi ho messo un altro livello di regolazione > luminosità e contrasto > automatico. Vado avanti con le regolazioni automatiche, sì. Sono un'imbrogliona!
Since the outline of Roy's face was kind of blended with the background - thanks afeastforme for making me paranoid! LOL - I drew a dark line on the outside and a light one on the inside and on his jaw so to define the outline. Then I added a new adjustment layer > brightness and contrast > auto.

Again, ho creato un livello vuoto impostato su luce soffusa a bassa opacità e ho spennellato di nero dove volevo scurire e di bianco dove volevo illuminare.
Again, some light-and-shadow things: new layer, soft light on a lower opacity this time and go with your black and white brushes! Just so you know: "scurito" means I made it darker, "schiarito" means I made it lighter ~

E ora passiamo all'effetto che vi piace tanto, sì? Bene, io quel poco che so l'ho imparato dalla guida di absolucion, quindi se l'avete letta non sorprendetevi se vi suona familiare. Ho duplicato l'immagine come mio solito (nuovo livello vuoto > immagine > applica immagine) e sono andata su filtri > sfocatura > sfocatura migliore impostata a raggio 3.0, soglia 10.0, più o meno come dice quella genia nella sua guida. Di solito, se mi sembra che sia troppo spezzettato abbasso l'opacità del livello, ma in questo caso mi andava bene così.
And now, painting! Uh-hun... well, come sort of painting, actually. I'm not really going to paint anoything. If you want to know how to really fake-paint something, then go to absolucion's guide, she explains much better than me. And she does paint, I just play around with brushes and filters. Anyway, let's see what I did on this icon. As always I used the apply image stuff and then went to filters > blur > smart blur (radius: 3.0, threshold: 10.0). If it is too much I usually lower the opacity og the whole layer, but not this time.

Poi che ho fatto? Ho preso lo sfumino (lo strumento con la manina col dito fuori, smudge) a 2px, intensità 30% e ho passato tutto quello che volevo "fondere". Sì, anche lo sfondo, a cui ho cancellato alcune parti, in alto.
So now? SMUDGE! My lovely smudge! I took the smudge tool (the little hand with an index pointed) with a 2px brush? and 30% intensity and smoothed everything, trying to blend every part and make it all a little more... smooth LOL. The background too.

A questo punto ho contrastato, convinta di essere quasi alla fine - sì, contrasto sempre alla fine. Per farlo ho duplicato nuovamente il tutto e unito, sempre con applica immagine e sono andata su filtri > nitidezza > nitidezza avanzata impostando il fattore a 75 e il raggio a 0.3.
Time to sharpen the icon! Again I used the apply image command and then filters > sharpen > smart sharpen (amount: 75, radius: 0.3).

Il cappello però non mi piaceva, era troppo spigoloso... quindi l'ho rifatto. Mi sono armata di pennello e contagocce e selezionando i colori direttamente dal cappello originale ho ridisegnato il contorno o insomma dove non mi piaceva. E ho aggiunto altre linee chiare (pennello a 2px, bianco, luce soffusa) sui contorni per renderli più evidenti. Voilà. Visto com'è migliorata?
I didn't like the hat too much, it was too sharpened, so I just re-painted it and added some 2px brush withe lines set on soft light on the outline.

E ora passiamo all'altra parte che mi diverte tanto: le textures. Ne uso sempre diverse, tutte belle colorate che danno luci e ombre e colori e boh tu. In questo caso ho applicato prima questa di midnight-road, su luce soffusa al 100%, cancellando un po' sul volto; poi ho messo questa (sempre di midnight-road) su luce soffusa al 30%, anche qui cancellando sul volto, e infine ho messo questa (ancora una volta di midnight-road) sempre su luce soffusa, ma al 40%. Per finire (?) ho applicato un nuovo livello di regolazione > luminosità e contrasto > automatico e un nuovo livello di regolazione > vividezza > +43, senza toccare la saturazione - la muovo raramente, quella povera levetta... toh, guardate come cambia!
TEXTURES TIIIIME! YAY! I like textures, especially when bright and colorful - yeah, I love colours. Okay, so, I used this texture by midnight-road set on soft light 100% and hid the parts over his face with a layer mask. Then I took this one by midnight-road again and set it on soft light 30%, and again I hid the parts over face and such. Next I took this one always by midnight-road and set it on soft light 40%. No masks this time. In the end I added a new adjustment layer > brightness and contrast > auto and new adjustment layer > vibrance > +43 without touching the hue amount again.

Per finire ho sfocato ancora un poco la pelle e alcune parti e ho corretto una bruciatura sul naso - ma questo solo dopo che me l'ha fatto notare afeastforme, perché io proprio non me n'ero accorta.

Et voilà, ho aggiunto il testo facendo dannare la povera Julza che mi ha dovuta sopportare tutta sera e l'icon è finita.
It's almost done! I smoothed a little more the skin and some other parts that were too sharp and adjusted the nose - thanks again afeastforme for pointing out the burning (?) LOL - and stop. Uh, yes, I added the text... YAY!

»


game of thrones x5
battleship | game of thrones x2 | once upon a time x2

once upon a time x3 | random (theiconquest) | merlin (theiconquest)
beauty and the beast | the wizard of oz | game of thrones x3 (all for theiconquest)

the vampire diaries | avengers | supernatural | lost | borgias (all for theiconquest)


random | game of thrones | the walking dead | supernatural x2


pretty little liars | sherlock | avengers | brokeback mountain | the hollow crown


supernatural | the fall | beastly


Ok guys, I wrote this tut in Italian and tried to translate it in English too, so you have both versions, Italian AND English. I hope you'll understand even though my English is SO DAMN BAD! Unfortunately my screenshots are all in Italian, but I guess you can figure out what there's written on them thanks to my WONDERFUL explanations, can't you?
In questa guida vi spiegherò come ho ottenuto quest'icon:
In this guide I'll try to explain you how I made this icon:

Prima però una nota: tutti gli stamp misurano 1440*900px, ma qui sono ridotti a 450px di larghezza, quindi per vederli a grandezza naturale cliccate con il tasto destro del mouse e scegliete apri in un'altra scheda!
First of all a note: all the screenshots are 1440*900; to see the full version you just have to right click on the image and select open in a new tab.
Bene! Ora, il primo passo è stato ovviamente scegliere la cap. Io ho scelto questa. L'ho tagliata a 100*100px lasciando dello spazio vuoto sopra - che, avendo lasciato l'immagine su Sfondo, da me si vede in nero. Ok.
Ok! First thing to do is: choose the cap, of course. I choosed this one and I cropped it at 100*100px, leaving some empty space in the upper part.
Poi cosa ho fatto? Be', volevo fare una mezza negative space, così ho "continuato" il cielo (era il cielo?) prendendo il colore con il contagocce, di modo che fosse uguale, e ho creato un nuovo livello di riempimento > tinta unita con quel colore. Poi con una buona spennellata sulla maschera di livello ho cancellato il beige dove non mi serviva, quindi sul soggetto e sulla parte di sfondo che pensavo di tenere.
My idea was to do some sort of center-cropped-negative-space, so I added a new fill layer > color fill/solid color with the same colour of the sky (? is it the sky?), applied a layer mask and painted over the black part of my icon with a solid white brush.

Carino, ma non mi convinceva, così ho aggiunto un nuovo livello di riempimento > tinta unita con un altro colore, questa volta che desse davvero l'idea di cielo, e sempre con la maschera ho cancellato la parte che copre il soggetto. Oh che bello, il mio bandito ha lo sfondo azzurro, adesso!
Nice, but I wasn't convinced. Therefore (?) I added a new fill layer > color fill/solid color with a light blue who reminded me of a real sky and using another layer mask I hid the parts over Roy/the Bandit. How nice, my Bandit has a light blue background now!

Io non sono mai contenta, e gli sfondi così... piatti non mi piacciono, trovo non sappiano di nulla. Quindi ho applicato questa texture di introspecticism, l'ho impostata su luce soffusa al 100% e anche qui ho cancellato la zona che copriva il soggetto.
I don't like flat backgrounds, so I added this texture by introspecticism, set it on soft light at 100% and with my all-present layer mask I hid it over the subject.

Fantastico, ma continua a non essere neanche a metà di quel che avevo in mente di fare. Innanzitutto, è troppo scura e piatta... quindi ho creato un nuovo livello VUOTO e sono andata su immagine > applica immagine, in modo da ottenere una copia dei livelli uniti (? vabbè, fatelo e capirete!) e ho sfruttato una scorciatoia a volte molto utile, ovvero sono andata su immagine > tono automatico. Nel mio caso ha funzionato benone, ma in altri non è proprio ottimale perché altera troppo i colori; in quel caso potete optare anche per contrasto automatico, che modifica solo luci e ombre ;D
Great! So what did I do next? I added a new (empty) layer and used the apply image feature (you know, right? image > apply image and on your empty layer you get a merged copy of all your layers... ok, I don't know how to explain it, sorry!) - uh yes, what was I saying? I applied the image (?) and went on image > auto tone wich I guess in the oldest versions of photoshop is auto levels? I'm not sure, actually. Anyway you can use auto contrast too, it works fine for me and doesn't change too much the colours.

Va bene, andiamo avanti. Volevo dare una leggera sfumatura con luci e ombre, ma non con i soliti gradienti, così ho usato un'altra texture - per la precisione questa sempre di introspecticism, sempre su luce soffusa al 100%, ho applicato una maschera - sì, uso tantissime maschere! - e ho cancellato un po' sul soggetto, dove mi sembrava troppo scuro o troppo chiaro. Di questo non vi serve lo stamp, vero? No, certo che no, quindi passiamo oltre e arriviamo al mio strumento (?) preferito: vividezza! In realtà non è uno strumento, è una regolazione che trovate sotto livello > nuovo livello di regolazione > vividezza, anche se non so se tutti i photoshop ce l'hanno... sorry! D: Comunque, ho impostato la vividezza al massimo, +100. Esageriamo, yeeeeeh! Be', d'altra parte la volevo bella colorata... bene. Poi che ho fatto? Ho dato un altro po' di luci e ombre semplicemente spennellando sul soggetto con bianco e nero e impostando il livello su luce soffusa, sempre al 100%. Era ancora troppo scura e spenta, così ho aggiunto un nuovo livello di riempimento > tinta unita con un marroncino non troppo scuro e l'ho messo su - indovinate? - luce soffusa al 100%. Dopodiché ho creato un nuovo livello di regolazione > luminosità e contrasto e ho cliccato su automatico.
Let's go on. I added this texture by introspecticism (again, yes) to give some depth and set it on soft light 100%. I added a layer mask and hid the texture where I thought it turned my icon too dark or too light. Does it make any sense what I'm saying? Anyway, after adding the texture and deleting it where needed I added a new adjustement layer > vibrance and moved the arrow (?) until +100 without touching the hue value. Yes, I wanted my icon to be VERY bright and colorful. So what now? Lights and shadows again! This time I took a soft round brush and brushed here and there and set the layer on soft light 100% - yes, again. The icon was still too dark and dull, that's why I added a new fill layer > color fill/solid color with a light brown and again I set it on soft light 100&. Then new adjustment layer > brightness and contrast and auto, et voilà, it's brighter!

Bene! Ora è il momento di giocare! Questa è la parte che preferisco in assoluto, perché ci spendo tipo... due secoli e mezzo solo sperimentando colori e pennellate? Vabbè, comunque, ho creato tanti nuovi livelli vuoti tutti impostati su luce soffusa e su ognuno ho spennellato alcune parti dell'icon con un colore diverso. I lati del viso per scurirlo e farlo più viola, i contorni del corpo per scurire, le parti basse dello sfondo per scurire anche quello... e via dicendo. Visto come basti poco per cambiare i toni di un'icon? Prima era itterico, ora non più! Be'... non più così tanto, almeno!
And now, let's play! I added a new (empty) layer, set it on - guess what? - soft light and started painting on it with a soft round brush (about 7px big) and sooooo many colours. Violet on his face, some dark blue around the body and on his shoulders, some orange, some green, like a rainbow, yay! Just go and paint, try, add as many layers as you wish with as many colours as you want. It's your icon, so do whatever you feel or think would fit better.

Siccome i contorni del viso non mi sembravano ben definiti - afeastforme è colpa tua, mi hai fatto venire i complessi! XD - ho disegnato una linea scura sul lato esterno e una chiara sulla mascella e sul contorno, appena più dentro della linea scura, così da definire i contorni. E poi ho messo un altro livello di regolazione > luminosità e contrasto > automatico. Vado avanti con le regolazioni automatiche, sì. Sono un'imbrogliona!
Since the outline of Roy's face was kind of blended with the background - thanks afeastforme for making me paranoid! LOL - I drew a dark line on the outside and a light one on the inside and on his jaw so to define the outline. Then I added a new adjustment layer > brightness and contrast > auto.

Again, ho creato un livello vuoto impostato su luce soffusa a bassa opacità e ho spennellato di nero dove volevo scurire e di bianco dove volevo illuminare.
Again, some light-and-shadow things: new layer, soft light on a lower opacity this time and go with your black and white brushes! Just so you know: "scurito" means I made it darker, "schiarito" means I made it lighter ~

E ora passiamo all'effetto che vi piace tanto, sì? Bene, io quel poco che so l'ho imparato dalla guida di absolucion, quindi se l'avete letta non sorprendetevi se vi suona familiare. Ho duplicato l'immagine come mio solito (nuovo livello vuoto > immagine > applica immagine) e sono andata su filtri > sfocatura > sfocatura migliore impostata a raggio 3.0, soglia 10.0, più o meno come dice quella genia nella sua guida. Di solito, se mi sembra che sia troppo spezzettato abbasso l'opacità del livello, ma in questo caso mi andava bene così.
And now, painting! Uh-hun... well, come sort of painting, actually. I'm not really going to paint anoything. If you want to know how to really fake-paint something, then go to absolucion's guide, she explains much better than me. And she does paint, I just play around with brushes and filters. Anyway, let's see what I did on this icon. As always I used the apply image stuff and then went to filters > blur > smart blur (radius: 3.0, threshold: 10.0). If it is too much I usually lower the opacity og the whole layer, but not this time.

Poi che ho fatto? Ho preso lo sfumino (lo strumento con la manina col dito fuori, smudge) a 2px, intensità 30% e ho passato tutto quello che volevo "fondere". Sì, anche lo sfondo, a cui ho cancellato alcune parti, in alto.
So now? SMUDGE! My lovely smudge! I took the smudge tool (the little hand with an index pointed) with a 2px brush? and 30% intensity and smoothed everything, trying to blend every part and make it all a little more... smooth LOL. The background too.

A questo punto ho contrastato, convinta di essere quasi alla fine - sì, contrasto sempre alla fine. Per farlo ho duplicato nuovamente il tutto e unito, sempre con applica immagine e sono andata su filtri > nitidezza > nitidezza avanzata impostando il fattore a 75 e il raggio a 0.3.
Time to sharpen the icon! Again I used the apply image command and then filters > sharpen > smart sharpen (amount: 75, radius: 0.3).

Il cappello però non mi piaceva, era troppo spigoloso... quindi l'ho rifatto. Mi sono armata di pennello e contagocce e selezionando i colori direttamente dal cappello originale ho ridisegnato il contorno o insomma dove non mi piaceva. E ho aggiunto altre linee chiare (pennello a 2px, bianco, luce soffusa) sui contorni per renderli più evidenti. Voilà. Visto com'è migliorata?
I didn't like the hat too much, it was too sharpened, so I just re-painted it and added some 2px brush withe lines set on soft light on the outline.

E ora passiamo all'altra parte che mi diverte tanto: le textures. Ne uso sempre diverse, tutte belle colorate che danno luci e ombre e colori e boh tu. In questo caso ho applicato prima questa di midnight-road, su luce soffusa al 100%, cancellando un po' sul volto; poi ho messo questa (sempre di midnight-road) su luce soffusa al 30%, anche qui cancellando sul volto, e infine ho messo questa (ancora una volta di midnight-road) sempre su luce soffusa, ma al 40%. Per finire (?) ho applicato un nuovo livello di regolazione > luminosità e contrasto > automatico e un nuovo livello di regolazione > vividezza > +43, senza toccare la saturazione - la muovo raramente, quella povera levetta... toh, guardate come cambia!
TEXTURES TIIIIME! YAY! I like textures, especially when bright and colorful - yeah, I love colours. Okay, so, I used this texture by midnight-road set on soft light 100% and hid the parts over his face with a layer mask. Then I took this one by midnight-road again and set it on soft light 30%, and again I hid the parts over face and such. Next I took this one always by midnight-road and set it on soft light 40%. No masks this time. In the end I added a new adjustment layer > brightness and contrast > auto and new adjustment layer > vibrance > +43 without touching the hue amount again.

Per finire ho sfocato ancora un poco la pelle e alcune parti e ho corretto una bruciatura sul naso - ma questo solo dopo che me l'ha fatto notare afeastforme, perché io proprio non me n'ero accorta.

Et voilà, ho aggiunto il testo facendo dannare la povera Julza che mi ha dovuta sopportare tutta sera e l'icon è finita.
It's almost done! I smoothed a little more the skin and some other parts that were too sharp and adjusted the nose - thanks again afeastforme for pointing out the burning (?) LOL - and stop. Uh, yes, I added the text... YAY!

»
