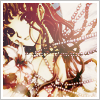
Tutorial :o
I've decided to create a tutorial for

Because it's so simple and easy to follow ^^. Please do not re-distribute this tutorial in any way, and try to experiment! I don't want to see clones walking around out there. *____* This was created in Photoshop, CS2, but I'm sure it is easily transferable.
1.First, we start with our base image, cropped from Aethereality's very pretty X/1999 gallery. (original image here.)All I did was size it down to around 40px and fool around with the placement. :3 Experiment and see what you think looks prettiest.

2. These next few parts are to enhance the color of your image, and will vary depending on what image you are using, so you can skip/modify these parts to your liking.
Now, duplicate the original image, and set it to Multiply, 50 opacity.

3. Next, duplicate that, and set the opacity to 100. Don't forget to desaturate it, as well. (ctrl+alt+u)

4. Duplicate the base image once again and move it to the top. Set that to Soft Light.

5. Duplicate the Soft Light layer one more time, and now go to Filter -> Blur -> Gaussian Blur. This step is optional, but I usually find that it gives mangas soft looking effects, so it's up to you. Now fool around with the Radius (I set mine to 2.) Once you have done that, desaturate that layer, and duplicate it once more.

6. Now, take this lovely texture by awmpdotnet:

,
and place it over your image. Now, you should fool around with the color a bit by doing Hue/Saturation. Since this is mostly a mute icon, we should lower the saturation a bit, by around 20-30. Remember, whatever you think looks best.

7. Set it to Hard Light.

8. Now, here comes a step that really gives it the mute effect, and it'll change the outcome of the icon. take this color: (#e4d5c1)

and set it to Multiply. See the difference? I usually find this color very helpful and pretty on manga images. Screw around with the opacity (For this particular image, I set the opacity to 30%).

9. Now, slap on some tiny text in pure white (#ffffff)

10. Now, slap on this very pretty soft color texture by 77words:

11. Once again, screw around with the Hue/Saturation until you're satisfied. Now, set that to Lighten, 80 opacity.

12. Now, slap on a border of your choice:

And we're done! Now you know how to make an icon like that. :o I hope you enjoyed, as this is my first ever tutorial. If you like it, please join, or watch this community and tell your friends! Comments are also welcome. ^^
Because it's so simple and easy to follow ^^. Please do not re-distribute this tutorial in any way, and try to experiment! I don't want to see clones walking around out there. *____* This was created in Photoshop, CS2, but I'm sure it is easily transferable.
1.First, we start with our base image, cropped from Aethereality's very pretty X/1999 gallery. (original image here.)All I did was size it down to around 40px and fool around with the placement. :3 Experiment and see what you think looks prettiest.

2. These next few parts are to enhance the color of your image, and will vary depending on what image you are using, so you can skip/modify these parts to your liking.
Now, duplicate the original image, and set it to Multiply, 50 opacity.

3. Next, duplicate that, and set the opacity to 100. Don't forget to desaturate it, as well. (ctrl+alt+u)

4. Duplicate the base image once again and move it to the top. Set that to Soft Light.

5. Duplicate the Soft Light layer one more time, and now go to Filter -> Blur -> Gaussian Blur. This step is optional, but I usually find that it gives mangas soft looking effects, so it's up to you. Now fool around with the Radius (I set mine to 2.) Once you have done that, desaturate that layer, and duplicate it once more.

6. Now, take this lovely texture by awmpdotnet:

,
and place it over your image. Now, you should fool around with the color a bit by doing Hue/Saturation. Since this is mostly a mute icon, we should lower the saturation a bit, by around 20-30. Remember, whatever you think looks best.

7. Set it to Hard Light.

8. Now, here comes a step that really gives it the mute effect, and it'll change the outcome of the icon. take this color: (#e4d5c1)

and set it to Multiply. See the difference? I usually find this color very helpful and pretty on manga images. Screw around with the opacity (For this particular image, I set the opacity to 30%).

9. Now, slap on some tiny text in pure white (#ffffff)

10. Now, slap on this very pretty soft color texture by 77words:

11. Once again, screw around with the Hue/Saturation until you're satisfied. Now, set that to Lighten, 80 opacity.

12. Now, slap on a border of your choice:
And we're done! Now you know how to make an icon like that. :o I hope you enjoyed, as this is my first ever tutorial. If you like it, please join, or watch this community and tell your friends! Comments are also welcome. ^^