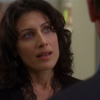
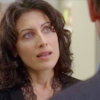
Cuddy Icon Tutorial
A little holiday gift for you all. I thought I should share how to brighten up House screenshots. Those are little buggers.

to
00. Prepare your base however you like. (e.g. Sharpen, crop, etc.)
01. My base is really dark so I'm going to duplicate it and set it to Screen 100%.

02. Make a new Curves layer just to brighten it a tad bit. (Layer>New Adjustment Layer>Curves)
RGB:
First Point: Input = 57; Output = 78
Second Point: Input = 191; Output = 197

03. So far my base is very flat. We're going to bring out some color.
Add a Channel Mixer Layer. (Layer>New Adjustment Layer> Channel Mixer)
RED: +148, -40, -19
GREEN: -10, +116, -8
BLUE: -6, -19, +125

04. I think there's too much red so I'm going to use a Color Balance layer to "balance" everything out.
MIDTONES: -14, +10, -2
SHADOWS: -1, -6, +6
HIGHLIGHTS: -11, 0, 0
Leave the Preserve Luminosity UNCHECKED!

05. We're going to add more color with a second Channel Mixer layer. (Layer>New Adjustment Layer> Channel Mixer)
RED: +113, -29, +14
BLUE: -14, -15, +143

06. Add a Brightness/Contrast layer.
CONTRAST: +16

07. Create a Hue/Saturation layer.
CYANS: 0, +31, 0
BLUES: 0, +36, 0

08. I personally think the icon is washed out so I'm adding a Levels layer.
RGB: 8, 0.92, 255
Don't touch anything in the Output levels below it.

09. And lastly, in order to "mute" the Level layer a little, we're going to add a Solid Fill layer with the color #030808. Set this layer to Exclusion 100%.
TA-DA~ We're done. Merry Christmas and Happy Holidays everyone.

.PSD FILE HERE

to

00. Prepare your base however you like. (e.g. Sharpen, crop, etc.)
01. My base is really dark so I'm going to duplicate it and set it to Screen 100%.

02. Make a new Curves layer just to brighten it a tad bit. (Layer>New Adjustment Layer>Curves)
RGB:
First Point: Input = 57; Output = 78
Second Point: Input = 191; Output = 197

03. So far my base is very flat. We're going to bring out some color.
Add a Channel Mixer Layer. (Layer>New Adjustment Layer> Channel Mixer)
RED: +148, -40, -19
GREEN: -10, +116, -8
BLUE: -6, -19, +125

04. I think there's too much red so I'm going to use a Color Balance layer to "balance" everything out.
MIDTONES: -14, +10, -2
SHADOWS: -1, -6, +6
HIGHLIGHTS: -11, 0, 0
Leave the Preserve Luminosity UNCHECKED!

05. We're going to add more color with a second Channel Mixer layer. (Layer>New Adjustment Layer> Channel Mixer)
RED: +113, -29, +14
BLUE: -14, -15, +143

06. Add a Brightness/Contrast layer.
CONTRAST: +16

07. Create a Hue/Saturation layer.
CYANS: 0, +31, 0
BLUES: 0, +36, 0

08. I personally think the icon is washed out so I'm adding a Levels layer.
RGB: 8, 0.92, 255
Don't touch anything in the Output levels below it.

09. And lastly, in order to "mute" the Level layer a little, we're going to add a Solid Fill layer with the color #030808. Set this layer to Exclusion 100%.
TA-DA~ We're done. Merry Christmas and Happy Holidays everyone.

.PSD FILE HERE