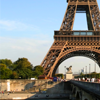
Paris Icon Tutorial
Make this icon coloring. Involves Selective Coloring. Photoshop CS3. Not Translatable. .PSD file included.
NOTE: I recently edited this tutorial due to several errors. So I'm sorry if the tutorial did not work for you before.

to
00. Prepare your base (Sharpen, crop, etc.)
01. Create a new layer, fill it with the color #bdaf4e. Set it to Soft Light 100%.
02. Now for Selective Coloring. (Go to Layers>New Adjustment Layer>Selective Coloring
REDS: -100, 0, -29, -12
YELLOWS: -100, -100, -100, -100
CYANS: +100, 0, 0, 0
BLUES: +100, 0, 0, 0
WHITES: -18, 0, +30, +8
NEUTRALS: +22, +15, +8, +6
03. Make another Selective Coloring Layer.
REDS: -100, 0, 100, 0
YELLOWS: -76, 0, -100, 0
CYANS: +31, 0, 0, 0
WHITES: -48, 0, 0, 0
NEUTRALS: +7, -12, -9, -6
04. Create a Fill Layer (Layer>New Fill Layer>Solid Color..) and fill it with #030829. Set it to Exclusion at 100%.
05. Make a third Selective Coloring layer.
REDS: -100, 0, 36, 0
YELLOWS: -100, 0, -100, 0
NEUTRALS: +24, 0, -21, 0
06. Create a Brightness/Contrast (Layer>New Adjustment Layer> Brightness/Contrast).
BRIGHTNESS: 0
CONTRAST: +13
07. Make a new Hue/Saturation Layer (Layer>New Adjustment Layer>Hue/Saturation)
MASTER:
HUE: 0
SATURATION: +13
LIGHTNESS: 0
08. Create a Color Balance Layer (Layers>New Adjustment Layer>Color Balance).
MIDTONES: +35, +21, +5
HIGHLIGHTS: -28, +4, +9
SHADOWS: -19, +6, +21
Set this Layer to 60%.
Make sure "Preserve Luminosity" is un-ticked.
09. And finally the Curves Layers (Layers>New Adjustment Layer>Curves).
RGB: Input: 109, Output: 113
REDS: Input: 142, Output: 102
Set this Layer to 46%.
And you're done!
Some examples with similar methods


.PSD FILE
NOTE: I recently edited this tutorial due to several errors. So I'm sorry if the tutorial did not work for you before.
to
00. Prepare your base (Sharpen, crop, etc.)
01. Create a new layer, fill it with the color #bdaf4e. Set it to Soft Light 100%.
02. Now for Selective Coloring. (Go to Layers>New Adjustment Layer>Selective Coloring
REDS: -100, 0, -29, -12
YELLOWS: -100, -100, -100, -100
CYANS: +100, 0, 0, 0
BLUES: +100, 0, 0, 0
WHITES: -18, 0, +30, +8
NEUTRALS: +22, +15, +8, +6
03. Make another Selective Coloring Layer.
REDS: -100, 0, 100, 0
YELLOWS: -76, 0, -100, 0
CYANS: +31, 0, 0, 0
WHITES: -48, 0, 0, 0
NEUTRALS: +7, -12, -9, -6
04. Create a Fill Layer (Layer>New Fill Layer>Solid Color..) and fill it with #030829. Set it to Exclusion at 100%.
05. Make a third Selective Coloring layer.
REDS: -100, 0, 36, 0
YELLOWS: -100, 0, -100, 0
NEUTRALS: +24, 0, -21, 0
06. Create a Brightness/Contrast (Layer>New Adjustment Layer> Brightness/Contrast).
BRIGHTNESS: 0
CONTRAST: +13
07. Make a new Hue/Saturation Layer (Layer>New Adjustment Layer>Hue/Saturation)
MASTER:
HUE: 0
SATURATION: +13
LIGHTNESS: 0
08. Create a Color Balance Layer (Layers>New Adjustment Layer>Color Balance).
MIDTONES: +35, +21, +5
HIGHLIGHTS: -28, +4, +9
SHADOWS: -19, +6, +21
Set this Layer to 60%.
Make sure "Preserve Luminosity" is un-ticked.
09. And finally the Curves Layers (Layers>New Adjustment Layer>Curves).
RGB: Input: 109, Output: 113
REDS: Input: 142, Output: 102
Set this Layer to 46%.
And you're done!
Some examples with similar methods
.PSD FILE