Full Icon Tutorial #1
OK my first tutorial!! here goes...
In this tutorial, you'll learn to make this icon
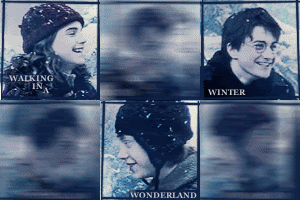
Go behind the cut for it!
This tutorial is for Paint Shop Pro 8 and Animation Shop 3. The first half of this tutorial is take, for the most part, from this tutorial from Syndarys, to whom I owe a lot to!. now, for the tutorial.
Im going to do this with one image, divided into three, but you can use however many you like. I started with this image from the amazing teh_indy , who I couldnt make any of my Harry Potter and Pirates of the Caribbean Icons without! I pasted the picture three times and cropped them down to 100x100 to get these
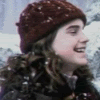
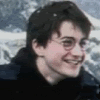
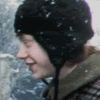
now for starters, im just going to take the first one, the one of Hermione. Set the other two aside for now. Take the Hermione one and duplicate the layer (layers>duplicate) Now, it may be a bit fuzzy. If it is, go to Adjust>sharpness>sharpen once or twice (Id say twice). Duplicate the sharpened layer (If you sharpened. If you didn't, then just duplicate the background layer agian)
Set the top layer to soft light and the one under it to screen (on the layers palette, where it says 'normal' click there)
Select the soft light layer and go to Adjust>hue & Saturation>Hue/Saturation/Lightness (or press Shift + H) Set it to Hue: 0 Lightness: 0 Saturation: -100. Click ok. It should look something like this
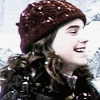
create a new raster layer between the screen layer and the soft light layer. I used this gradient, but you can choose one of your own if you like. (the icon will look different at the end though)

Flood fill the new layer with it, with the angle around 210. set the layer to exclusion. It should look like this.
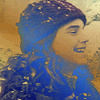
Terrible isn't it? well its supposed to be. lower the opacity to 50%. thats better.
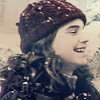
Now lets add some color. Create a new layer on the top. choose the lightest color from the gradient we used earlier (in this case, #6BB3F7) and flood fill the layer with it. then set the layer to overlay.
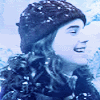
Its ok, but a little too blue for my taste. lower the opacity to 50%.

Much better! Ok, now starts MY part of the tutorial ;). create a new layer on top and fill it with black. Set the layer to soft light and lower the opacity to 62%
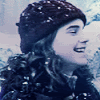
If you're going to add text, do it now. The full icon that im making says "Walking in a winter wonderland" so Ill take 'Walking in a' for the first part. The font I used is Georgia on bold, all caps, and size 6. I used a light color from the icon for the text.
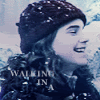
Its kind of hard to see 'walking' so im going to make a new layer under the text layer. take the selection too and make a box around 'walking' but have it go off the side like this

Then I fill it with this dark blue color

to get this
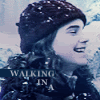
I think it stands out too much, so im going to lower the opacity of the bar under the text to around 60%. Now its time to add a border. Im using this one from Syndarys.
You can use whichever one you want, but you can use the one im using too. Make a new layer for the border. Im using the same dark blue color that I used for the bar behind the text. I get this.
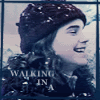
you're done with the first image! now go back and do all that again for the rest of the images you're using. Now I have three images. (on the second image, the one of Harry, I mirrored the layer with the border, select the layer and go to image>mirror) Here's what I have now.

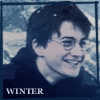
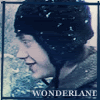
Take the first image and right click>copy merged. paste as a new image. go to adjust>blur>motion blur. use these settings Angle: 272 strength: 33. click ok. It should look like this.
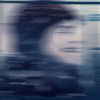
now, do the same thing to the second image. right click>copy merged. paste as a new image. go to adjust>blur>motion blur. use the settings Angle: 272 strength: 33. click ok. Now paste that on top of the first blur image you made, and lower the opacity to 50%. it should look like this.
Now blur the third image as before. paste that as a new layer on the second blur. then put the first blur on the third blur. Now we're going to use AS3. put them in there in this order.

that would be image 1, image blur 1 on 2, image 2, image blur 2 on 3, image 3, image blur 1 on 3. I hope that makes sense. now hold ctrl and click on the main images, not the blurs. then right click on one of them and go to frame properties. change the number to 100. click ok. then click on all of the blurred images, and set the frame properties to 16. then your done! the finished product!

Congrats if you did it! please tell me if any of this should be changed to make it easier to follow. phew. that was easier than I thought. But please excuse me while I go un-cramp my hands. lol. Credit isn't needed, but is never declined! you can link back to this tutorial if you wish.
Footnote: Join my community hp_lotr_potc!! Please, we need members!! lol, its an icontest community. Ok im out. Peace.
Kelly
In this tutorial, you'll learn to make this icon
Go behind the cut for it!
This tutorial is for Paint Shop Pro 8 and Animation Shop 3. The first half of this tutorial is take, for the most part, from this tutorial from Syndarys, to whom I owe a lot to!. now, for the tutorial.
Im going to do this with one image, divided into three, but you can use however many you like. I started with this image from the amazing teh_indy , who I couldnt make any of my Harry Potter and Pirates of the Caribbean Icons without! I pasted the picture three times and cropped them down to 100x100 to get these


now for starters, im just going to take the first one, the one of Hermione. Set the other two aside for now. Take the Hermione one and duplicate the layer (layers>duplicate) Now, it may be a bit fuzzy. If it is, go to Adjust>sharpness>sharpen once or twice (Id say twice). Duplicate the sharpened layer (If you sharpened. If you didn't, then just duplicate the background layer agian)
Set the top layer to soft light and the one under it to screen (on the layers palette, where it says 'normal' click there)
Select the soft light layer and go to Adjust>hue & Saturation>Hue/Saturation/Lightness (or press Shift + H) Set it to Hue: 0 Lightness: 0 Saturation: -100. Click ok. It should look something like this

create a new raster layer between the screen layer and the soft light layer. I used this gradient, but you can choose one of your own if you like. (the icon will look different at the end though)

Flood fill the new layer with it, with the angle around 210. set the layer to exclusion. It should look like this.

Terrible isn't it? well its supposed to be. lower the opacity to 50%. thats better.

Now lets add some color. Create a new layer on the top. choose the lightest color from the gradient we used earlier (in this case, #6BB3F7) and flood fill the layer with it. then set the layer to overlay.

Its ok, but a little too blue for my taste. lower the opacity to 50%.

Much better! Ok, now starts MY part of the tutorial ;). create a new layer on top and fill it with black. Set the layer to soft light and lower the opacity to 62%

If you're going to add text, do it now. The full icon that im making says "Walking in a winter wonderland" so Ill take 'Walking in a' for the first part. The font I used is Georgia on bold, all caps, and size 6. I used a light color from the icon for the text.

Its kind of hard to see 'walking' so im going to make a new layer under the text layer. take the selection too and make a box around 'walking' but have it go off the side like this

Then I fill it with this dark blue color

to get this

I think it stands out too much, so im going to lower the opacity of the bar under the text to around 60%. Now its time to add a border. Im using this one from Syndarys.

You can use whichever one you want, but you can use the one im using too. Make a new layer for the border. Im using the same dark blue color that I used for the bar behind the text. I get this.

you're done with the first image! now go back and do all that again for the rest of the images you're using. Now I have three images. (on the second image, the one of Harry, I mirrored the layer with the border, select the layer and go to image>mirror) Here's what I have now.


Take the first image and right click>copy merged. paste as a new image. go to adjust>blur>motion blur. use these settings Angle: 272 strength: 33. click ok. It should look like this.

now, do the same thing to the second image. right click>copy merged. paste as a new image. go to adjust>blur>motion blur. use the settings Angle: 272 strength: 33. click ok. Now paste that on top of the first blur image you made, and lower the opacity to 50%. it should look like this.

Now blur the third image as before. paste that as a new layer on the second blur. then put the first blur on the third blur. Now we're going to use AS3. put them in there in this order.

that would be image 1, image blur 1 on 2, image 2, image blur 2 on 3, image 3, image blur 1 on 3. I hope that makes sense. now hold ctrl and click on the main images, not the blurs. then right click on one of them and go to frame properties. change the number to 100. click ok. then click on all of the blurred images, and set the frame properties to 16. then your done! the finished product!
Congrats if you did it! please tell me if any of this should be changed to make it easier to follow. phew. that was easier than I thought. But please excuse me while I go un-cramp my hands. lol. Credit isn't needed, but is never declined! you can link back to this tutorial if you wish.
Footnote: Join my community hp_lotr_potc!! Please, we need members!! lol, its an icontest community. Ok im out. Peace.
Kelly