Invitation Tutorial, Challenge #97, by stripped
This was actually a nicely simple icon to make. It was done using Photoshop CS4 on a Mac.
I began by rotating the image 30 degrees counter-clockwise, then cropping out my base.

Next I made a copy of that layer so I could preserve the original crop and did a radial blur with a setting of 10.
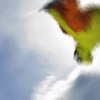
I made a second crop of the clouds from the image, and modified those with a Distort / Twirl with a setting of -330 (I needed negative to make it rotate the right direction).

I set that layer to a blend mode of multiply over the top of the blurred image.
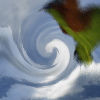
At this point, I was afraid I was losing the snowboarder, so I grabbed a copy of my original background crop and brought it up, and set it to overlay.
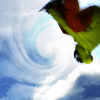
It still needed something, some dot of brightness, because it looked a little muddy to me. I didn't want to brighten the whole thing, so I made an amalgam layer of all the layers so far (Cmd-Optn-Shift-E) and then applied a Render/Lens Flare to that layer with settings of a 105mm lens and picking to center the brightest spot right about the boarder's knees.
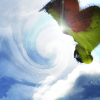
And that was it!
I began by rotating the image 30 degrees counter-clockwise, then cropping out my base.

Next I made a copy of that layer so I could preserve the original crop and did a radial blur with a setting of 10.

I made a second crop of the clouds from the image, and modified those with a Distort / Twirl with a setting of -330 (I needed negative to make it rotate the right direction).

I set that layer to a blend mode of multiply over the top of the blurred image.

At this point, I was afraid I was losing the snowboarder, so I grabbed a copy of my original background crop and brought it up, and set it to overlay.

It still needed something, some dot of brightness, because it looked a little muddy to me. I didn't want to brighten the whole thing, so I made an amalgam layer of all the layers so far (Cmd-Optn-Shift-E) and then applied a Render/Lens Flare to that layer with settings of a 105mm lens and picking to center the brightest spot right about the boarder's knees.

And that was it!