Tutorial #2: Concerning colour and the softglow effect
Before I started experimenting with curves, I wrote a small handful of tutorials. They weren't very good, but I received excellent feedback on them. I've had people ask me to continue, so here's my attempt at showing how I use curves. Please note that you do need to have a basic knowledge of curves. I've never looked at the curves function in programs other than GIMP, but hopefully non-GIMP users will benefit from this tutorial.
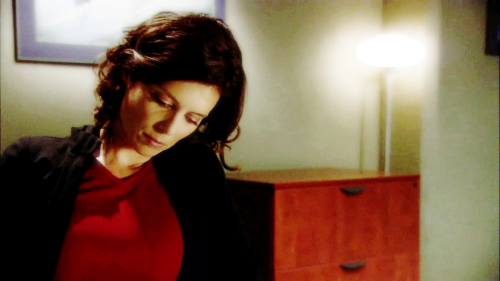
First, open your base image. I've chosen a recently released headshot of Torri Higginson, Doctor Elizabeth Weir from Stargate Atlantis.
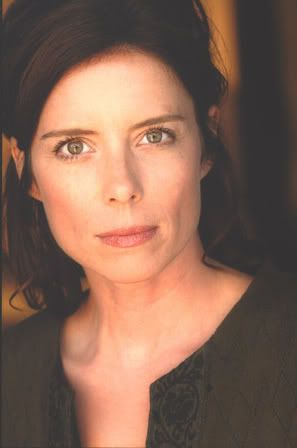
What are the biggest problems with this base? One, it looks washed out because it's too bright and it's lacking the necessary contrast. Two, Torri is too orange. She looks as though she's been sunbathing on Mars.
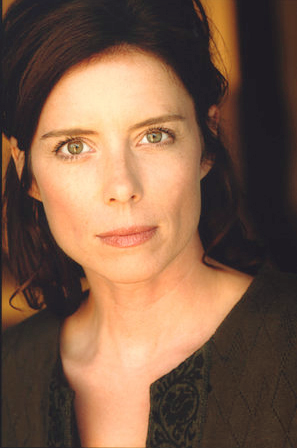
Open your curves function. To add contrast, set your channel to "value" (which is the default setting, point of fact). Input the following:
x: 32, y: 5
x: 123 y: 132
You should have two points on your line (note: I exclude the point in the bottom left corner, x: 0 y: 0). It's obviously not necessary to be completely accurate with these settings as they're only a guide for this image.
Okay, now you've fixed the contrast, change to the blue channel. Once more, input the following settings by creating two points on the line.
x: 27 y: 33
x: 128 y: 115
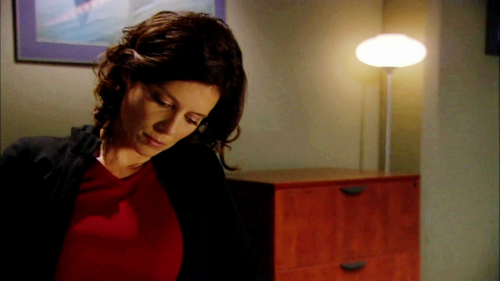
Torri's face is still too orange. We could play around with the colour channels more (there are so many ways to do colour adjustment, after all), but I've decided to use the soft glow feature. In GIMP, this is located Filters > Artistic > Softglow. For my softglow, I've used the following settings.
Glow radius: 9.62
Brightness: 0.44
Sharpness: 0.73
How did I determine those settings? I went with what looks good. Everyone has different interpretations of "good", so play around and more importantly, listen to yourself.
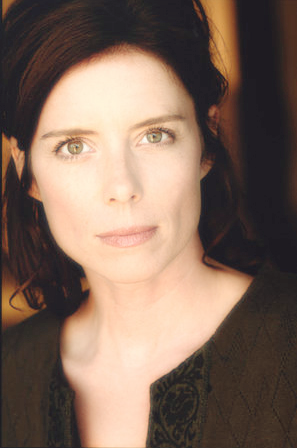
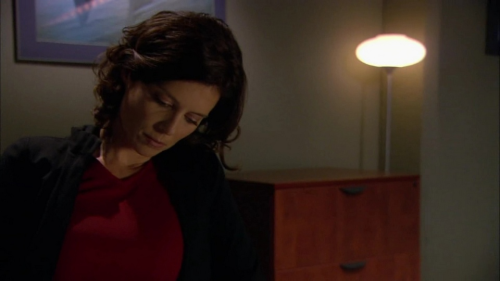
Now Torri's too bright, so the last step is to adjust the contrast. Curves > Value channel. I used the following settings, creating three points on the line:
x: 27 y: 0
x: 92 y: 53
x: 196 y: 180
The end result:
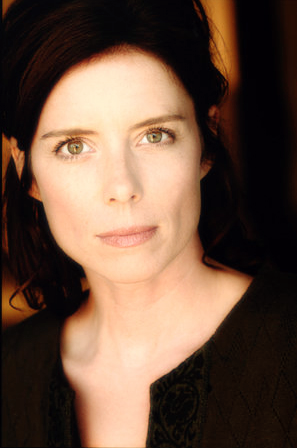
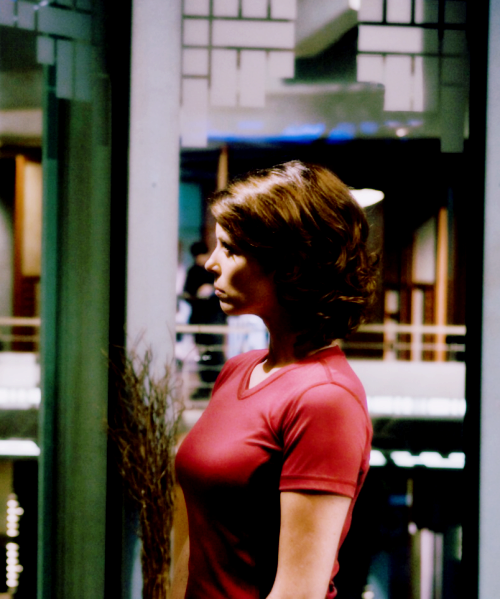
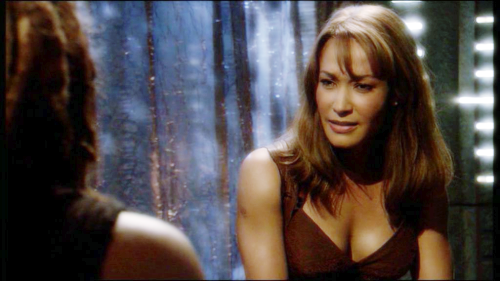
Let's try another base image. Here is cap of Torri in her role as Elizabeth Weir.
First, let's add more colour to this image. Open your curves function again.
Value channel. Two points.
x: 20 y: 18
x: 111 y: 177
Red channel. One point.
x: 120 y: 137
Green channel. One point.
x: 120 y: 137
Blue channel. One point.
x: 127 y: 138
Time for the softglow effect. Filters > Artistic > Softglow. I used the following settings:
Glow radius: 8.84
Brightness: 0.87
Sharpness: 0.71

Requires more colour. For that, I opened my curves function again.
Value channel. Two points.
x: 16 y: 20
x: 113 y: 136
Red value. One point.
x: 106 y: 119
Green value. Two points.
x: 44 y: 46
x: 108 y: 131
Blue value. Two points.
x: 24 y: 20
x: 110 y: 121
I chose a green shade, as you can see. It does look a little red on the side of Elizabeth's face but once it's cropped and resized to 100x100, it looks good.
Other examples:
||
First, open your base image. I've chosen a recently released headshot of Torri Higginson, Doctor Elizabeth Weir from Stargate Atlantis.
What are the biggest problems with this base? One, it looks washed out because it's too bright and it's lacking the necessary contrast. Two, Torri is too orange. She looks as though she's been sunbathing on Mars.
Open your curves function. To add contrast, set your channel to "value" (which is the default setting, point of fact). Input the following:
x: 32, y: 5
x: 123 y: 132
You should have two points on your line (note: I exclude the point in the bottom left corner, x: 0 y: 0). It's obviously not necessary to be completely accurate with these settings as they're only a guide for this image.
Okay, now you've fixed the contrast, change to the blue channel. Once more, input the following settings by creating two points on the line.
x: 27 y: 33
x: 128 y: 115
Torri's face is still too orange. We could play around with the colour channels more (there are so many ways to do colour adjustment, after all), but I've decided to use the soft glow feature. In GIMP, this is located Filters > Artistic > Softglow. For my softglow, I've used the following settings.
Glow radius: 9.62
Brightness: 0.44
Sharpness: 0.73
How did I determine those settings? I went with what looks good. Everyone has different interpretations of "good", so play around and more importantly, listen to yourself.
Now Torri's too bright, so the last step is to adjust the contrast. Curves > Value channel. I used the following settings, creating three points on the line:
x: 27 y: 0
x: 92 y: 53
x: 196 y: 180
The end result:
Let's try another base image. Here is cap of Torri in her role as Elizabeth Weir.
First, let's add more colour to this image. Open your curves function again.
Value channel. Two points.
x: 20 y: 18
x: 111 y: 177
Red channel. One point.
x: 120 y: 137
Green channel. One point.
x: 120 y: 137
Blue channel. One point.
x: 127 y: 138
Time for the softglow effect. Filters > Artistic > Softglow. I used the following settings:
Glow radius: 8.84
Brightness: 0.87
Sharpness: 0.71
Requires more colour. For that, I opened my curves function again.
Value channel. Two points.
x: 16 y: 20
x: 113 y: 136
Red value. One point.
x: 106 y: 119
Green value. Two points.
x: 44 y: 46
x: 108 y: 131
Blue value. Two points.
x: 24 y: 20
x: 110 y: 121
I chose a green shade, as you can see. It does look a little red on the side of Elizabeth's face but once it's cropped and resized to 100x100, it looks good.
Other examples:
||