Tutorial #9
to
Using Photoshop CS3
PSD Included
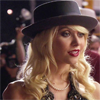
To begin, get your base and crop to icon sized.
And then, screen once.. no more than twice, this coloruing lightens images up more than you expect.
Merge these layers.
Step 1.
New Curves Layer
RGB
Point 1: out:82, in:37
Point 2: out: 210, in: 148
BLUE:
Point 1: out:79, in:71
Point 2: out:190, in: 163
Step 2.
New Colour Balance Layer
Shadows: 0, 0, +21
Midtones: 0, -6, -4
Highlights: -6, +1, +3
Step 3.
Add this texture, I can'tseem to find who it is by so please do inform me if you know and I will amend this immediately.
Set to Pin Light 64%
Step 4.
New Selective Colour Layer
Reds:
0, 0, +100, 0
Yellows:
0, 0, -86, 0
Neutrals:
0, +7, +7, -7
Step 5.
Another Selective Colour Layer, opacity 74%
Reds:
-30, 0, +100, 0
Yellows:
0, -4, -39, 0
Whites:
0, 0, +5, 0
Neutrals:
0, +7, -16, +12
Blacks:
0, 0, 0, -12
Step 6.
New Colour Fill Layer #8e2f12
Exclusion, 36% Opacity.
Step 7.
New Colour Fill Layers #1e1042
Exclusion, 36% Opacity.
Step 8.
New Channel Mixer Layer
Hard Light 64% Opacity
Monochrome checked.
Red: +21
Green: +46
Blue: +33
Step 9. (Optional)
Gradient Fill Layer..
White diagonal to transparent.. you know the stuff.
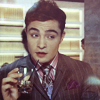
I have mine on Normal 30%.. but I don't have it on the Jenny icon.
Just depends on the caps you use.
Step 10.
Copy base on top set to Soft Light
Step 11.
One final Selective Colour Layer
Reds: +11, 0, 0, 0
Whites: 0, 0, 0, -9
Neutrals: +6, 0, +10, 0
.PSD
Sorry about this, not the best I've done but my mum was actually rearranging my room as I was trying to type this out - very frustrating.
Merry Christmas everyone!