TUTORIAL #7
THE VILLAGE
tutorial #7
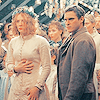
going from
to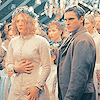
using
- photoshop cs 2
- selective coloring
- works best on really red screencaps/pictures
step 001
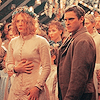
let's just prepare our base by duplicating the image, then set the blend mode to luminosity and sharpen the new layer once
layer >> duplicate layer
filter >> sharpen >> sharpen
step 002
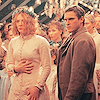
duplicate the image again, now set the new layer to screen
layer >> duplicate layer
blend mode >> screen
step 003
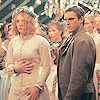
now make a new selective colour layer
layer >> new adjustment layer >> selective colour
and set the colour like this-
REDS
cyan: +50
magenta: 0
yellow: 0
black: -10
YELLOWS
cyan: +100
magenta: -30
yellow: -19
black: 0
WHITES
cyan: 0
magenta: 0
yellow: 0
black:-70
NEUTRALS
cyan: +7
magenta: -6
yellow: -5
black: -5
step 004
add another colour adjustment layer
layer >> new adjustment layer >> selective color
set the colors like this-
REDS
cyan: -100
magenta: 0
yellow: +100
black: 0
YELLOWS
cyan: +40
magenta: -40
yellow: -100
black: +30
NEUTRALS
cyan: +18
magenta: 0
yellow: -11
black: -8
step 005
now add a third colour adjustment layer
layer >> new adjustment layer >> selective color
set the colors like this-
REDS
cyan: -100
magenta: +16
yellow: +100
black: 0
YELLOWS
cyan: -47
magenta: 0
yellow: -31
black: -22
NEUTRALS
cyan: +17
magenta: -11
yellow: -18
black: -18

step 006
now merge all the layers and you're done!

other icons made with this tutorial


here's a PSD FILE, click on the link to download it over @ deviantart.
- this tutorial is a guideline, do not follow it step by step!!
- i'd like to get feedback on this tutorial and also see what others can do with this
- feel free to ask, if something is unclear
- if you like this, feel free to join this journal
tutorial #7
going from

to

using
- photoshop cs 2
- selective coloring
- works best on really red screencaps/pictures
step 001
let's just prepare our base by duplicating the image, then set the blend mode to luminosity and sharpen the new layer once
layer >> duplicate layer
filter >> sharpen >> sharpen

step 002
duplicate the image again, now set the new layer to screen
layer >> duplicate layer
blend mode >> screen

step 003
now make a new selective colour layer
layer >> new adjustment layer >> selective colour
and set the colour like this-
REDS
cyan: +50
magenta: 0
yellow: 0
black: -10
YELLOWS
cyan: +100
magenta: -30
yellow: -19
black: 0
WHITES
cyan: 0
magenta: 0
yellow: 0
black:-70
NEUTRALS
cyan: +7
magenta: -6
yellow: -5
black: -5

step 004
add another colour adjustment layer
layer >> new adjustment layer >> selective color
set the colors like this-
REDS
cyan: -100
magenta: 0
yellow: +100
black: 0
YELLOWS
cyan: +40
magenta: -40
yellow: -100
black: +30
NEUTRALS
cyan: +18
magenta: 0
yellow: -11
black: -8

step 005
now add a third colour adjustment layer
layer >> new adjustment layer >> selective color
set the colors like this-
REDS
cyan: -100
magenta: +16
yellow: +100
black: 0
YELLOWS
cyan: -47
magenta: 0
yellow: -31
black: -22
NEUTRALS
cyan: +17
magenta: -11
yellow: -18
black: -18

step 006
now merge all the layers and you're done!

other icons made with this tutorial


here's a PSD FILE, click on the link to download it over @ deviantart.
- this tutorial is a guideline, do not follow it step by step!!
- i'd like to get feedback on this tutorial and also see what others can do with this
- feel free to ask, if something is unclear
- if you like this, feel free to join this journal