(no subject)
3 Colouring Tutorials.
All involve selective coloring.
Made in PS CS3.
Not dial-up friendly.
Tutorial #8
Go from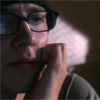
to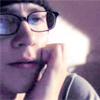
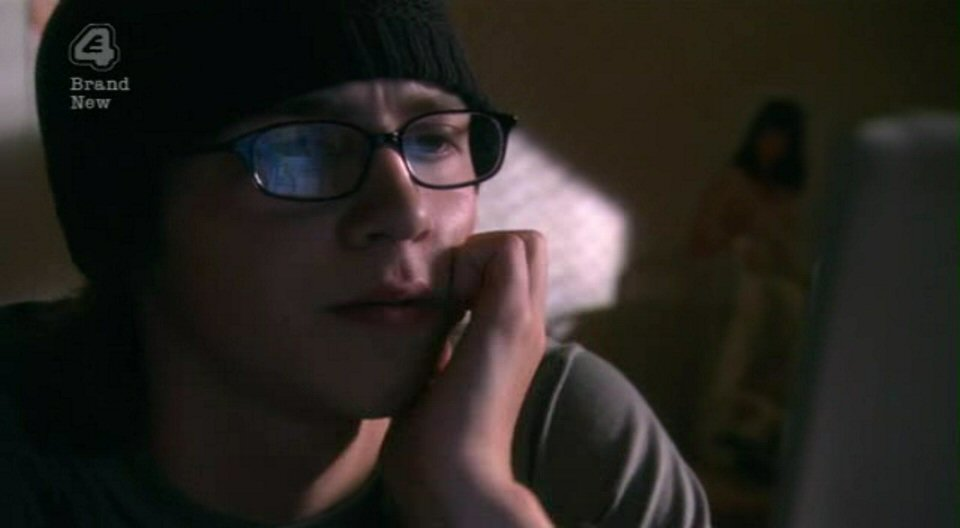
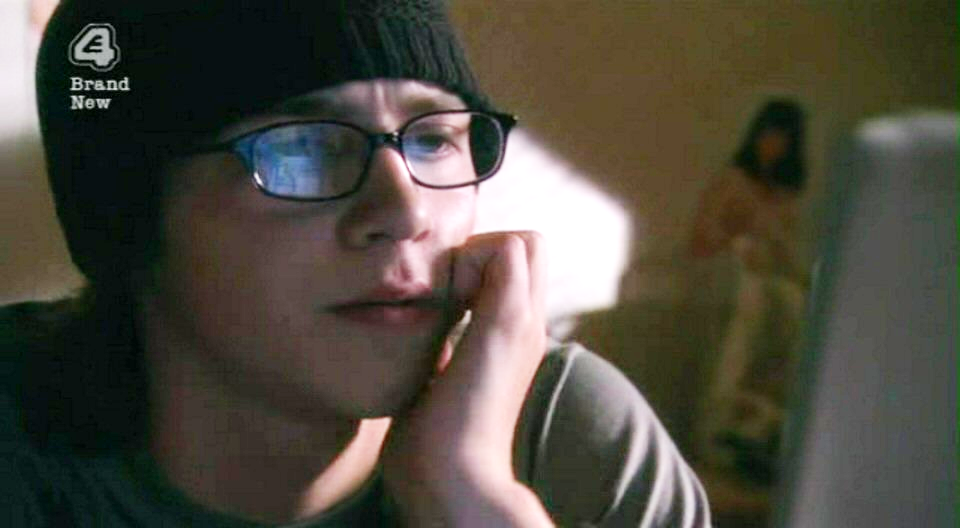
01. First get your picture. Mine's of Sid from Skins by marishna @ SummerSkin

02. New curves layer. Layer>New Adjustment Layer>Curves...
In RGB:
Point 1: Input-50 Output-110
Point 2: Input-85 Output-175
Point 3: Input-130 Output-225
Point 4: Input-170 Output-250

03. Duplicate the curves layer (Ctrl+J). Set it to multiply with 50% opacity.

04. New fill layer. Layer>New Fill Layer>Solid color... Fill with #fcff00, set to Soft light with 70% opacity.

05. New selective color layer. Layer>New Adjustment Layer>Selective color...
Red: Nothing
Yellows: 0,20,-20,5
Greens: Nothing
Cyans: Nothing
Blues: Nothing
Magentas: Nothing
Whites: Nothing
Neutrals: 0,0,-75,0
Blacks: 0,0,0,20

06. New selective color layer. Layer>New Adjustment Layer>Selective color...
Red: 0,-30,-70,-50
Yellows: Nothing
Greens: Nothing
Cyans: -100,0,-50,100
Blues: 100,30,40,60
Magentas: Nothing
Whites: Nothing
Neutrals: Nothing
Blacks: Nothing

07. All done now. I selected and resized the part I wanted and icons was done.
Tutorial #9
And from
to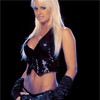
01. First get your picture. Mine's of Maryse from WWE.com

02. New Hue/Saturation Layer. Layer>New Adjustment Layer>Hue/Sat...
Master Saturation: -35 (your's will probably be less than this, Maryse was just a bit orange)

03. New selective color layer. Layer>New Adjustment Layer>Selective color...
Red: -100,0,100,0
Yellows: -100,0,100,0
Greens: Nothing
Cyans: -100,-100,100,0
Blues: -100,-100,-100,0
Magentas: Nothing
Whites: Nothing
Neutrals: 20,0,-45,0
Blacks: Nothing

04. New selective color layer. Layer>New Adjustment Layer>Selective color...
Red: -100,0,100,0
Yellows: -100,0,-50,0
Greens: Nothing
Cyans: 100,-100,100,0
Blues: 100,-100,-100,-100
Magentas: Nothing
Whites: Nothing
Neutrals: 35,0,-20,0
Blacks: Nothing

05. All done now. I selected and resized the part I wanted and icons was done.
Tutorial #10
And from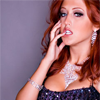
to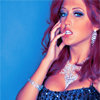
01. First get your picture. Mine's of SoCal Val from TNA

02. New selective color layer. Layer>New Adjustment Layer>Selective color...
Red: -100,0,100,100
Yellows: -25,0,-20,0
Greens: Nothing
Cyans: Nothing
Blues: Nothing
Magentas: -100,-100,-100,0
Whites: Nothing
Neutrals: 70,-30,-75,20
Blacks: Nothing

PSD's:
Sid : Maryse : Val
PSDs are the size of the original images.
All involve selective coloring.
Made in PS CS3.
Not dial-up friendly.
Tutorial #8
Go from
to
01. First get your picture. Mine's of Sid from Skins by marishna @ SummerSkin
02. New curves layer. Layer>New Adjustment Layer>Curves...
In RGB:
Point 1: Input-50 Output-110
Point 2: Input-85 Output-175
Point 3: Input-130 Output-225
Point 4: Input-170 Output-250
03. Duplicate the curves layer (Ctrl+J). Set it to multiply with 50% opacity.

04. New fill layer. Layer>New Fill Layer>Solid color... Fill with #fcff00, set to Soft light with 70% opacity.

05. New selective color layer. Layer>New Adjustment Layer>Selective color...
Red: Nothing
Yellows: 0,20,-20,5
Greens: Nothing
Cyans: Nothing
Blues: Nothing
Magentas: Nothing
Whites: Nothing
Neutrals: 0,0,-75,0
Blacks: 0,0,0,20

06. New selective color layer. Layer>New Adjustment Layer>Selective color...
Red: 0,-30,-70,-50
Yellows: Nothing
Greens: Nothing
Cyans: -100,0,-50,100
Blues: 100,30,40,60
Magentas: Nothing
Whites: Nothing
Neutrals: Nothing
Blacks: Nothing

07. All done now. I selected and resized the part I wanted and icons was done.
Tutorial #9
And from
to
01. First get your picture. Mine's of Maryse from WWE.com

02. New Hue/Saturation Layer. Layer>New Adjustment Layer>Hue/Sat...
Master Saturation: -35 (your's will probably be less than this, Maryse was just a bit orange)

03. New selective color layer. Layer>New Adjustment Layer>Selective color...
Red: -100,0,100,0
Yellows: -100,0,100,0
Greens: Nothing
Cyans: -100,-100,100,0
Blues: -100,-100,-100,0
Magentas: Nothing
Whites: Nothing
Neutrals: 20,0,-45,0
Blacks: Nothing

04. New selective color layer. Layer>New Adjustment Layer>Selective color...
Red: -100,0,100,0
Yellows: -100,0,-50,0
Greens: Nothing
Cyans: 100,-100,100,0
Blues: 100,-100,-100,-100
Magentas: Nothing
Whites: Nothing
Neutrals: 35,0,-20,0
Blacks: Nothing

05. All done now. I selected and resized the part I wanted and icons was done.
Tutorial #10
And from
to
01. First get your picture. Mine's of SoCal Val from TNA

02. New selective color layer. Layer>New Adjustment Layer>Selective color...
Red: -100,0,100,100
Yellows: -25,0,-20,0
Greens: Nothing
Cyans: Nothing
Blues: Nothing
Magentas: -100,-100,-100,0
Whites: Nothing
Neutrals: 70,-30,-75,20
Blacks: Nothing

PSD's:
Sid : Maryse : Val
PSDs are the size of the original images.