tutorial number one
i originally made this icon a few days ago for a friend and she was curious about the coloring.
alot of VM caps are murder to get right, so i thought a tutorial might of some use.

to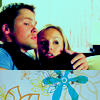
uses ps cs2.
involves curves, color/adjustment layers.
fairly simple, but contains a good amount of steps.
this tutorial will not work for every base.
play with layers to achieve your own look.
try not to edit or adjust your base too much before you begin the first steps.
i found the best results if i left the darker bases as they were.
001.
create a new layer and fill it with #CFD38E.
set it to multiply 100%.
002.
create a new curves layer.
curves are tricky for each base, but i used the following settings.
Input: 58
Output: 138

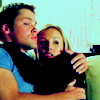
as you can see, the base is still very yellow - not at all attractive.
now its time to lighten it up and soften the yellow tones.
003.
duplicate your base, drag it to the top, and set it to screen 100%.
duplicate the screen layer as many times as needed.
i ended up with four screen layers.
however many you need, desaturate the top one or two.
this will lower the ugly yellow tones so we can recolor the icon later.

004.
create a new layer and fill it with #5F5CB8.
set it to softlight 100%.
005.
create a new layer and fill it with #8A8EA7.
set it to softlight 100%.
006.
create a new layer and fill it with #B7D7E2.
set it to colorburn 100%.
007.
create a new layer and fill it with #D8EFEB.
set it to multiply 100%.
008.
create a new hue/saturation layer.
increase saturation +25.
duplicate this layer (optional) and play with the opacity until it suits your icon.
009.
create a new layer and fill it with #229764.
set it to softlight 100%.
the coloring is now finished.
while it was a step-up from the original base, the last step is needed to make the icon pop.
010.
you can choose any texture to use.
i used the following...
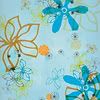
(by
tragic_icons)
i simply cropped it and moved it onto an apppropriate part of the icon.
for your own icon you can add text as well or other brushes.
finished!
i hope it was easy to understand.
it is a bit long, so if anyone wants the psd. i'll glady post it.
alot of VM caps are murder to get right, so i thought a tutorial might of some use.
to
uses ps cs2.
involves curves, color/adjustment layers.
fairly simple, but contains a good amount of steps.
this tutorial will not work for every base.
play with layers to achieve your own look.
try not to edit or adjust your base too much before you begin the first steps.
i found the best results if i left the darker bases as they were.
001.
create a new layer and fill it with #CFD38E.
set it to multiply 100%.
002.
create a new curves layer.
curves are tricky for each base, but i used the following settings.
Input: 58
Output: 138
as you can see, the base is still very yellow - not at all attractive.
now its time to lighten it up and soften the yellow tones.
003.
duplicate your base, drag it to the top, and set it to screen 100%.
duplicate the screen layer as many times as needed.
i ended up with four screen layers.
however many you need, desaturate the top one or two.
this will lower the ugly yellow tones so we can recolor the icon later.
004.
create a new layer and fill it with #5F5CB8.
set it to softlight 100%.
005.
create a new layer and fill it with #8A8EA7.
set it to softlight 100%.
006.
create a new layer and fill it with #B7D7E2.
set it to colorburn 100%.
007.
create a new layer and fill it with #D8EFEB.
set it to multiply 100%.
008.
create a new hue/saturation layer.
increase saturation +25.
duplicate this layer (optional) and play with the opacity until it suits your icon.
009.
create a new layer and fill it with #229764.
set it to softlight 100%.
the coloring is now finished.
while it was a step-up from the original base, the last step is needed to make the icon pop.
010.
you can choose any texture to use.
i used the following...
(by
tragic_icons)
i simply cropped it and moved it onto an apppropriate part of the icon.
for your own icon you can add text as well or other brushes.
finished!
i hope it was easy to understand.
it is a bit long, so if anyone wants the psd. i'll glady post it.