MINI-MOVIE ICON TUTORIAL UPON REQUEST

Watch and learn the step by step process I used to make this icon!
Okay, for this tutorial to work for you, you're going to need Animation Shop 3, Corel PaintShop Pro X and InterVideo WinDVD Player.
You can download InterVideo WinDVD player here, but many computers come with it pre-downloaded.
You can download Animation Shop 3 here. (It's the basic download one!)
You can download PaintShop Pro X here.
Now on with the tutorial.
01. Put in the DVD you want to be making a mini-movie of in the computer.
02. Open both applications
03.

Click the circled arrow three times, then click P on your keyboard: this will take a screen capture. Do the process of 3 clicks then screen capture 12 times. You should have about twelve frames, maybe less, maybe more. If you have more or less, don't freak out. You can decide which frames to use later.
04.
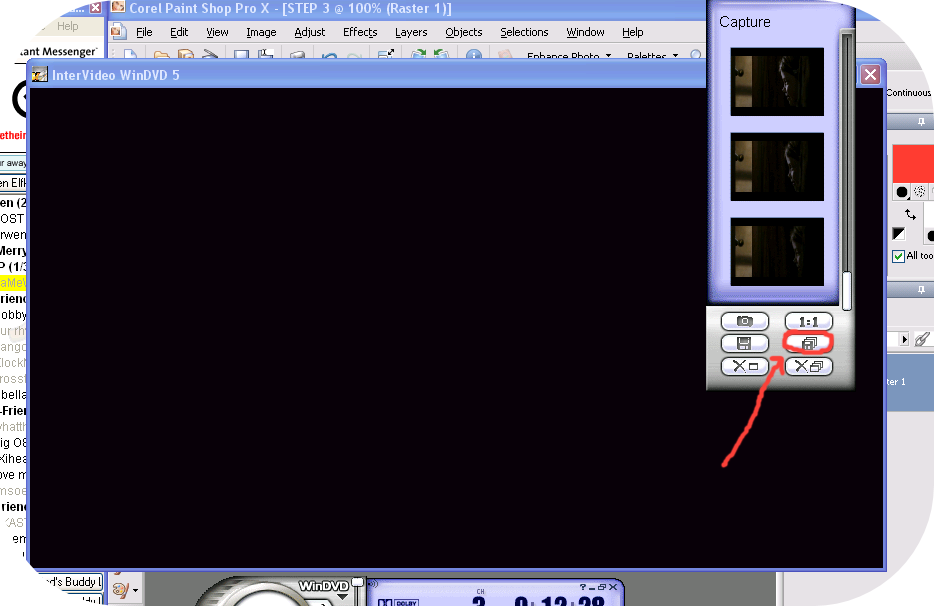
Once you have the necessary pictures, click the Save All button, indicated by the red circle.
05.
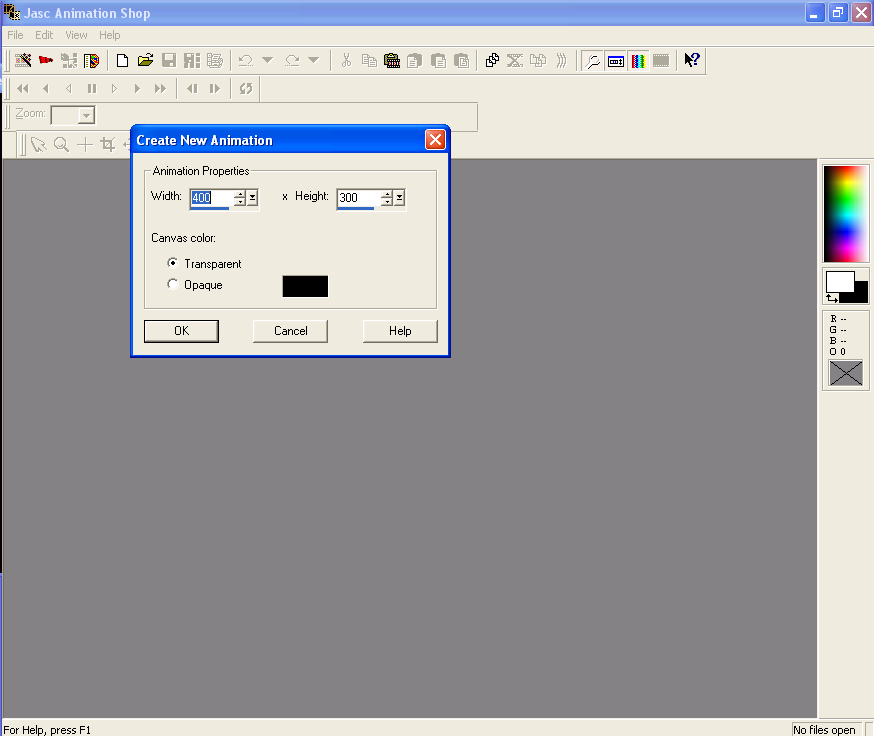
Now go to Jasc Animation Shop 3. Click File -- New. Have the new image be 400 x 300, and Transparent.
06.
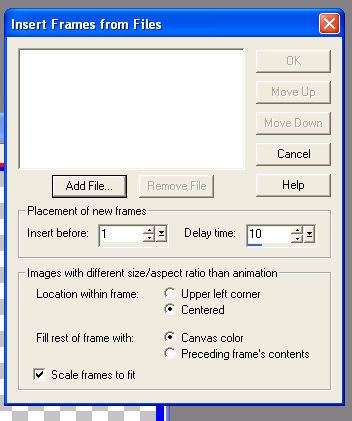
Once you've got that all set, click Animation -- Insert Frames -- From File. A box will pop up. Select Add File.
07.
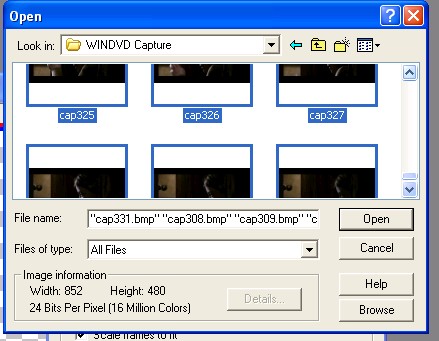
Select all the ones that you want to be in the icon, holding down the shift key to select more than one.
08.
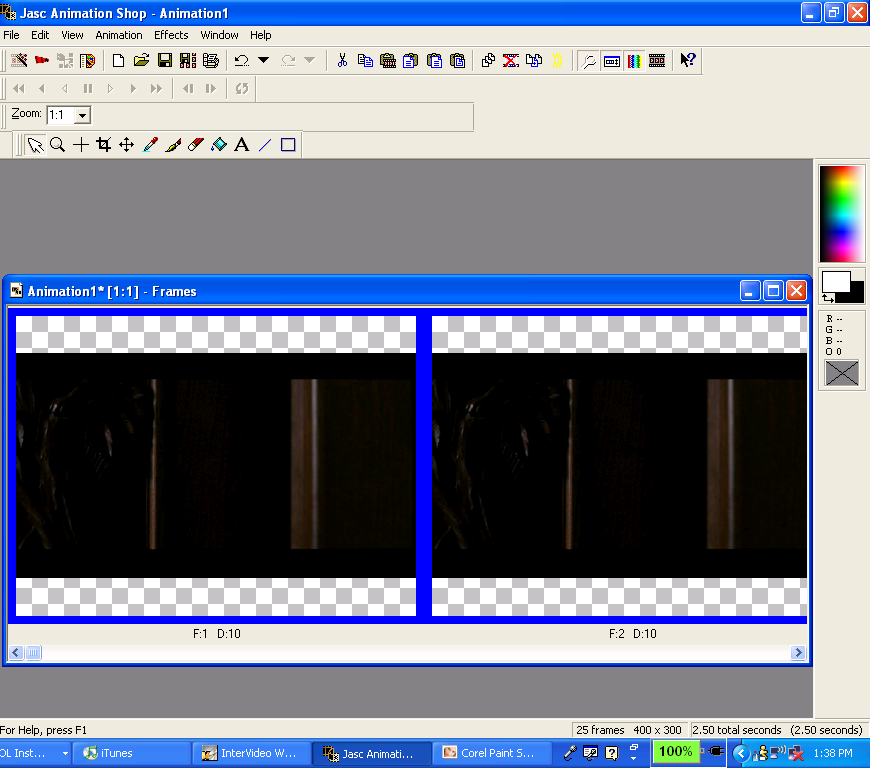
It'll look like this.
09.
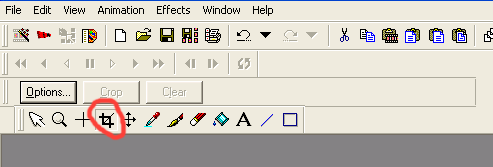
Now select the CROP tool.
10.
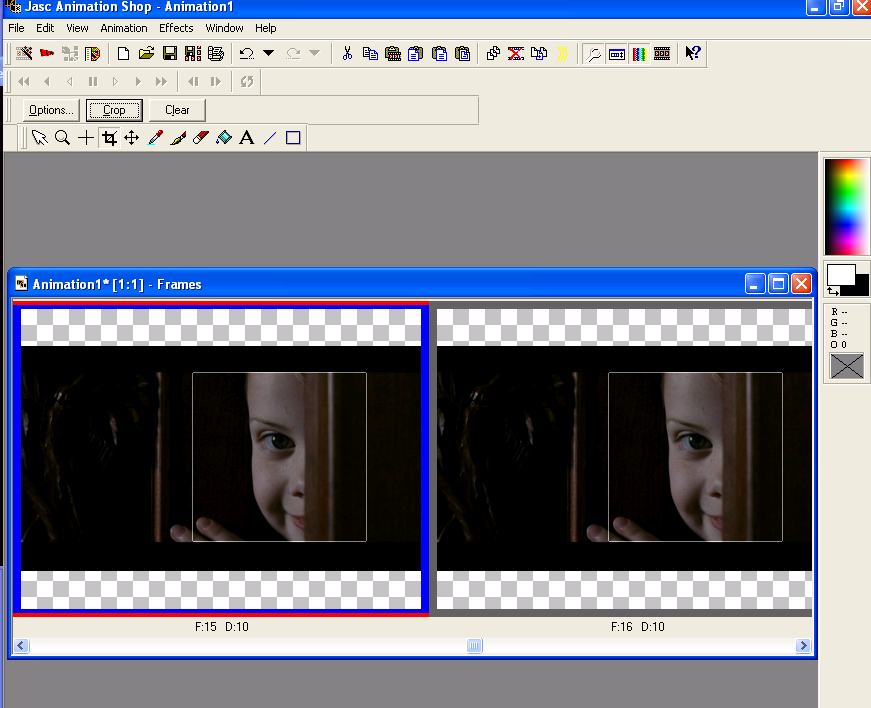
Now using the crop tool, make a perfect square. You can look at the bottom left corner for the pixel size.
11.
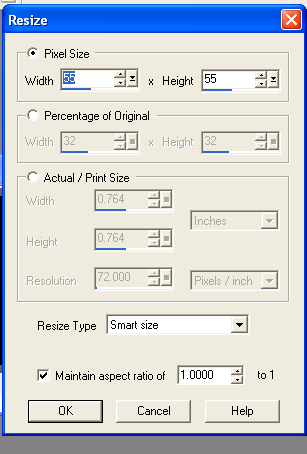
Now click "SHIFT + S". For it to fit the base I've provided, it'll have to be 55 x 55. But, if you're making your own, then make the pixel size to fit the frame you want it to.
12.
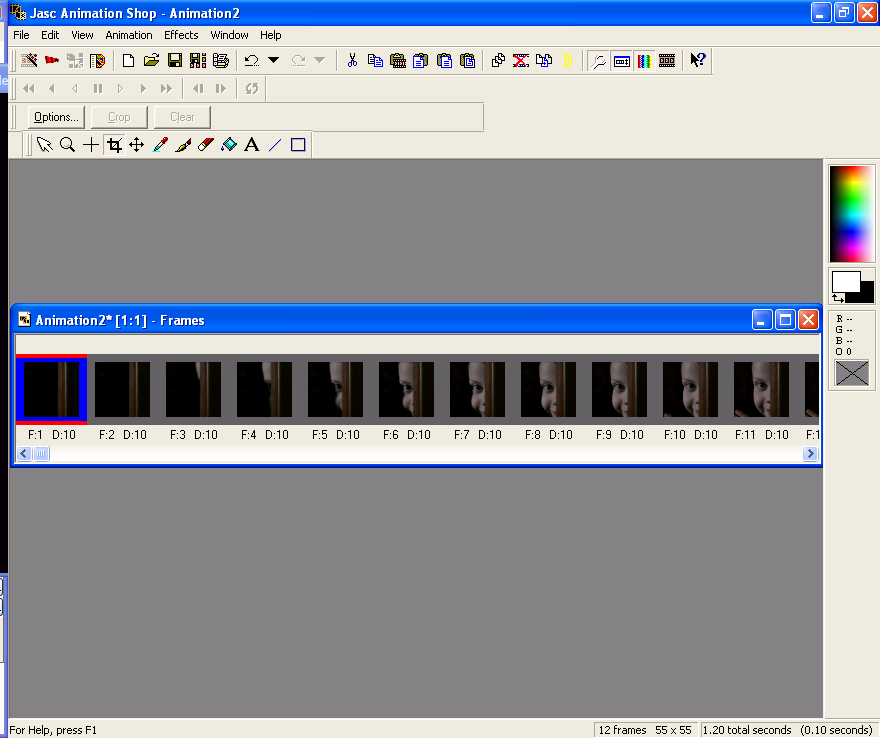
It should look like this afterwards.
13.
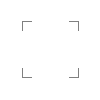
Now, in COREL PAINTSHOP PRO X, paste or open the base you're going to use. I used this one.
14.
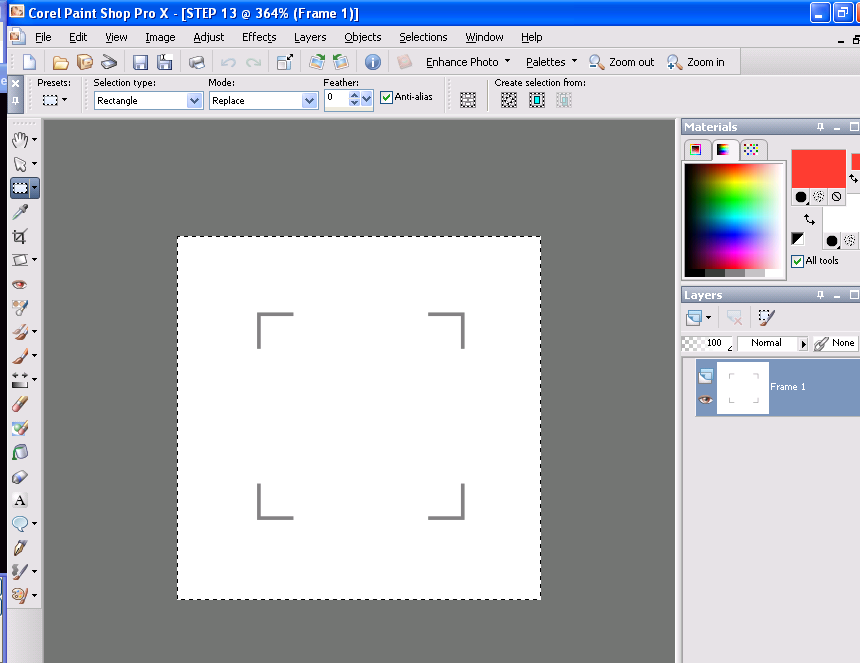
Zoom in as much as you need to be sure the you fit the picture in exactly. I zoom in over 300%. The more you zoom in, the better chance you'll have of being accurate.
15. Now, write in it whatever you want. I chose Hide & Seek for mine. Once you have that, click CTRL + A, then CTRL + SHIFT + C to copy merged. Then paste it in ANIMATION SHOP 3 using CTRL + V.
16. Now, reopen or repaste your base in PaintShop.
16b.Go to Animation Shop and copy the first frame of your animation. Paste it on your base in PaintShop.
17.
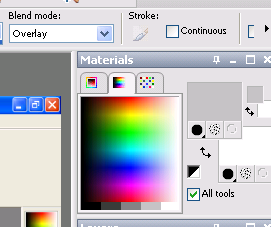
Now, for coloring, I simply Overlay using a paintbrush with either the lightest gray or white until the color is satisfying.
18.
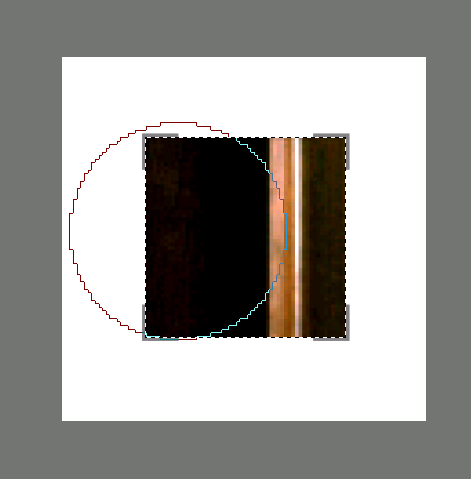
Like this. Now after this, select all, copy and go to Animation Shop.
19.
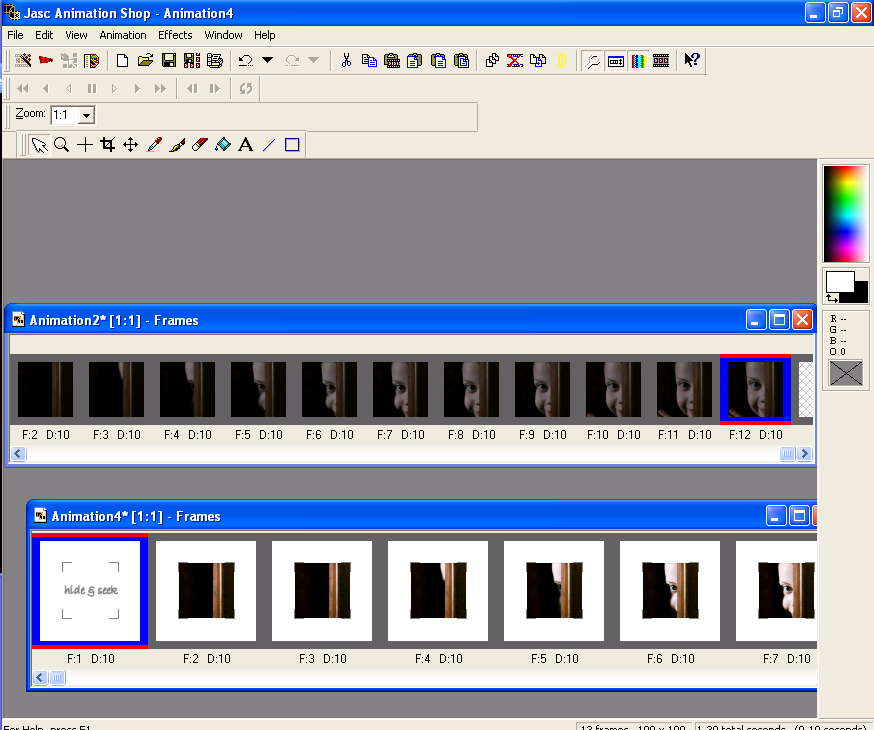
Paste your new frame in the new icon you started. A shortcut that makes the process faster is CTRL + SHIFT + L. REPEAT STEPS 16b - 19 UNTIL ALL OF YOUR ORIGINAL ANIMATION FRAMES ARE IN THE 100x100 ICON.
20.
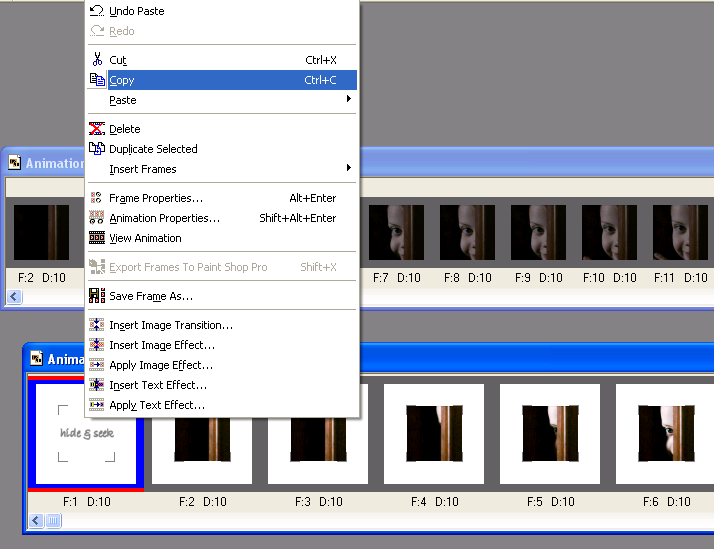
Copy your first frame.
21.
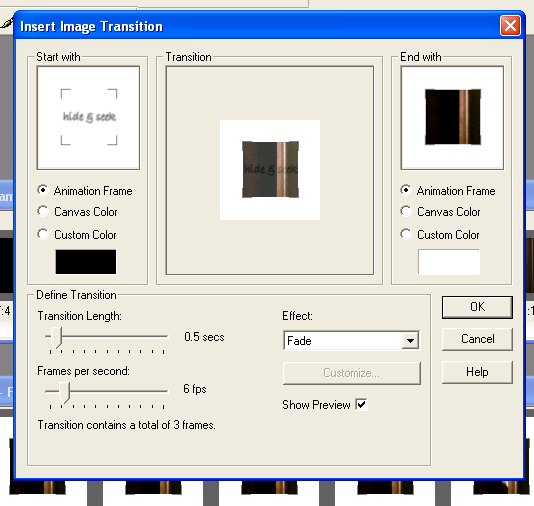
Keep your first frame selected, and select Effects -- Insert Image Transition.... A box will pop up. Under Start with, select Animation Frame. End with will also be Animation Frame.
Under Define Transition, there are several things to pay attention to.
Transition Length: .5 secs
Frames per second: 6 fps
Effect: Fade
Click OK.
22. Paste the first frame at the end of the animation. Now, select the second to last frame and do exactly what you did in Step 21.
23.
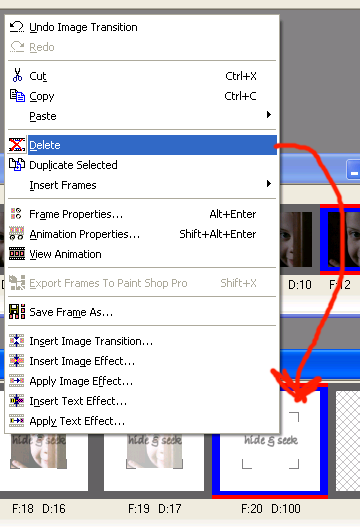
Delete the lasts just taking up space.
24.
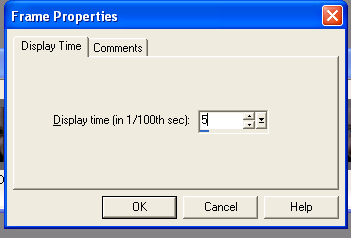
Select the three transition frame at the beginning (Holding down control or shift will allow you to select more than one at once). Click Alt + Enter to open up the Frame properties. Put the number 5 into the box.
25.
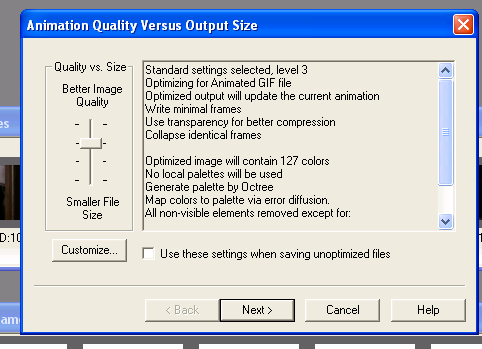
Time to save!!
Scroll the bar down one so it has 127 colors. Then click Customize.
26.
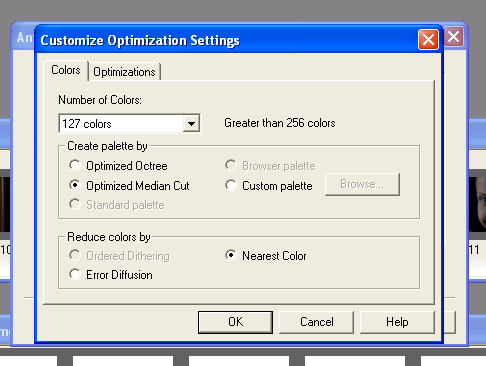
Now, under Colors, there are two things to pay mind to.
Create palette by: Optimized Median Cut
Reduce colors by: Nearest Color
27.
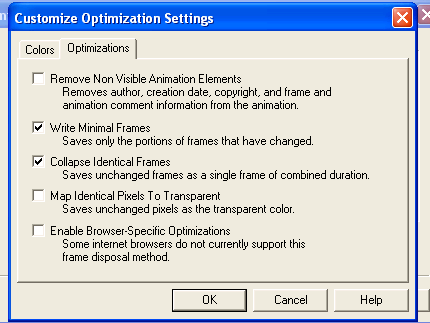
Under Optimizations, select the second and third check boxes.
28. Keep clicking Next, until you get to the one where it says FINISH. Make sure that, for LJ, the icon should be 40 bytes or less. For GJ 63 or less.
And that's it! Be patient, it does take a lot of time. But the outcome is so worth it!!
And here's the finished product!

If using the base I made, please credit sawyer.