[tutorial] another bunch of icon tutorials!
I haven't done a tutorial post for quite a while, and here I am presenting two! Wow. And I've decided to show how the effects I gain look on other pictures, something that I should do from now on.
Okay, let's begin.
Learn how to go from this to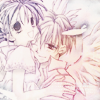
Using PS 7.0, EASY level of difficulty (just textures and colour layers), and should be transferrable to most programs.
01. First, crop your picture to what you want it to be.

02. Duplicate the layer and set it to Soft Light, 100% opacity.

03. Create a new layer and fill with #7E7082 (mauvy-purple) Edited with the correct Hex code. Set the layer to Saturation, 100%.

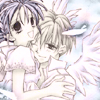
04. Create and fill another layer with #ECDEDD (a light pink). Set this layer to Color Burn, 100%.

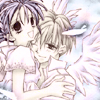
05. Another layer, and fill this one with #6283C4 (mid blue). Set this layer to Exclusion, 20%.

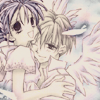
06. Duplicate this layer, but this time, change the layer to Lighten, 20%.

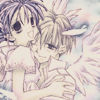
07. Now, we'll have some fun with textures! Take this light texture (from CDG), and add to the icon. Set the new layer to Overlay, 25%. I also rotated the texture 90 degree clockwise, you can do this depending on your own preference. :)
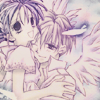
08. Duplicate the base image, and drag it up to the top of the layer palette, desaturate, and set the layer to Soft Light, 100%.
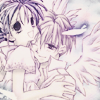
09. Last step! Take this texture (from CDG again - you can tell I love using their textures, can't you? ^_~), and set it on the icon to Overlay, 100%. Optionally, you can flip the texture vertically, like I did, or leave it the way it is.

There! One pretty icon!
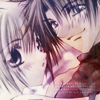
How this looks on other images:
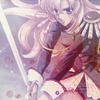
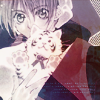
How this tutorial looks with other icons:
---
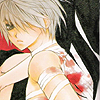
How to go from this to
Using PS 7.0, EASY level of difficulty (just textures and colour layers), and should be transferrable to most programs.
01. Crop the image, as this image was slightly fuzzier than I had liked, I sharpened the base once (Filter > Sharpen > Sharpen).
02. Duplicate the base, and desaturate it (Image > Adjustments > Desaturate). Then set the layer to Linear Burn, 100% opacity.

03. Now Duplicate the base and drag it to the top of the layer palette. Apply a Gaussian Blur to the layer (Filter > Blur > Gaussian Blur), at about 2.0. Then set the layer to Linear Light, 50%.

04. Use this texture (from CDG), and set it on the icon to Overlay, 100%.

05. Now, add this texture (from colorfilter), and set to Soft Light, 100%.

06. New layer, flood fill with #E4D5C1 (a light brown), then set the layer to Multiply, 50%.


07. And lastly, because this image is quite light, add another new layer which you fill with #000000 (black), set to Soft Light, 100%. This brings out the lines and the image a bit more.


And that's it!
How this effect looks on other images:

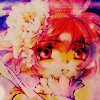
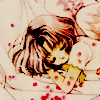
I find this tutorial works best on images that are naturally light, especially manga images. You may need to adjust for bolder images. Just let my tutorial be a guide.
I hope that people like these tutorials. If you have any questions, please ask. I would also love to see what you can make with them!
Okay, let's begin.
Learn how to go from this to

Using PS 7.0, EASY level of difficulty (just textures and colour layers), and should be transferrable to most programs.
01. First, crop your picture to what you want it to be.

02. Duplicate the layer and set it to Soft Light, 100% opacity.

03. Create a new layer and fill with #7E7082 (mauvy-purple) Edited with the correct Hex code. Set the layer to Saturation, 100%.


04. Create and fill another layer with #ECDEDD (a light pink). Set this layer to Color Burn, 100%.


05. Another layer, and fill this one with #6283C4 (mid blue). Set this layer to Exclusion, 20%.


06. Duplicate this layer, but this time, change the layer to Lighten, 20%.


07. Now, we'll have some fun with textures! Take this light texture (from CDG), and add to the icon. Set the new layer to Overlay, 25%. I also rotated the texture 90 degree clockwise, you can do this depending on your own preference. :)

08. Duplicate the base image, and drag it up to the top of the layer palette, desaturate, and set the layer to Soft Light, 100%.

09. Last step! Take this texture (from CDG again - you can tell I love using their textures, can't you? ^_~), and set it on the icon to Overlay, 100%. Optionally, you can flip the texture vertically, like I did, or leave it the way it is.

There! One pretty icon!
How this looks on other images:
How this tutorial looks with other icons:


---
How to go from this to

Using PS 7.0, EASY level of difficulty (just textures and colour layers), and should be transferrable to most programs.
01. Crop the image, as this image was slightly fuzzier than I had liked, I sharpened the base once (Filter > Sharpen > Sharpen).

02. Duplicate the base, and desaturate it (Image > Adjustments > Desaturate). Then set the layer to Linear Burn, 100% opacity.

03. Now Duplicate the base and drag it to the top of the layer palette. Apply a Gaussian Blur to the layer (Filter > Blur > Gaussian Blur), at about 2.0. Then set the layer to Linear Light, 50%.

04. Use this texture (from CDG), and set it on the icon to Overlay, 100%.

05. Now, add this texture (from colorfilter), and set to Soft Light, 100%.

06. New layer, flood fill with #E4D5C1 (a light brown), then set the layer to Multiply, 50%.


07. And lastly, because this image is quite light, add another new layer which you fill with #000000 (black), set to Soft Light, 100%. This brings out the lines and the image a bit more.


And that's it!
How this effect looks on other images:


I find this tutorial works best on images that are naturally light, especially manga images. You may need to adjust for bolder images. Just let my tutorial be a guide.
I hope that people like these tutorials. If you have any questions, please ask. I would also love to see what you can make with them!