Tutorial # 10
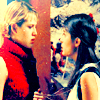
Icon tutorial requested by candygurl1718 from this icon batch
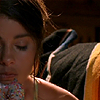
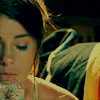
to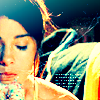
- Made in ps7
- Uses selective coloring and curves
1)Crop your image. Duplicate 3 times and set them all on screen 100%
2)Go to Layer> new fill layer> solid color> and fill with #020229. Set this to exclusion 100%

3)Go to Layer> new fill layer> solid color> and fill with #D0C194. set this to multiply 100%
4)Go to Layer> new fill layer> solid color> and fill with #B6EFED. set this to colorburn 100%
5)Go to Layer> new adjustment layer> Curves and put in these settings:
RGB
pont one = 37,59
point two = 78,165

6)Go to layer> new adjustment layer> selective color and put in these settings:
Neutrals
C : -41
M : -13
Y : -39
B : +12
7)Go to Layer> new adjustment layer> Hue/saturation and increase the saturation to +20
8)Go to layer> new adjustment layer> selective color and put in these settings:
Red
C : -100
M : +20
Y : +100
B : 0
Neutrals
C : +25
M : -12
Y : -35
B : -12
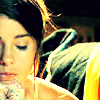
9)Add this gradient and set it to lighten 100%

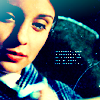
to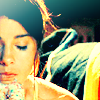
10)Add this gradient and set it to colorburn 100%

to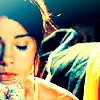
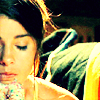
11)Add This texture by peoplemachines and set it to screen 100%. Drag this layer and set it over the exclusion layer (step 2)
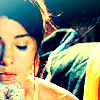
12)Add this brush by wonderland__ (color #ffffff) Drag this layer under the texture (step 11).Blur her skin and sharpen
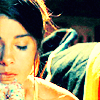
to
Dude!
Please comment and credit if you take any
Please don't hotlink
If you do use the tut I'd love to see your result ;)
And lastly..Enjoy!
Other Examples (same/similar technique)
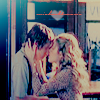
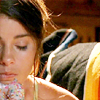
to
- Made in ps7
- Uses selective coloring and curves
1)Crop your image. Duplicate 3 times and set them all on screen 100%
2)Go to Layer> new fill layer> solid color> and fill with #020229. Set this to exclusion 100%
3)Go to Layer> new fill layer> solid color> and fill with #D0C194. set this to multiply 100%
4)Go to Layer> new fill layer> solid color> and fill with #B6EFED. set this to colorburn 100%
5)Go to Layer> new adjustment layer> Curves and put in these settings:
RGB
pont one = 37,59
point two = 78,165
6)Go to layer> new adjustment layer> selective color and put in these settings:
Neutrals
C : -41
M : -13
Y : -39
B : +12
7)Go to Layer> new adjustment layer> Hue/saturation and increase the saturation to +20
8)Go to layer> new adjustment layer> selective color and put in these settings:
Red
C : -100
M : +20
Y : +100
B : 0
Neutrals
C : +25
M : -12
Y : -35
B : -12
9)Add this gradient and set it to lighten 100%
to
10)Add this gradient and set it to colorburn 100%
to
11)Add This texture by peoplemachines and set it to screen 100%. Drag this layer and set it over the exclusion layer (step 2)
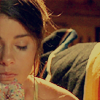
12)Add this brush by wonderland__ (color #ffffff) Drag this layer under the texture (step 11).Blur her skin and sharpen
to
Dude!
Please comment and credit if you take any
Please don't hotlink
If you do use the tut I'd love to see your result ;)
And lastly..Enjoy!
Other Examples (same/similar technique)