Tutorial '# 7
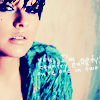
How to go from 
to this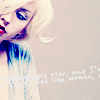
- Made in ps7
- Translatable
- Easy + psd
1) Crop your image. Go to layer > New fill layer> solid colour and fill with # 1144E9. Set this to softlight on 63%

2) Go to layer > New fill layer> solid colour and fill with # B6B986. Set this to overlay on 100%

3) Go to layer > New fill layer> solid colour and fill with # E9C3BB. Set this to overlay on 100%
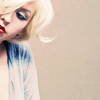
4) Go to layer > New fill layer> solid colour and fill with # 020525. Set this to exclusion on 100%
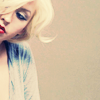
5) Go to layer > New fill layer> solid colour and fill with # ACB9E9. Set this to color burn on 100%
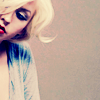
6) Go to Layer> new adjustment layer> Curves and put in these settings:
RGB
point one = 139,166
Point two = 73, 117
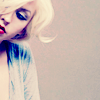
7) Go to Layer> new adjustment layer> Curves and put in these settings:
RGB
point one = 139,166
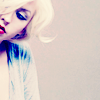
8)Sharpen (mine was 40%) blur the skin, add text/ brushes or you can leave it as it is.
Voila
Download the psd
Dude!
Please comment and credit if you take any
Please don't hotlink
If you do use the tut I'd love to see your result ;)
And lastly..Enjoy!
Tips If your icon comes out too light, reduce the pink overlay layer or remove it.
Other Examples with same/similar technique


to this

- Made in ps7
- Translatable
- Easy + psd
1) Crop your image. Go to layer > New fill layer> solid colour and fill with # 1144E9. Set this to softlight on 63%

2) Go to layer > New fill layer> solid colour and fill with # B6B986. Set this to overlay on 100%

3) Go to layer > New fill layer> solid colour and fill with # E9C3BB. Set this to overlay on 100%

4) Go to layer > New fill layer> solid colour and fill with # 020525. Set this to exclusion on 100%

5) Go to layer > New fill layer> solid colour and fill with # ACB9E9. Set this to color burn on 100%

6) Go to Layer> new adjustment layer> Curves and put in these settings:
RGB
point one = 139,166
Point two = 73, 117

7) Go to Layer> new adjustment layer> Curves and put in these settings:
RGB
point one = 139,166

8)Sharpen (mine was 40%) blur the skin, add text/ brushes or you can leave it as it is.
Voila

Download the psd
Dude!
Please comment and credit if you take any
Please don't hotlink
If you do use the tut I'd love to see your result ;)
And lastly..Enjoy!
Tips If your icon comes out too light, reduce the pink overlay layer or remove it.
Other Examples with same/similar technique
