Icon Tutorial #4 - Hyuuga Neji (Naruto)
My wireless internet crashed on me today, and it seemed like forever... and so I had the time to batch up yet another tutorial. I wasn't home... so no DSL. :P This would be the fourth. And no it isn't animated... I'm still a newbie when it comes to those.... This is a pretty easy tutorial; just a general icon tutorial. A tutorial of Hyuuga Neji from the hit anime/manga series Naruto
We'll be going from...
here >>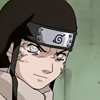
to here >>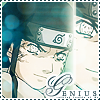
I'm using Adobe Photoshop Elements 3.0 since it's not a difficult tutorial. (& I was feeling lazy and decided not to open any of my other photoshop programs. :P) I'm sure this tutorial can be translated into other programs, like Adobe Photoshop 7.0, CS2 or PaintShoprPro.
I tried clarifying the way things should be within this tutorial, I even capped my dektop to show. All right, let's start. :] Click the cut!
Step 1: We'll take our image and crop it to your liking. In this case, I cropped it like this, and I decreased the size to 100x100, here it is:

Now we have our base, but now we're also going to add a part of the image into the mix.
Step 2: Take our original image and crop it to a nice square close up in his face and barely showing his hair, or the headband, but don't decrease the size, please keep it as it is like this:
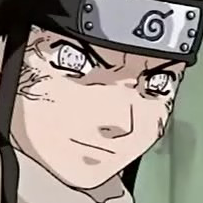
Then cut out Neji's right eye into a strip like this:
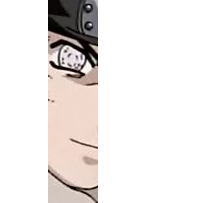
Now we're going to resize the strip to make it fit 100x100. I resized it so it can fit into a 100x100 icon canvas:
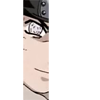
And now it shows a part of his right eye; byakugan activated. Paste the this strip into our original base's canvas. And move the strip into the very right:
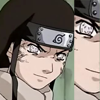
Now we're ready to fix the image. :D
Step 3: It's all nice and layered/separated. This is how your 2 layers should look like >> click. Now let's color. First, we'll fix the base... yes that's the one with the full Neji head. Click the eye within the second layer - the one with the Neji eye strip. So now the only one visible is the base - the first layer.
Duplicate the base and set the duplicate to Soft Light; 100% Opacity. Then go to Filter >> Blur >> Gaussian Blur and Set the radius to 5.6.

Click okay, then go to the original base and go to Filter >> Sharpen >> Sharpen. Merge both the sharpened base, and blurred duplicated together (CTRL+E merges it down) So now blurred and sharpened this is what you get:
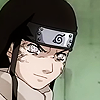
Now to the strip! ^-^
Step 4: Okay, click the eye within the base (full head Neji) to make it invisible and click the eye within the second layer (Cut strip Neji) to make it visible, since we'll be working with that strip now. Duplicate the strip and set the duplicate to Soft Light; 100% Opacity. It's all the same as what we did to the first layer. Then do the Filter >> Blur >> Gaussian Blur; radius is 5.6 thing. Now go to the original strip layer and go to Filter >> Sharpen >> Sharpen. From there we get this:
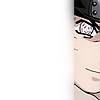
Step 5: We're done with fixing the bases, now to add some color. Make a new layer on top of both the base and strip layers and fill it with the color #A16816. Then set that layer to Soft Light; 100% Opacity
Then we stroke the second layer a.k.a the strip layer. Click the strip layer and go to Edit >> Stroke (Outline) Selection and set the color to pure white and the pixels to 3. The location should be selected to Center Mode should be Normal; 100% Opacity. The Preserve Transperancy box should not be checked. Then click okay.
Now we're going to stroke the base - the full head Neji base. Same thing that we did above for the strip is the same as the full head base:
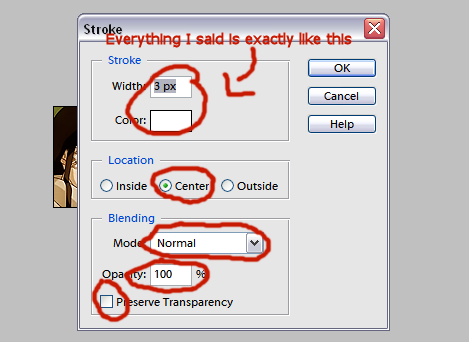
And so now, both have a border, merge both of those layers together [CTRL+E merges the strip layer down with the full head base] and viola:
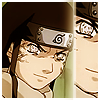
Step: 6 Now to add effects and all those stuff. Take this texture by gender, I believe:
And put it in Screen; 100% Opacity. Then duplicate the base, and take the duplicated base to the very top and set it to Soft Light; 100% Opacity. From there we get this:

(If you're already confused by how the layers' order should be like, click here and you'll see a cap of how the order of the layers should be like.)
Step 7: Now to add some more textures and effects. :] We'll take this shiny light texture from fukikomu/triedtoholdonto (♥) and set it to the very top, and set it toScreen; 100% Opacity.

But then, it turns out that the color blue of the texture is so... different from the theme color:
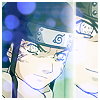
See?
So what we'll do is take the first texture and duplicate it and set it to Color; 100% Percent and drag it on top of the light texture and click CTRL+E so that the texture that's set in Color would merge with the shiny light texture to make the shiny light texture this color:

Now the texture isn't very different from the theme color of the icon. Here's the result of what we just did:
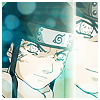
There may be some light texture that's blocking Neji's face just a bit too much or a big block of light just doesn't seem right, so take the eraser tool and erase some:
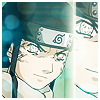
There. :] You can stop at this step and admire your textless icon. But if you'd like to add text and a border then go on to the next step.
Step 8: Now to add some text. Take the color #0A2F38 and the font Old Script in 30 pt and type in the letter "G". We will be writing "Genius" in the icon as to show how Hyuuga Neji is a fated genius. xD Place the "G" somewhere on the bottom right corner, as to keep it away from blocking Neji's beautiful face. :] Duplicate the "G" layer and take one duplicate and simplify it, then go to Edit >> Stroke (Outline) Selection and stroke the copy with these settings (Make sure the outline color is pure white):
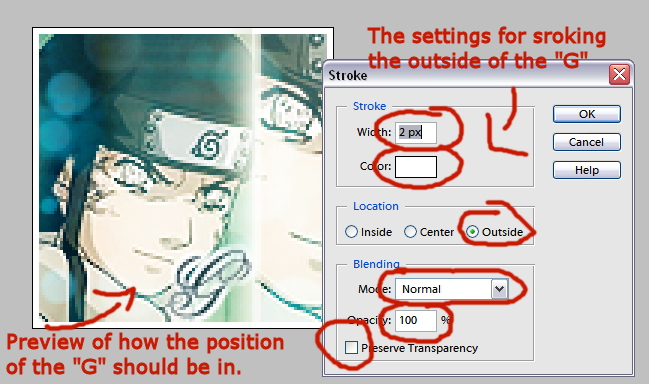
Now that you've stroked the duplicate of the "G", make sure the original unsimplified copy of the "G" is on top of the stroked "G". Then to make it look solid, duplicate the stroked "G" so that the outline is solid.
(I capped yet again another image as to not confuse some people on how the order of the text layers should be. :] Click here.)
Here's the icon with the stroked "G" and original "G":
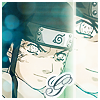
Step: 9 Now to add "enius" in the icon. :] Take the same font color as the first one - #0A2F38 and the font Times New Roman in 7 pt and type in "Genius" using all Caps, and making sure that there are 2 spaces between the letters. Place it near the "G". Then make a new layer under all of the text layers... and take the Rectangular Marquee Tool, and select a whole section under the word "enius" and fill it in with the color white - #FFFFFF. Duplicate the layer "enius" to give the word a bold look. Then use tiny text, or type in text in a really small size, and add one line of tinytext under "enius" and with that you recieve this:
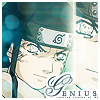
Step 10: We're almost done. :) Now lastly, to add the border. Make a new layer and drag it to the very top. Now that you have a new layer, take this brush that I made (You can download the brush set here):

And using the color #0A2F38 (Yeah... same color as the text. (:) place it around the icon. And from there you get this:
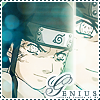
And now you're done. =D You've finally made a genius Neji icon. :D
Phew... done. xD That took long! To be exact... about 2 1/2hours. x_____x Hope you all enjoy the tutorial. :D I did... you could say, used my all to make this tutorial. I'd love to see what you made! Any feedbacks? Comments? Comments are ALWAYS loved. :)
P.S Sorry it was soooooooo long. xD;; Got carried away with clarifiying... but if you have any questions just ask. (: I know how confusing it must've gotten. x__x
We'll be going from...
here >>

to here >>
I'm using Adobe Photoshop Elements 3.0 since it's not a difficult tutorial. (& I was feeling lazy and decided not to open any of my other photoshop programs. :P) I'm sure this tutorial can be translated into other programs, like Adobe Photoshop 7.0, CS2 or PaintShoprPro.
I tried clarifying the way things should be within this tutorial, I even capped my dektop to show. All right, let's start. :] Click the cut!
Step 1: We'll take our image and crop it to your liking. In this case, I cropped it like this, and I decreased the size to 100x100, here it is:

Now we have our base, but now we're also going to add a part of the image into the mix.
Step 2: Take our original image and crop it to a nice square close up in his face and barely showing his hair, or the headband, but don't decrease the size, please keep it as it is like this:

Then cut out Neji's right eye into a strip like this:

Now we're going to resize the strip to make it fit 100x100. I resized it so it can fit into a 100x100 icon canvas:

And now it shows a part of his right eye; byakugan activated. Paste the this strip into our original base's canvas. And move the strip into the very right:

Now we're ready to fix the image. :D
Step 3: It's all nice and layered/separated. This is how your 2 layers should look like >> click. Now let's color. First, we'll fix the base... yes that's the one with the full Neji head. Click the eye within the second layer - the one with the Neji eye strip. So now the only one visible is the base - the first layer.
Duplicate the base and set the duplicate to Soft Light; 100% Opacity. Then go to Filter >> Blur >> Gaussian Blur and Set the radius to 5.6.

Click okay, then go to the original base and go to Filter >> Sharpen >> Sharpen. Merge both the sharpened base, and blurred duplicated together (CTRL+E merges it down) So now blurred and sharpened this is what you get:

Now to the strip! ^-^
Step 4: Okay, click the eye within the base (full head Neji) to make it invisible and click the eye within the second layer (Cut strip Neji) to make it visible, since we'll be working with that strip now. Duplicate the strip and set the duplicate to Soft Light; 100% Opacity. It's all the same as what we did to the first layer. Then do the Filter >> Blur >> Gaussian Blur; radius is 5.6 thing. Now go to the original strip layer and go to Filter >> Sharpen >> Sharpen. From there we get this:

Step 5: We're done with fixing the bases, now to add some color. Make a new layer on top of both the base and strip layers and fill it with the color #A16816. Then set that layer to Soft Light; 100% Opacity
Then we stroke the second layer a.k.a the strip layer. Click the strip layer and go to Edit >> Stroke (Outline) Selection and set the color to pure white and the pixels to 3. The location should be selected to Center Mode should be Normal; 100% Opacity. The Preserve Transperancy box should not be checked. Then click okay.
Now we're going to stroke the base - the full head Neji base. Same thing that we did above for the strip is the same as the full head base:

And so now, both have a border, merge both of those layers together [CTRL+E merges the strip layer down with the full head base] and viola:

Step: 6 Now to add effects and all those stuff. Take this texture by gender, I believe:

And put it in Screen; 100% Opacity. Then duplicate the base, and take the duplicated base to the very top and set it to Soft Light; 100% Opacity. From there we get this:

(If you're already confused by how the layers' order should be like, click here and you'll see a cap of how the order of the layers should be like.)
Step 7: Now to add some more textures and effects. :] We'll take this shiny light texture from fukikomu/triedtoholdonto (♥) and set it to the very top, and set it toScreen; 100% Opacity.

But then, it turns out that the color blue of the texture is so... different from the theme color:

See?
So what we'll do is take the first texture and duplicate it and set it to Color; 100% Percent and drag it on top of the light texture and click CTRL+E so that the texture that's set in Color would merge with the shiny light texture to make the shiny light texture this color:

Now the texture isn't very different from the theme color of the icon. Here's the result of what we just did:

There may be some light texture that's blocking Neji's face just a bit too much or a big block of light just doesn't seem right, so take the eraser tool and erase some:

There. :] You can stop at this step and admire your textless icon. But if you'd like to add text and a border then go on to the next step.
Step 8: Now to add some text. Take the color #0A2F38 and the font Old Script in 30 pt and type in the letter "G". We will be writing "Genius" in the icon as to show how Hyuuga Neji is a fated genius. xD Place the "G" somewhere on the bottom right corner, as to keep it away from blocking Neji's beautiful face. :] Duplicate the "G" layer and take one duplicate and simplify it, then go to Edit >> Stroke (Outline) Selection and stroke the copy with these settings (Make sure the outline color is pure white):

Now that you've stroked the duplicate of the "G", make sure the original unsimplified copy of the "G" is on top of the stroked "G". Then to make it look solid, duplicate the stroked "G" so that the outline is solid.
(I capped yet again another image as to not confuse some people on how the order of the text layers should be. :] Click here.)
Here's the icon with the stroked "G" and original "G":

Step: 9 Now to add "enius" in the icon. :] Take the same font color as the first one - #0A2F38 and the font Times New Roman in 7 pt and type in "Genius" using all Caps, and making sure that there are 2 spaces between the letters. Place it near the "G". Then make a new layer under all of the text layers... and take the Rectangular Marquee Tool, and select a whole section under the word "enius" and fill it in with the color white - #FFFFFF. Duplicate the layer "enius" to give the word a bold look. Then use tiny text, or type in text in a really small size, and add one line of tinytext under "enius" and with that you recieve this:

Step 10: We're almost done. :) Now lastly, to add the border. Make a new layer and drag it to the very top. Now that you have a new layer, take this brush that I made (You can download the brush set here):

And using the color #0A2F38 (Yeah... same color as the text. (:) place it around the icon. And from there you get this:
And now you're done. =D You've finally made a genius Neji icon. :D
Phew... done. xD That took long! To be exact... about 2 1/2hours. x_____x Hope you all enjoy the tutorial. :D I did... you could say, used my all to make this tutorial. I'd love to see what you made! Any feedbacks? Comments? Comments are ALWAYS loved. :)
P.S Sorry it was soooooooo long. xD;; Got carried away with clarifiying... but if you have any questions just ask. (: I know how confusing it must've gotten. x__x