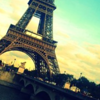
first colorization.
From 
to
Cut, crop, and prepare your image/blend.
Good?
Then let's get started.
001}. Duplicate your base, put it on top, and set it as Screen 50%. Feel free to decrese or increse the opacity as you feel needed.
002}. Go to Layers -> New Adjustment Layers -> Color Balance.
Midtones = 50, -50, 30
003}. Go to Layers -> New Adjustment Layers -> Channel Mixer. (Make sure Monochrome isn't checked!)
Red = 89, 0, 10, -5
Blue = -40, 45, 95, 0
004}. Duplicate base again. Drag to top. Set it as Soft Light 45%.
005}. New Rastor Layer. Fill with #f5d839. Set as Soft Light 45%.
006}. New Channel Mixer layer.
Red = 85, -5, -5, 0
Blue = -20, 30, 95, 0
007}. New Color Balance layer.
Midtones = 30, -15, 30
Shadows = 20, 20, -5
Highlights = -30, -15, 15
008}. Duplicate base. Drag to top. Set as Soft Light 50%.
009}. Once again, duplicate base. Set blend mode as Luminance.
010}. New Rastor Layer. Fill with #080161. Set as Exclusion 50%.
011}. New Channel Mixer.
Red = 150, -20, -5, -5
Blue = -60, 60, 89, 0
012}. Layers -> New Adjustment Layer -> Hue/Saturation.
For Blues, set the saturation as -50.
For Magentas, set the saturation as -40.
013}. Copy merged. Paste on top. Sharpen it (Adjust -> Sharpness -> Sharpen) and set opacity as 50%.
I'd love to see results!
Credit is very nice, but not necessary as long as you don't claim it as your own. =]

to

Cut, crop, and prepare your image/blend.
Good?
Then let's get started.
001}. Duplicate your base, put it on top, and set it as Screen 50%. Feel free to decrese or increse the opacity as you feel needed.
002}. Go to Layers -> New Adjustment Layers -> Color Balance.
Midtones = 50, -50, 30
003}. Go to Layers -> New Adjustment Layers -> Channel Mixer. (Make sure Monochrome isn't checked!)
Red = 89, 0, 10, -5
Blue = -40, 45, 95, 0
004}. Duplicate base again. Drag to top. Set it as Soft Light 45%.
005}. New Rastor Layer. Fill with #f5d839. Set as Soft Light 45%.
006}. New Channel Mixer layer.
Red = 85, -5, -5, 0
Blue = -20, 30, 95, 0
007}. New Color Balance layer.
Midtones = 30, -15, 30
Shadows = 20, 20, -5
Highlights = -30, -15, 15
008}. Duplicate base. Drag to top. Set as Soft Light 50%.
009}. Once again, duplicate base. Set blend mode as Luminance.
010}. New Rastor Layer. Fill with #080161. Set as Exclusion 50%.
011}. New Channel Mixer.
Red = 150, -20, -5, -5
Blue = -60, 60, 89, 0
012}. Layers -> New Adjustment Layer -> Hue/Saturation.
For Blues, set the saturation as -50.
For Magentas, set the saturation as -40.
013}. Copy merged. Paste on top. Sharpen it (Adjust -> Sharpness -> Sharpen) and set opacity as 50%.
I'd love to see results!
Credit is very nice, but not necessary as long as you don't claim it as your own. =]