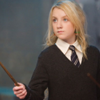
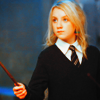
don't make luna stick that wand up your ass
From 
to
Resize, cut, and prepare your blend/image.
When that's all done, proceed with the steps below.
001}. Duplicate the base and drag to top. Set as Screen 45%.
002}. Layers -> New Adjustment Layer -> Color Balance.
Midtones = 30, -10, 50
Shadows = 10, -10, 20
Highlights = -20, 10, -10
003}. Layers -> New Adjustment Layer -> Channel Mixer. (Make sure monochrome isn't checked.)
Red = 100, -69, 69, -10
Green = -10, 100, 10, 0
Blue = -89, 89, 100, 0
004}. Duplicate base. Drag to top. Set as Luminance (Legacy).
005}. New Color Balance layer.
Midtones = -30, 10, -20
Shadows = -10, -20, 10
Highlights = 30, 0, 20
006}. New Channel Mixer.
Red = 100, 60, -60, 0
Blue = -50, 50, 100, 0
007}. New Color Balance.
Midtones = 20, 10, 20
Shadows = -20, 10, -20
Highlights = 20, -5, 10
008}. Duplicate base. Drag to top. Set as Soft Light.
009}. Layers -> New Adjustment Layer -> Hue/Saturation/Lightness.
Edit: Master = set saturation to -10.
010}. New Color Balance.
Shadows = 0, 0, -5
Highlights = 0, 0, -20
011}. Duplicate base. Set as Luminance (Legacy). Adjust the opacity between 75% and 50%, depending on how much you think your image needs it.
The example up above (Luna with her wand) was made using 50% opacity on this step.
The example below was made using 75% opacity.
From
to
No credit necessary as long as you don't claim as your own.
I'd love to see results!

to

Resize, cut, and prepare your blend/image.
When that's all done, proceed with the steps below.
001}. Duplicate the base and drag to top. Set as Screen 45%.
002}. Layers -> New Adjustment Layer -> Color Balance.
Midtones = 30, -10, 50
Shadows = 10, -10, 20
Highlights = -20, 10, -10
003}. Layers -> New Adjustment Layer -> Channel Mixer. (Make sure monochrome isn't checked.)
Red = 100, -69, 69, -10
Green = -10, 100, 10, 0
Blue = -89, 89, 100, 0
004}. Duplicate base. Drag to top. Set as Luminance (Legacy).
005}. New Color Balance layer.
Midtones = -30, 10, -20
Shadows = -10, -20, 10
Highlights = 30, 0, 20
006}. New Channel Mixer.
Red = 100, 60, -60, 0
Blue = -50, 50, 100, 0
007}. New Color Balance.
Midtones = 20, 10, 20
Shadows = -20, 10, -20
Highlights = 20, -5, 10
008}. Duplicate base. Drag to top. Set as Soft Light.
009}. Layers -> New Adjustment Layer -> Hue/Saturation/Lightness.
Edit: Master = set saturation to -10.
010}. New Color Balance.
Shadows = 0, 0, -5
Highlights = 0, 0, -20
011}. Duplicate base. Set as Luminance (Legacy). Adjust the opacity between 75% and 50%, depending on how much you think your image needs it.
The example up above (Luna with her wand) was made using 50% opacity on this step.
The example below was made using 75% opacity.
From

to

No credit necessary as long as you don't claim as your own.
I'd love to see results!