Another Coloring Tutorial
This one is also made in GIMP. If your program has channel mixer, you should be able to do this, if you don't, then you can get by with color balance.
go from this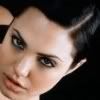
To this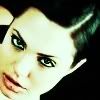
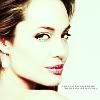
Other icons with same effect.

First of all, do not follow this completely the same, all images are, of course, different.
Get your base, duplicate it, set the top layer to soft light, screen, or whatever works well with your image.
I like to flatten this image, and then duplicate it, working with the top layer.
Now, go to TOOLS->Color tools->hue/saturation.
Set the saturation bar at about 40.
Then, take this same layer and go to, FILTERS->Colors->channel mixer.
make sure preserve luminosity is unchecked.
my output is;
Green:
red= -19
green=78
blue=54
Red:
red=57
Green=10
Blue= -1.5
Blue:
red=28
Green= -25
Blue=75
Now I have this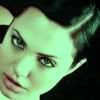
Now, take your other base layer, and bring it to the top, set it at softlight.
Duplicate the base layer again, and set to Dodge at around 50-60% opacity.
You can also add a screen layer set below the dodge one, which I did on this one.
Flatten your image, sharpen around the eyes, lips, ect. and there you go.
Hope this helps anyone. You can also change the coloring if you don't like it to have the green hue.
go from this

To this

Other icons with same effect.


First of all, do not follow this completely the same, all images are, of course, different.
Get your base, duplicate it, set the top layer to soft light, screen, or whatever works well with your image.
I like to flatten this image, and then duplicate it, working with the top layer.
Now, go to TOOLS->Color tools->hue/saturation.
Set the saturation bar at about 40.
Then, take this same layer and go to, FILTERS->Colors->channel mixer.
make sure preserve luminosity is unchecked.
my output is;
Green:
red= -19
green=78
blue=54
Red:
red=57
Green=10
Blue= -1.5
Blue:
red=28
Green= -25
Blue=75
Now I have this

Now, take your other base layer, and bring it to the top, set it at softlight.
Duplicate the base layer again, and set to Dodge at around 50-60% opacity.
You can also add a screen layer set below the dodge one, which I did on this one.

Flatten your image, sharpen around the eyes, lips, ect. and there you go.
Hope this helps anyone. You can also change the coloring if you don't like it to have the green hue.