art process-- nevermore
I decided to do a step-by-step process of how I do a painting. Sometimes it's more detailed than this, but I wanted to focus on how I do faces, so I did a quick body. :D :D Click the cut to see the whole thing.
Note: not exactly a tutorial, since I dunno if you'll learn anything. I do things my way, and there are better ways, but this is MY way, so. :D
Tools:
Zhuzhu's custom brushes -- mainly Oils 125 Smooth Flat set to Pen Pressure at varying sizes.
Eyelash brushes by Trisste
Photoshop7
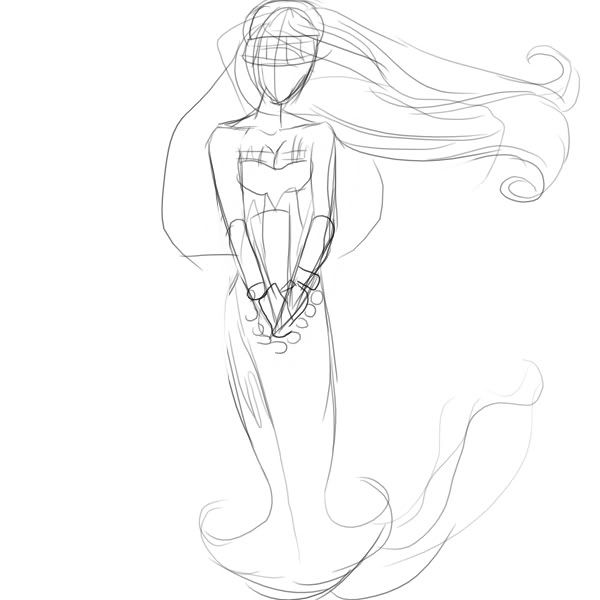
I start with a concept sketch of the entire thing. Like said in all my previous tuts -- I don't recommend starting with a tiny sketch like I do, I just hate sketching big. I have been listening to Halloween music and wanted to do a spooky bride. The sketch always differs somewhat from the main picture, but this is what I think I want it to look like.

I do a to-scale sketch of the face. I always try to get it to look as much like the final product as I can. It helps. :(
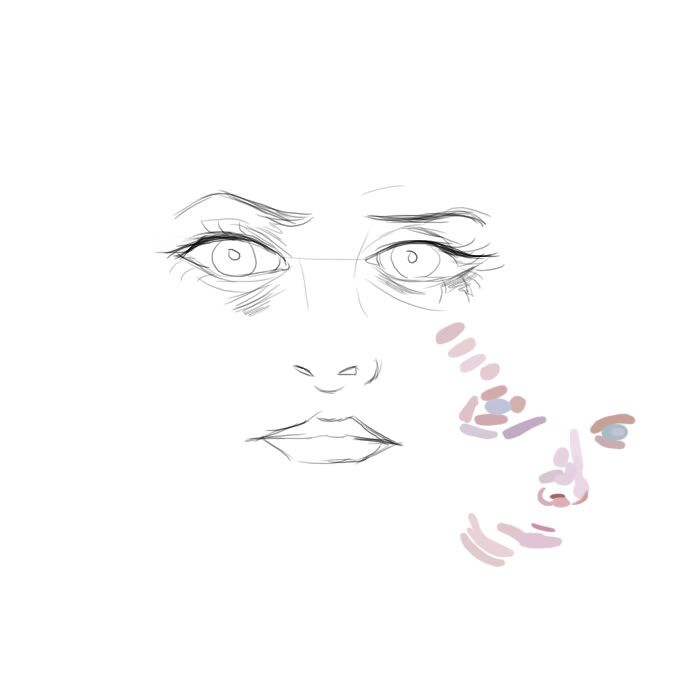
I paste on my colors on a new layer. I get them from everywhere -- modified photographs, stocks, my own head etc. This is a combo of all of them and I made it in a new document in the shape of a face so I could remember where exactly all the colors go. :)
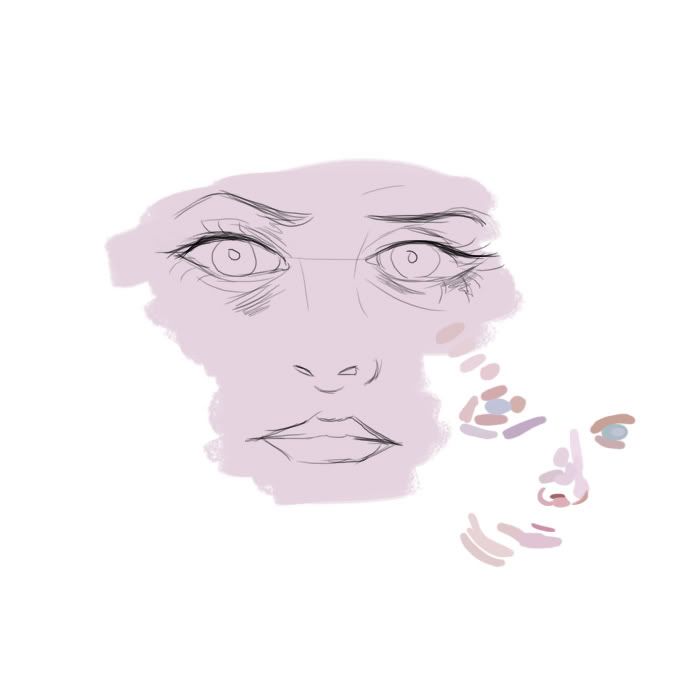
Underneath the sketch on a new layer I fill it in with a skin color.
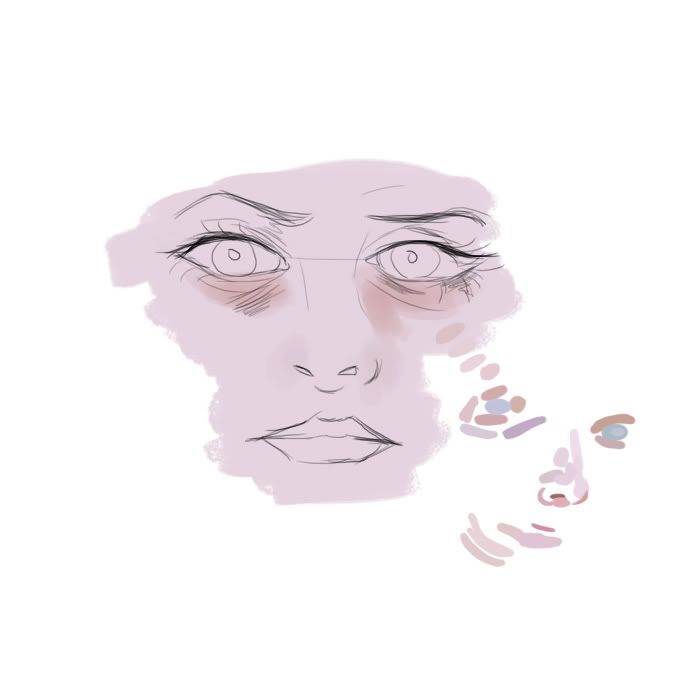
On the same skin layer I crudely block in some colors to give me an idea.
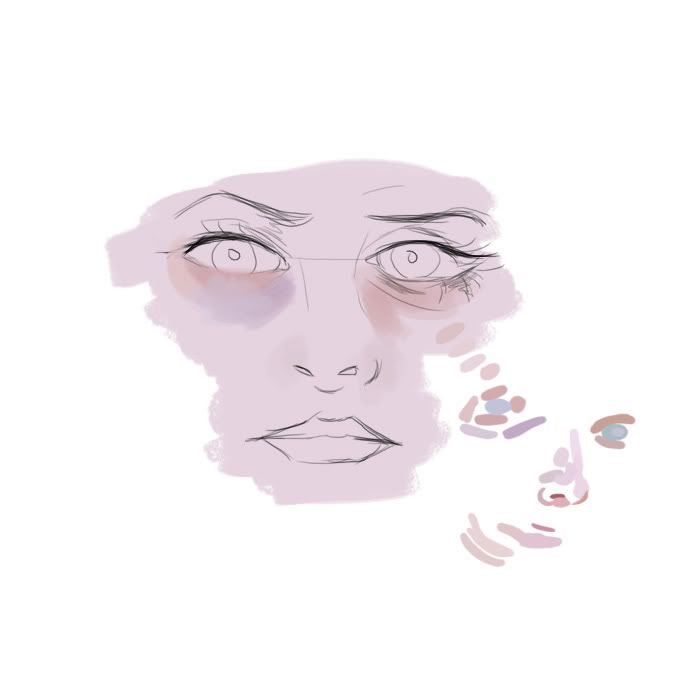
On a new layer above the sketch I pick up the colors from my palette and begin to block in the colors, blending by picking up colors in between the blocks with the eyedropper tool.

I add more colors and add an eyelash brush to give me my bearings as far as the eye shape goes. I modify it by adding more lashes with a 3-pixel hard brush and smudge the lashes a bit. I always add my lashes on a new layer.
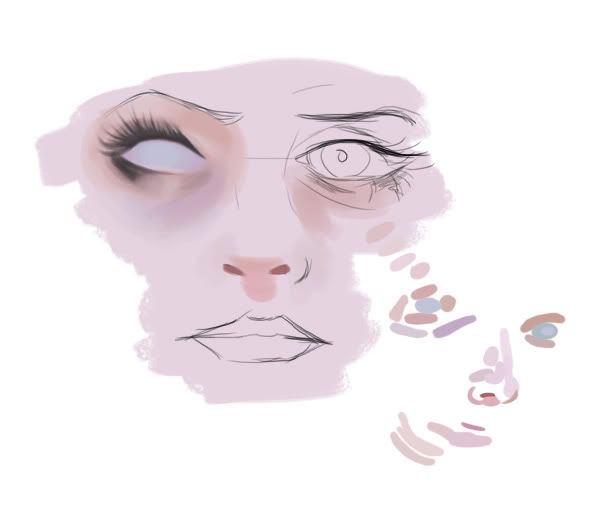
I block in the colors for the nose on the same layers as the eyes using colors from my palette.

I do the nose the same way as the eyes -- blending by picking up colors that mix with the eyedropper. I pick up some blue from the eyes to bring the colors a bit more together and add some purple for dark contrast.

Add a highlight to the nose. I do the second eye picking up colors from my palette and also from my first eye. LOL I always do things out of order. But I added some non-palette colors to the first eye (more blues) so I need to add them in to make both of them match.
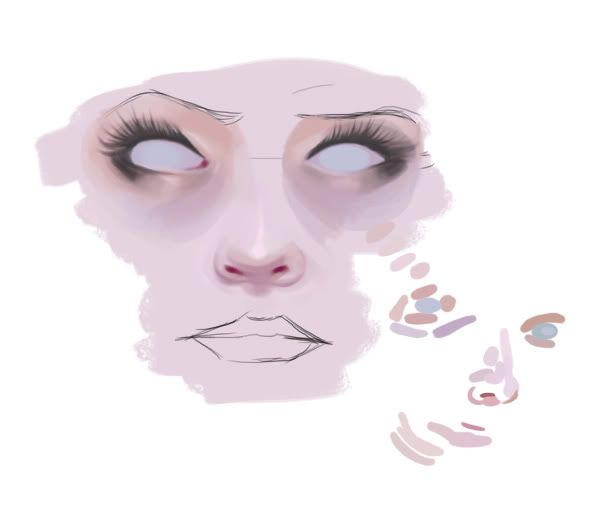
I do the same thing I did with the first eye -- went to the eyelash layer and put a brush on it to get my bearings and went back to my eye layer and worked around it. Same thing basically as the first eye.
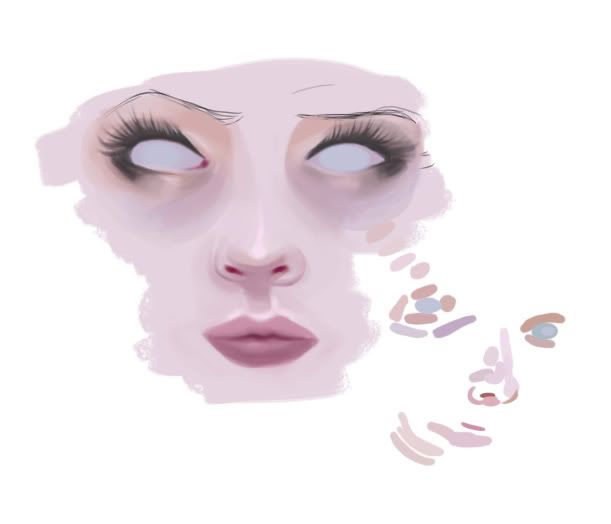
I pick up a color from the lip section -- I just needed one color to work, since I'm blending with the skin. I take down the opacity and sweep across the lips lighly, then make a dark line in the center and picking up colors, blend the two shades. I pick up colors from the eyes to make a bit of a more muted color and add a dark red line in the center for the mouth line. Add a bit of purple and a highlight above the lip.
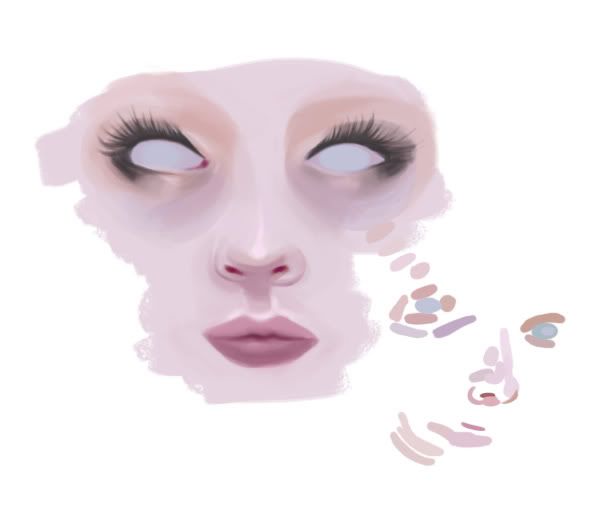
I cover the eyebrows I sketched with colors I picked up from the palette. Basically, just three shades I smoothed together, from light (at the brow) and dark at the edge of the forehead.
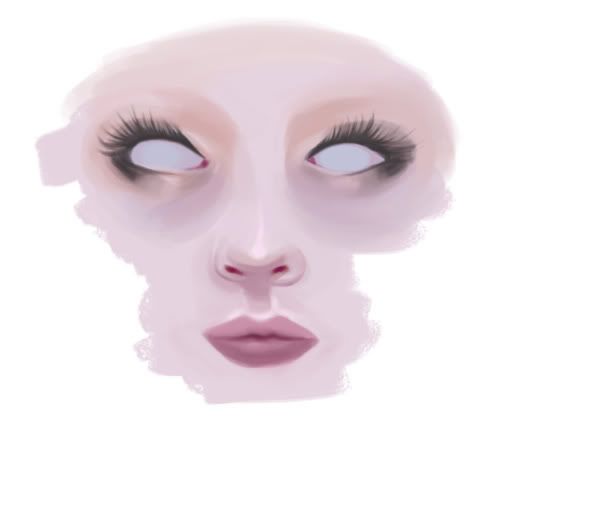
I build up with the colors for the forehead and hide my color palette and background white so I can merge all the layers. I usually duplicate the merged layer once more and then merge it again to strengthen the colors around the edges so I can know where to erase the excess. I define the jawline by picking up colors from the rest of the face (and the hidden palette) and begin to erase the excess.

I flip the picture to fix some mistakes.
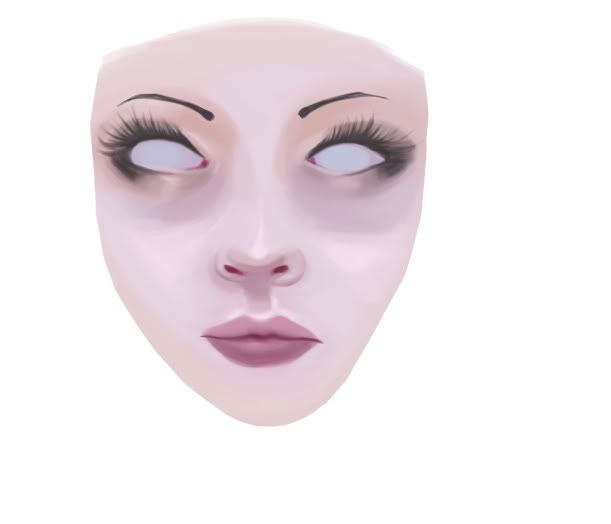
I flip it back and add the eyebrows with just a swipe of a hard 5-pixel brush and add a tiny bit of definition to the lips with the same darkish color.
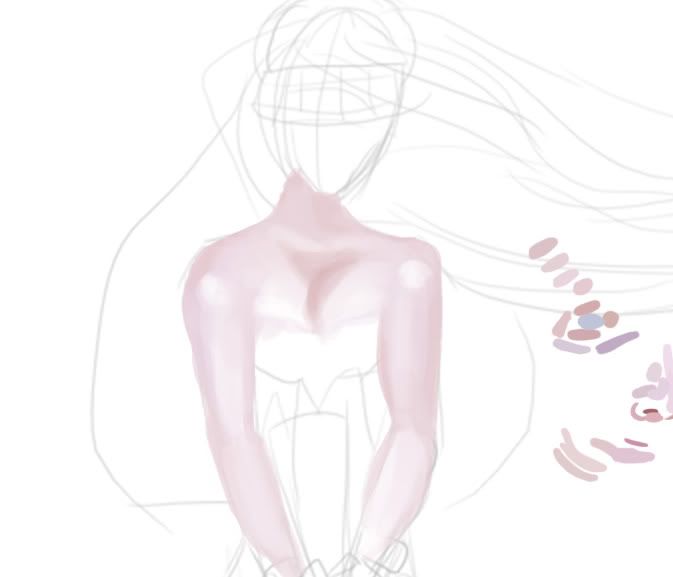
I blow up the body concept sketch double and paste the palette on a new layer. Making a new layer on TOP of the sketch, I just begin lightly laying down colors. Mainly because for this type of picture, the focus is on the face and the body and other details are more shape than formed picture. I've always loved this unfinished type of drawing since I was a little girl and saw sketches drawn like that in some book lol Focus on the face and not the rest of it. I also want it to be kind of hazy and soft. My trick for making the scratching coloring style? The eraser. :D I continue down the sketching, adding things here and nixing them there. Nothing major; I take out the chains.
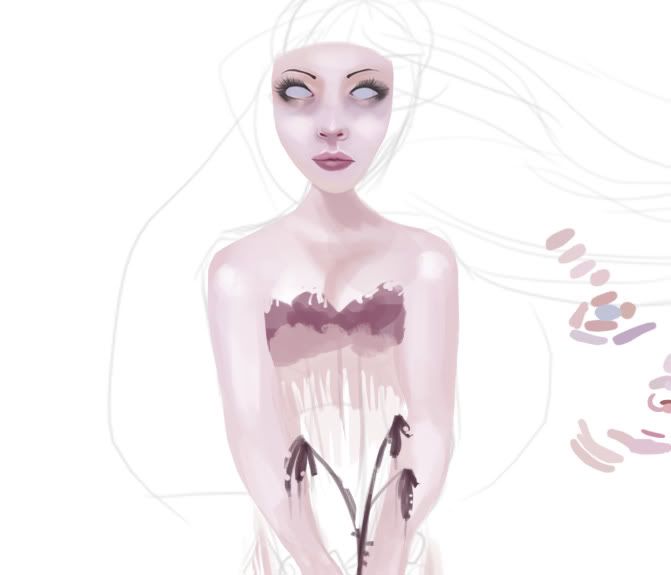
Now I shrink the face and fit it where the head is -- I always do my pictures in pieces. If I doing a super detailed picture, I draw the hands around 700x700 each and shrink them, same with the feet and other details. I always sharpen the face a tiiiiny amount, since it gets blurred in the transition. From here, I just add the veil I sketched and the hair using the 3-pixel hard brush and erasing a bit. I do the erasing around the edges because I wanted it to have a deteriorating feel -- like the picture is sweet and rotting. Also, I add some highlights to the face to match the skin highlights.

The last detail is a sketchy flower flowing from her gown; the flowers I gave her are dead and she needs a black funeral rose.
To finish I copy merged, paste in new document, shrink it slightly and sharpen the entire thing very very slightly.
Aaaaaand ...

Nevermore by *dr-runcible on deviantART
Note: not exactly a tutorial, since I dunno if you'll learn anything. I do things my way, and there are better ways, but this is MY way, so. :D
Tools:
Zhuzhu's custom brushes -- mainly Oils 125 Smooth Flat set to Pen Pressure at varying sizes.
Eyelash brushes by Trisste
Photoshop7

I start with a concept sketch of the entire thing. Like said in all my previous tuts -- I don't recommend starting with a tiny sketch like I do, I just hate sketching big. I have been listening to Halloween music and wanted to do a spooky bride. The sketch always differs somewhat from the main picture, but this is what I think I want it to look like.

I do a to-scale sketch of the face. I always try to get it to look as much like the final product as I can. It helps. :(

I paste on my colors on a new layer. I get them from everywhere -- modified photographs, stocks, my own head etc. This is a combo of all of them and I made it in a new document in the shape of a face so I could remember where exactly all the colors go. :)

Underneath the sketch on a new layer I fill it in with a skin color.

On the same skin layer I crudely block in some colors to give me an idea.

On a new layer above the sketch I pick up the colors from my palette and begin to block in the colors, blending by picking up colors in between the blocks with the eyedropper tool.

I add more colors and add an eyelash brush to give me my bearings as far as the eye shape goes. I modify it by adding more lashes with a 3-pixel hard brush and smudge the lashes a bit. I always add my lashes on a new layer.

I block in the colors for the nose on the same layers as the eyes using colors from my palette.

I do the nose the same way as the eyes -- blending by picking up colors that mix with the eyedropper. I pick up some blue from the eyes to bring the colors a bit more together and add some purple for dark contrast.

Add a highlight to the nose. I do the second eye picking up colors from my palette and also from my first eye. LOL I always do things out of order. But I added some non-palette colors to the first eye (more blues) so I need to add them in to make both of them match.

I do the same thing I did with the first eye -- went to the eyelash layer and put a brush on it to get my bearings and went back to my eye layer and worked around it. Same thing basically as the first eye.

I pick up a color from the lip section -- I just needed one color to work, since I'm blending with the skin. I take down the opacity and sweep across the lips lighly, then make a dark line in the center and picking up colors, blend the two shades. I pick up colors from the eyes to make a bit of a more muted color and add a dark red line in the center for the mouth line. Add a bit of purple and a highlight above the lip.

I cover the eyebrows I sketched with colors I picked up from the palette. Basically, just three shades I smoothed together, from light (at the brow) and dark at the edge of the forehead.

I build up with the colors for the forehead and hide my color palette and background white so I can merge all the layers. I usually duplicate the merged layer once more and then merge it again to strengthen the colors around the edges so I can know where to erase the excess. I define the jawline by picking up colors from the rest of the face (and the hidden palette) and begin to erase the excess.

I flip the picture to fix some mistakes.

I flip it back and add the eyebrows with just a swipe of a hard 5-pixel brush and add a tiny bit of definition to the lips with the same darkish color.

I blow up the body concept sketch double and paste the palette on a new layer. Making a new layer on TOP of the sketch, I just begin lightly laying down colors. Mainly because for this type of picture, the focus is on the face and the body and other details are more shape than formed picture. I've always loved this unfinished type of drawing since I was a little girl and saw sketches drawn like that in some book lol Focus on the face and not the rest of it. I also want it to be kind of hazy and soft. My trick for making the scratching coloring style? The eraser. :D I continue down the sketching, adding things here and nixing them there. Nothing major; I take out the chains.

Now I shrink the face and fit it where the head is -- I always do my pictures in pieces. If I doing a super detailed picture, I draw the hands around 700x700 each and shrink them, same with the feet and other details. I always sharpen the face a tiiiiny amount, since it gets blurred in the transition. From here, I just add the veil I sketched and the hair using the 3-pixel hard brush and erasing a bit. I do the erasing around the edges because I wanted it to have a deteriorating feel -- like the picture is sweet and rotting. Also, I add some highlights to the face to match the skin highlights.

The last detail is a sketchy flower flowing from her gown; the flowers I gave her are dead and she needs a black funeral rose.
To finish I copy merged, paste in new document, shrink it slightly and sharpen the entire thing very very slightly.
Aaaaaand ...

Nevermore by *dr-runcible on deviantART