Tutorial: Al Pacino in The Godfather
So, yesterday I was making icons from The Godfather and coloring the indoor scenes caps was HELL, I tell ya..worse than Supernatural..'nuff said. I found some friends in mr. Channel Mixer and the Curves chicks XD
here's a tut to give Micheal Corleone the coloring he deserves =)
From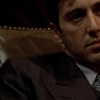
to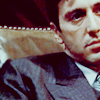
Program: Photoshop CS2
Includes: Curves, Channel Mixer, Selective Colors
Took my cap, dragged it on a 100x100 blank canvas and scaled it down as I liked.
This is my base:

Curves: RGB (I:38, 0:87)
set to screen 90%
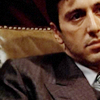
Duplicate the Curves layer and keep it at screen. Lower the opacity to 41%

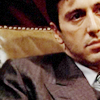
Let's give some color. Create another curves layer, with these settings:
RGB: 1st(I:51, O:76) ; 2nd(I:145; 0:196)
Red: 1st(I:59, O:85) ; 2nd(I:153; 0:125)
Blue: 1st(I:55, O:71) ; 2nd(I:162; 0:178)
Leave to Normal and lower the opacity to 50%
Selective Colors layer
R: -21, 0, -1, 13
Y: -25, 0, 8, 13
G: 24, -30, 18, 15
C: 100, 9, 32, 56
W: 0, 0, 0, -23
N: 7, 0, -7, 8
B: 0, 0, 0, 11
Color fill layer: #070e39, set to exclusion 58%
Channel mixer:
Red: 84, 10, -4
Green: -4, 104, 0
Blue: 2, 0, 96 Constant 2%
Set it to darken 60%
Selective Colors:
R: -56, 0, 39, 17
Y: -25, 0, -33, 13
C: 100, 0, 0, 100
N: 7, 0, -7, 9
B: 0, 0, 0, 11
Lower the opacity to 75%

And now one of my best friends.
Photo Filter: Cooling Filter (82)
Lower the opacity to 20%
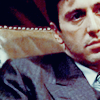
Color fill: #260700, set to lighten 81%

Color fill: #231000, set to exclusion 52%

Brightness/Contrast: -4, +8

And you're done!
With the same technique I made also:
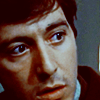
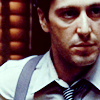
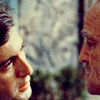
and pretty all the GF ones from this batch
Hope it's useful. Show me what you got if you use it ^^
Enjoy!
here's a tut to give Micheal Corleone the coloring he deserves =)
From

to

Program: Photoshop CS2
Includes: Curves, Channel Mixer, Selective Colors
Took my cap, dragged it on a 100x100 blank canvas and scaled it down as I liked.
This is my base:

Curves: RGB (I:38, 0:87)
set to screen 90%

Duplicate the Curves layer and keep it at screen. Lower the opacity to 41%


Let's give some color. Create another curves layer, with these settings:
RGB: 1st(I:51, O:76) ; 2nd(I:145; 0:196)
Red: 1st(I:59, O:85) ; 2nd(I:153; 0:125)
Blue: 1st(I:55, O:71) ; 2nd(I:162; 0:178)
Leave to Normal and lower the opacity to 50%

Selective Colors layer
R: -21, 0, -1, 13
Y: -25, 0, 8, 13
G: 24, -30, 18, 15
C: 100, 9, 32, 56
W: 0, 0, 0, -23
N: 7, 0, -7, 8
B: 0, 0, 0, 11

Color fill layer: #070e39, set to exclusion 58%

Channel mixer:
Red: 84, 10, -4
Green: -4, 104, 0
Blue: 2, 0, 96 Constant 2%
Set it to darken 60%

Selective Colors:
R: -56, 0, 39, 17
Y: -25, 0, -33, 13
C: 100, 0, 0, 100
N: 7, 0, -7, 9
B: 0, 0, 0, 11
Lower the opacity to 75%

And now one of my best friends.
Photo Filter: Cooling Filter (82)
Lower the opacity to 20%

Color fill: #260700, set to lighten 81%

Color fill: #231000, set to exclusion 52%

Brightness/Contrast: -4, +8

And you're done!
With the same technique I made also:
and pretty all the GF ones from this batch
Hope it's useful. Show me what you got if you use it ^^
Enjoy!