Tutorial: the X-Files
Requested by pnr from this post
How to go from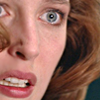
to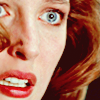
Program: Photoshop 8
Includes: Gradient Map, Levels, Selective Color
Translatable : no
PSD: no
I used this cap from Pusher (s3) from xfphotos.fredfarm.com

crop and stuff as you like it.
Duplicate the base twice, set the first layer to soft light, the second one to screen 15%
Layer >> New Adjustment Layer >> Selective Colors
R: -18, 13, 29, 0
Y: 100, 15, -29, -25
B: 43, 19, -10, 0
W: 100, 0, -19, -9
N: 21, -6, -9, 3
Layer >> New Adjustment Layer >> Levels
RGB: Input Levels: 50 - 1,40- 255
Output Levels: 10-255
Red; Input : 0-1,10-255
Output: 10-255
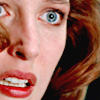
Layer >> New Adjustment Layer >> Hue/Saturation
Master: 0, 12, 0
Reds: 0, 27, 0
Cyans: 0, 37, 0
lower the opacity to 70%
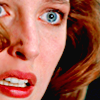
Layer>> New Fill Layer >> Solid Color: #3E1E04
set to exclusion
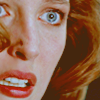
Other 2 exclusion layers
- #01040E
- #000619
both 100% opacity
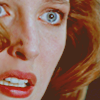
Layer >> New Adjustment Layer >> Brightness/Contrast
Br: +10
Contrast: 37
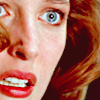
Layer >> New Adjustment Layer >> Gradient Map
Choose the 3rd gradient from the left (the black to white one) and set to screen 40%
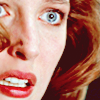
Layer >> New Fill Layer >> Solid Color : #DED4D1
set to color burn 44%
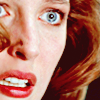
Another fill layer: #F9F7E8
set to multiply 100%

of course you may play with the opacities and layers as you like depending on your base.
---
I used the same technique for other icons of the batch BUT in the first step, instead of a soft light layer I opted for a screen layer, so that the duplicated base layers were 2 (or more) screen layers.
and you're done! :D
Hope you like it ^^
How to go from

to

Program: Photoshop 8
Includes: Gradient Map, Levels, Selective Color
Translatable : no
PSD: no
I used this cap from Pusher (s3) from xfphotos.fredfarm.com

crop and stuff as you like it.
Duplicate the base twice, set the first layer to soft light, the second one to screen 15%

Layer >> New Adjustment Layer >> Selective Colors
R: -18, 13, 29, 0
Y: 100, 15, -29, -25
B: 43, 19, -10, 0
W: 100, 0, -19, -9
N: 21, -6, -9, 3

Layer >> New Adjustment Layer >> Levels
RGB: Input Levels: 50 - 1,40- 255
Output Levels: 10-255
Red; Input : 0-1,10-255
Output: 10-255

Layer >> New Adjustment Layer >> Hue/Saturation
Master: 0, 12, 0
Reds: 0, 27, 0
Cyans: 0, 37, 0
lower the opacity to 70%

Layer>> New Fill Layer >> Solid Color: #3E1E04
set to exclusion

Other 2 exclusion layers
- #01040E
- #000619
both 100% opacity

Layer >> New Adjustment Layer >> Brightness/Contrast
Br: +10
Contrast: 37

Layer >> New Adjustment Layer >> Gradient Map
Choose the 3rd gradient from the left (the black to white one) and set to screen 40%

Layer >> New Fill Layer >> Solid Color : #DED4D1
set to color burn 44%

Another fill layer: #F9F7E8
set to multiply 100%

of course you may play with the opacities and layers as you like depending on your base.
---
I used the same technique for other icons of the batch BUT in the first step, instead of a soft light layer I opted for a screen layer, so that the duplicated base layers were 2 (or more) screen layers.
and you're done! :D
Hope you like it ^^