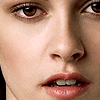
tutorial 01
This is my first tutorial, so please bare with me if my explaining sucks. I made this tutorial requested by
brooke_davis23 @ HERE. Made in Photoshop CS, I have no idea if it's translatable or not.

→
1.Take your base and duplicate it once, and set that to screen, opacity 80%.
2.Make a new selective coloring layer (which you will set at Normal, opacity 60%), with these properties:
REDS: -30, +22, +35, +100
YELLOWS: 0, +30, +51, +63
WHITES: 0, 0, +16, -10
NEUTRALS: -23, -7, 0, +13
BLACKS: 0, 0, 0, +2
3.Make a new color balance layer, with these properties:
MIDTONES: +41, 0, +2
SHADOWS: +4, 0, 0
HIGHLIGHTS: +3, 0, -7
4.Add the following texture (made by me)
and set it to Soft light opacity 100%
5.Add a new fill layer, with #553324 and set it to soft light, opacity 48%
6.Add a new fill layer, with #EB1B2E and set it to Multiply, opacity 10% and FILL 60%
7.Duplicate your base and drag it to the top. Desaturate it (ctrl+shift+u) and set it to Darken at opacity 17%.
8.Add a new fill layer #452A08 an set to Exclusion 50% and FILL 17%
9.Add this texture (made by me)
and set it to Overlay at opacity 48%
10.Add this texture (also made by me)
and set it to soft light opacity 100%.
11.Make a new layer and take a soft brush and make a white blob not quite in the center, and set that to Soft light opcaity 100%.
12.Now flatten your image and then duplicate it. Using the blur tool (opacity 56%) gently use it on the face (NOT THEY EYES OR MOUTH).
13.Now use the sharpen tool set it to lighten at 40% and use it on the eyes and mouth. Flatten your image again and sharpen it again if you'd like and YOUR DONE! :)
Other examples with the same coloring thought with some adjustments to fit the image used :


brooke_davis23 @ HERE. Made in Photoshop CS, I have no idea if it's translatable or not.

→

1.Take your base and duplicate it once, and set that to screen, opacity 80%.
2.Make a new selective coloring layer (which you will set at Normal, opacity 60%), with these properties:
REDS: -30, +22, +35, +100
YELLOWS: 0, +30, +51, +63
WHITES: 0, 0, +16, -10
NEUTRALS: -23, -7, 0, +13
BLACKS: 0, 0, 0, +2
3.Make a new color balance layer, with these properties:
MIDTONES: +41, 0, +2
SHADOWS: +4, 0, 0
HIGHLIGHTS: +3, 0, -7
4.Add the following texture (made by me)

and set it to Soft light opacity 100%
5.Add a new fill layer, with #553324 and set it to soft light, opacity 48%
6.Add a new fill layer, with #EB1B2E and set it to Multiply, opacity 10% and FILL 60%
7.Duplicate your base and drag it to the top. Desaturate it (ctrl+shift+u) and set it to Darken at opacity 17%.
8.Add a new fill layer #452A08 an set to Exclusion 50% and FILL 17%
9.Add this texture (made by me)

and set it to Overlay at opacity 48%
10.Add this texture (also made by me)

and set it to soft light opacity 100%.
11.Make a new layer and take a soft brush and make a white blob not quite in the center, and set that to Soft light opcaity 100%.
12.Now flatten your image and then duplicate it. Using the blur tool (opacity 56%) gently use it on the face (NOT THEY EYES OR MOUTH).
13.Now use the sharpen tool set it to lighten at 40% and use it on the eyes and mouth. Flatten your image again and sharpen it again if you'd like and YOUR DONE! :)
Other examples with the same coloring thought with some adjustments to fit the image used :


