When I'm not drawing on papers, I'm drawing on my face.
These photos are part of my makeover’s photo shoots of the [Red Red Eyessssssss : July activity] www.jeban.com . You can also see ‘How to let loose - red loose' from the link and you will probably realize how wonderful make-over and photo’s angle could do for me. *lol*
Sorry for hurting your eyes with these XD
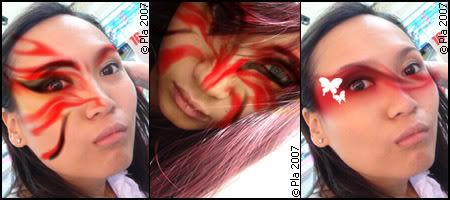
Before I start my makeover, I did some draft sketchs on my own photos in the photoshop. Which is quite wierd *lol* I decide I'll used those sketch as reference for my make up. But the finished one was quite difference from the sketchs.
:D
oh...and this is the first time I try to translate my 'How to' to English. So if you see my mistake please don't hesitate to tell me.
Thank you in forward.
: let loose - red loose : let loose the evil within
for point make up
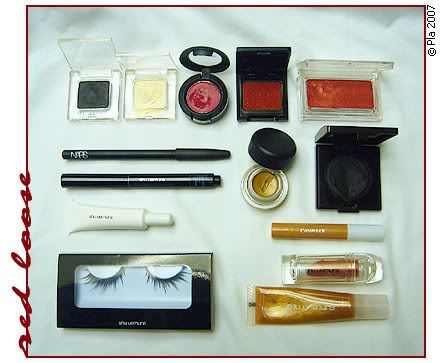
from top to bottom and left to right
EYES
(a) SHU UEMURA Pressed Eye shadow : ME BLACK 990 black matte eyeshadow.
(b) SHU UEMURA Pressed Eye shadow : IR WHITE 900Y white with golden shimmer.
(c) M.A.C Eyeshadow : Passionate red-pink eyeshadow.
(d) SUQQU Powder Eyeshadow : EX-42 AKA deep red eyeshadow with silver glitter.
(e) SHU UEMURA Glow on : P Red 19 D red blush on with golden shimmer.
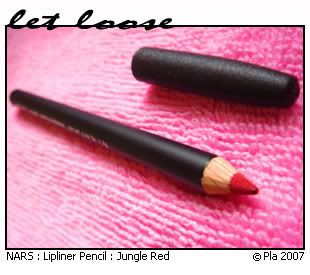
(f) NARS Lipliner Pencil : Jungle Red red lipliner
(g) SHU UEMURA Liquid Eye Liner : Black
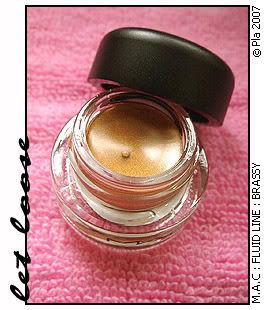
(h) M.A.C Fluid line : BRASSY golden gel liner.
(i) Laura Mercier : Cavier Eye Liner
(j) SHU UEMURA Eyelash Adhesive
(k) SHU UEMURA False Eyelashes : SLANT BLACK
LIPS
(l) CANMAKE Lip Concealer : 02 NUDE BEIGE
(m) SHU UEMURA Rouge : BG 902
(n) SHU UEMURA Gloss : Amber Gold
before
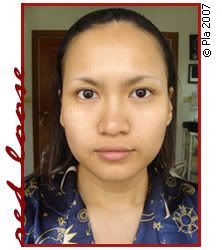
Before make up but after finished room cleaning..
BASE & FOUNDATION
After applied all eyecream, moisturizer, sunblock. I applied LM primer foundation all over my face except eyes area. Dabbed gently to let the Primer settle into my skin. It make my skin smoother and easier to applied foundation. I applied LM secret brighteneras base on my panda eyes. To reduce the darknen ring. Dabbed gently with finger tip.
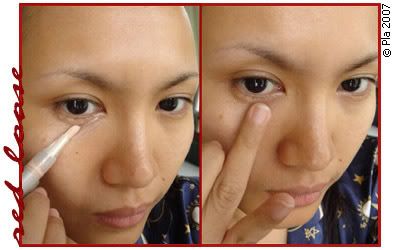
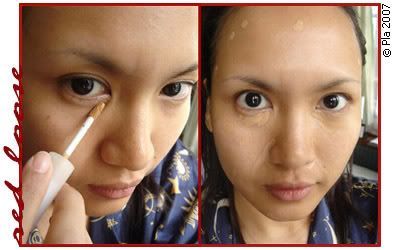
Appied SHU mark cealer on the dark rings under eyes, two side of nose and cheek and scar. Dabbed with finger's tip to bleand the concealer to the skin.
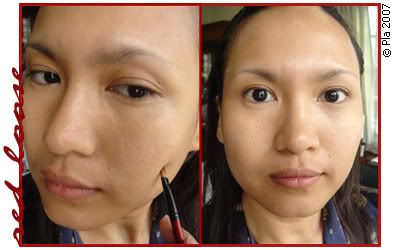
Used concealer brush applied SHU proconcealer on the redness, dark spot. Dabbed with finger's, blending the edge of concealer to the skin.
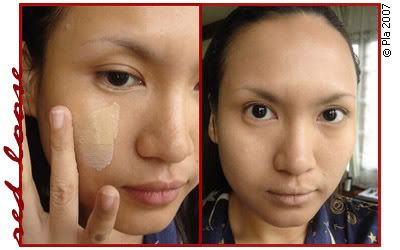
Mixed SHU purplr base control with foundation, it'll make the foundation color brighter. Start with two cheeks then applied foundation on the center of my forehead and smoothen them out to the side. I want my lips to be nude, I also applied the foundation on my lips, to erase color of my lips.
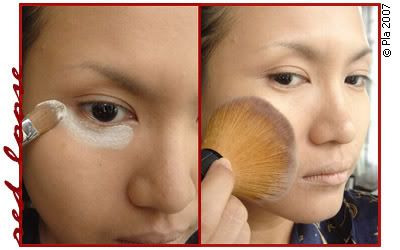
I used eyeshadow brush applied LM secret brightening powder for eyes. Then applied loose powder with brush all over my face.
I damped tissue paper with water and folded into half, and pressed gently on each side of my face to get rid of some exceeding loose powder.
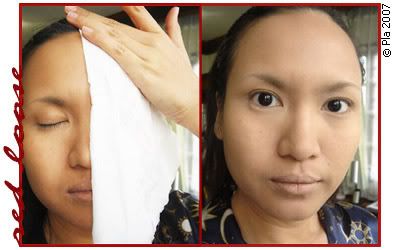
Finished all base make up step. Then the point make up.
Start with EYES
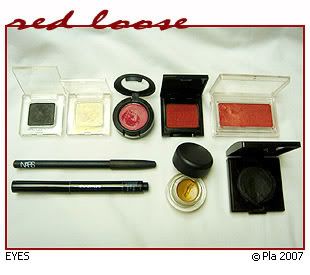
(a) (b) (c) (d) (e)
(f) (g) (h) (i)
I started with (b) on the right,
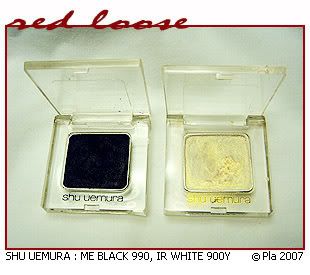
(a) (b)
Used finger or eyeshadow brush applied (b) all over my eyelids and inside the white dotted area of both eyes.
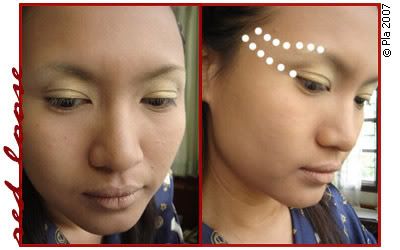
Next was red which was the main challenge of this contest. I compared all my red make up that I got.
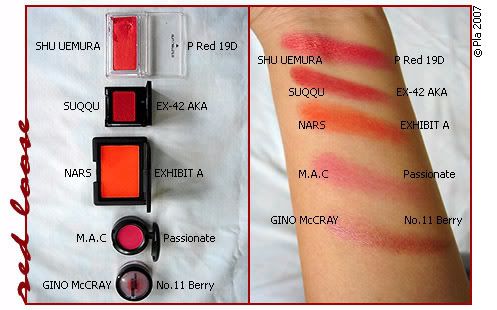
Then I choose only these items and added NARS lipliners for the bright hot red color.
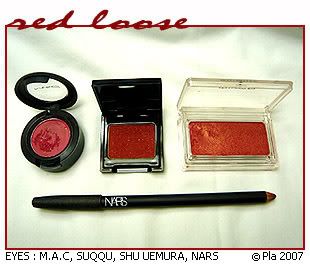
(c) (d) (e)
(f)
I choose gold and black to acompanied red make up.
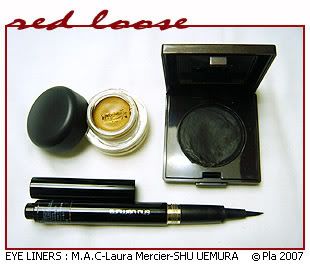
(h) (i)
(g)
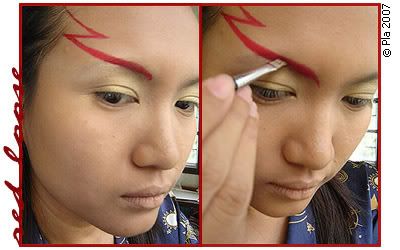
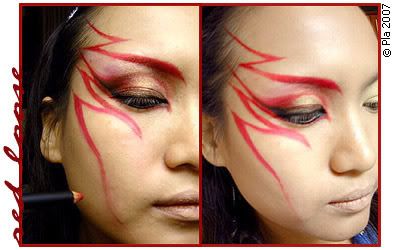
Draw the line with lipliner from nose to the middle of eyebrow's line and curved the line up like thunder shape. Used eyebrow brush to soften and even the line.
I added a few drop of MISSHA magic eye changer to (i) LM Cavier eye liner
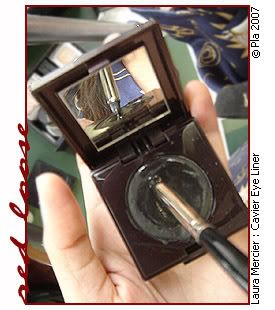
Used brush to draw the line with cavier, Then draw the curve at the end of my eyes angled to my hairlines. Draw a long tail.
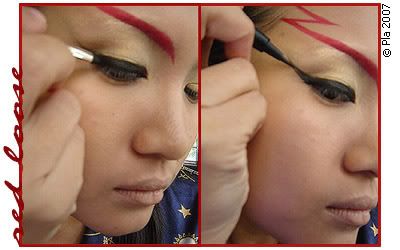
Draw the parallel line to the black eye liner with (f) NARS Jungle red lipliner, both upper and lower lines, and make a sharp > at the corner.
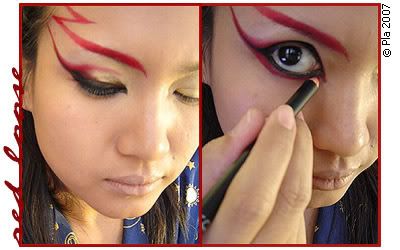
I used lipliner draw the pattern down on cheek area, you can see it's not quite like my draft sketch above. But I think this one is better.
Next I used (e) , actually it's brush on but I always use it as eyeshadow...
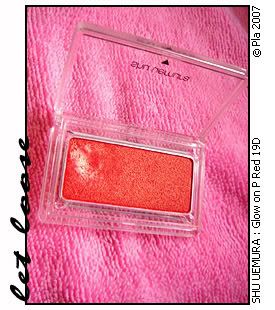
Applied (e) with eyeshadow brush to the curve of eyelid, only on the curve not whole lid. then applied the black eyeshadow (a) at the end in < shape.
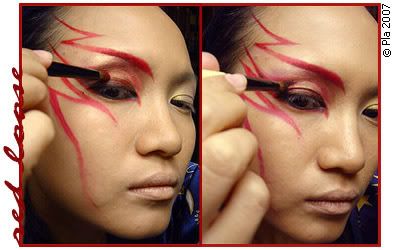
Used eyeliner brush with (h) golden metallic gel liner...
at the corner of the red > draw the > a bit longer than the red one to make it stand out. Then applied (e) with eyeshadow brush blended under the red lines. Now we finished the first eye.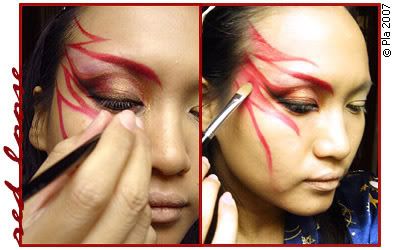
move to the next one. I decided to make it difference from the first one. I used (c)M.A.C Passionate and (d)SUQQU AKA
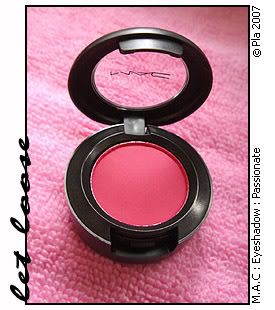
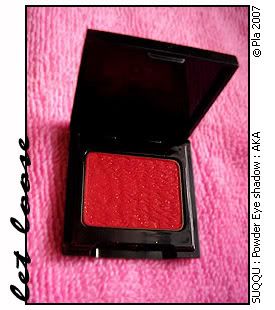
I used round brush apllied (c) on the curved of my eyes and blend it to the middle of eyelid but now whole. Then added (d) on outer curve and drag it 45 degree up to the temple but not too long.
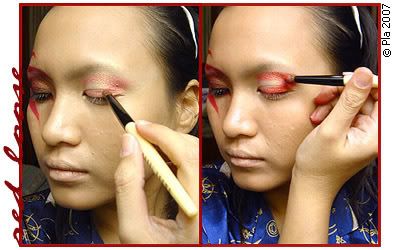
I used (f) lipliner draw the < shape and lower line, and draw longer line from the corner of red eyeshadow up to the temple. Then draw the upper line with (i) and make the tail long and parallel with red line.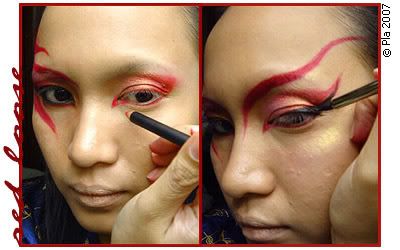
Now finished the eyes painting.
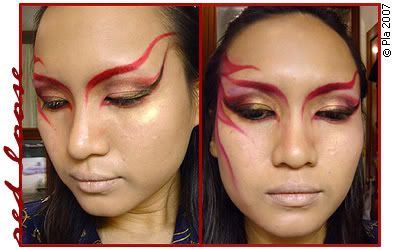
LIPS
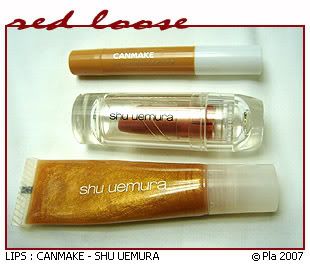
(l)
(m)
(n)
I applied (l) CANMAKE lip concealer with my finger's tips, gently dabbed on my lips. Then I applied (n) SHU Amber lip gloss with lip brush, on whole lips.
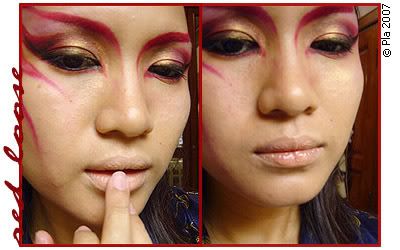
After that I added (m) at the middle of my lips and gelntly blend it to outside.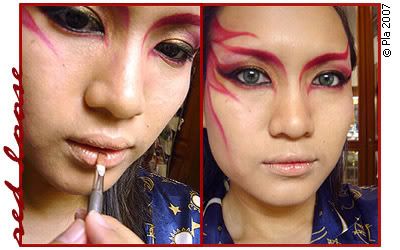
That all for lips. I put on my contact lens* and curled my eyelashes add Dejavu mascara. And I decide to put on (k) SHU UEMURA False Eyelashes
*contact lens : BIG EYES2 , Green
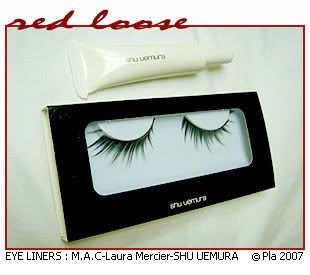
(j)
(k)
This is the first time I used false eyelashes. I made a little mess with eyelashed adhesive. So it might not look as neat as it should be. I put the base of false eyelashes as near as possible to the base of natural lashes. See the left photo is natural lashes, the right one is after I put false lashes on.
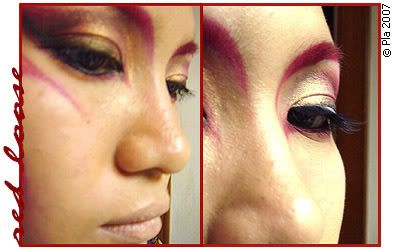
The photo below is not done yet, I just want to show the difference between with and without false eyelashes. And the put on another false lashes.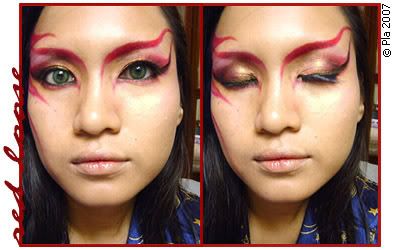
Finished all process of my makeover. Move to costumes and accessories to complete my makeover concept : let loose - red loose
after

red loose
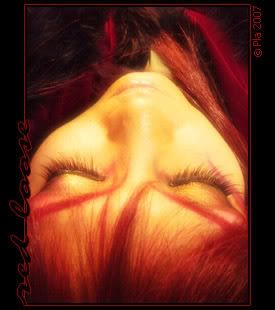
I love this false eyelashes.
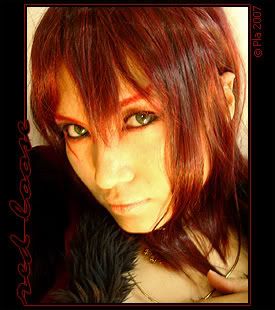
I really love this photo, it shows one of my elven ears XD
I just fold my ears to make pointed tips and hold it with hair pins
It's quite hurt but I love the result...temporary elven pointy ears *lol*.
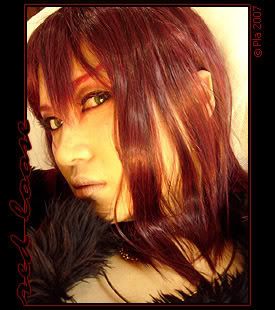
But I think I looked like Mr.Spock in this one XD
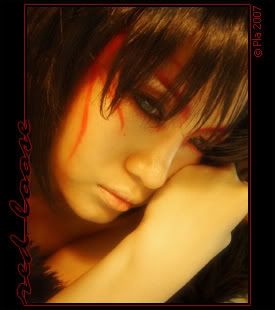
Change the wig to the shorter one.
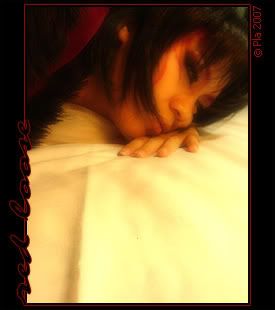
sleeping

My friend told me this one remind her of 'Crimson Spell' *lol*
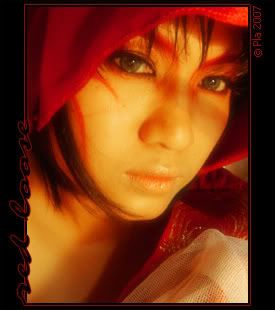
my red elven rope that I used in LOTR cosplay few years ago.
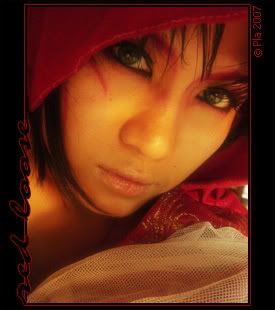
Thanks for viewing, love.
And sorry for hurting your eyes.
It was really fun to do this.
Thank you www.jeban.com for this wonderful activity.
Sorry for hurting your eyes with these XD

Before I start my makeover, I did some draft sketchs on my own photos in the photoshop. Which is quite wierd *lol* I decide I'll used those sketch as reference for my make up. But the finished one was quite difference from the sketchs.
:D
oh...and this is the first time I try to translate my 'How to' to English. So if you see my mistake please don't hesitate to tell me.
Thank you in forward.
: let loose - red loose : let loose the evil within
for point make up

from top to bottom and left to right
EYES
(a) SHU UEMURA Pressed Eye shadow : ME BLACK 990 black matte eyeshadow.
(b) SHU UEMURA Pressed Eye shadow : IR WHITE 900Y white with golden shimmer.
(c) M.A.C Eyeshadow : Passionate red-pink eyeshadow.
(d) SUQQU Powder Eyeshadow : EX-42 AKA deep red eyeshadow with silver glitter.
(e) SHU UEMURA Glow on : P Red 19 D red blush on with golden shimmer.
(f) NARS Lipliner Pencil : Jungle Red red lipliner
(g) SHU UEMURA Liquid Eye Liner : Black
(h) M.A.C Fluid line : BRASSY golden gel liner.
(i) Laura Mercier : Cavier Eye Liner
(j) SHU UEMURA Eyelash Adhesive
(k) SHU UEMURA False Eyelashes : SLANT BLACK
LIPS
(l) CANMAKE Lip Concealer : 02 NUDE BEIGE
(m) SHU UEMURA Rouge : BG 902
(n) SHU UEMURA Gloss : Amber Gold
before

Before make up but after finished room cleaning..
BASE & FOUNDATION
After applied all eyecream, moisturizer, sunblock. I applied LM primer foundation all over my face except eyes area. Dabbed gently to let the Primer settle into my skin. It make my skin smoother and easier to applied foundation. I applied LM secret brighteneras base on my panda eyes. To reduce the darknen ring. Dabbed gently with finger tip.

Appied SHU mark cealer on the dark rings under eyes, two side of nose and cheek and scar. Dabbed with finger's tip to bleand the concealer to the skin.

Used concealer brush applied SHU proconcealer on the redness, dark spot. Dabbed with finger's, blending the edge of concealer to the skin.

Mixed SHU purplr base control with foundation, it'll make the foundation color brighter. Start with two cheeks then applied foundation on the center of my forehead and smoothen them out to the side. I want my lips to be nude, I also applied the foundation on my lips, to erase color of my lips.

I used eyeshadow brush applied LM secret brightening powder for eyes. Then applied loose powder with brush all over my face.

I damped tissue paper with water and folded into half, and pressed gently on each side of my face to get rid of some exceeding loose powder.

Finished all base make up step. Then the point make up.
Start with EYES

(a) (b) (c) (d) (e)
(f) (g) (h) (i)
I started with (b) on the right,

(a) (b)
Used finger or eyeshadow brush applied (b) all over my eyelids and inside the white dotted area of both eyes.

Next was red which was the main challenge of this contest. I compared all my red make up that I got.

Then I choose only these items and added NARS lipliners for the bright hot red color.

(c) (d) (e)
(f)
I choose gold and black to acompanied red make up.

(h) (i)
(g)

Draw the line with lipliner from nose to the middle of eyebrow's line and curved the line up like thunder shape. Used eyebrow brush to soften and even the line.

I added a few drop of MISSHA magic eye changer to (i) LM Cavier eye liner

Used brush to draw the line with cavier, Then draw the curve at the end of my eyes angled to my hairlines. Draw a long tail.

Draw the parallel line to the black eye liner with (f) NARS Jungle red lipliner, both upper and lower lines, and make a sharp > at the corner.

I used lipliner draw the pattern down on cheek area, you can see it's not quite like my draft sketch above. But I think this one is better.

Next I used (e) , actually it's brush on but I always use it as eyeshadow...

Applied (e) with eyeshadow brush to the curve of eyelid, only on the curve not whole lid. then applied the black eyeshadow (a) at the end in < shape.

Used eyeliner brush with (h) golden metallic gel liner...

at the corner of the red > draw the > a bit longer than the red one to make it stand out. Then applied (e) with eyeshadow brush blended under the red lines. Now we finished the first eye.

move to the next one. I decided to make it difference from the first one. I used (c)M.A.C Passionate and (d)SUQQU AKA


I used round brush apllied (c) on the curved of my eyes and blend it to the middle of eyelid but now whole. Then added (d) on outer curve and drag it 45 degree up to the temple but not too long.

I used (f) lipliner draw the < shape and lower line, and draw longer line from the corner of red eyeshadow up to the temple. Then draw the upper line with (i) and make the tail long and parallel with red line.

Now finished the eyes painting.

LIPS

(l)
(m)
(n)
I applied (l) CANMAKE lip concealer with my finger's tips, gently dabbed on my lips. Then I applied (n) SHU Amber lip gloss with lip brush, on whole lips.

After that I added (m) at the middle of my lips and gelntly blend it to outside.

That all for lips. I put on my contact lens* and curled my eyelashes add Dejavu mascara. And I decide to put on (k) SHU UEMURA False Eyelashes
*contact lens : BIG EYES2 , Green

(j)
(k)
This is the first time I used false eyelashes. I made a little mess with eyelashed adhesive. So it might not look as neat as it should be. I put the base of false eyelashes as near as possible to the base of natural lashes. See the left photo is natural lashes, the right one is after I put false lashes on.

The photo below is not done yet, I just want to show the difference between with and without false eyelashes. And the put on another false lashes.

Finished all process of my makeover. Move to costumes and accessories to complete my makeover concept : let loose - red loose
after

red loose

I love this false eyelashes.

I really love this photo, it shows one of my elven ears XD
I just fold my ears to make pointed tips and hold it with hair pins
It's quite hurt but I love the result...temporary elven pointy ears *lol*.

But I think I looked like Mr.Spock in this one XD

Change the wig to the shorter one.

sleeping

My friend told me this one remind her of 'Crimson Spell' *lol*

my red elven rope that I used in LOTR cosplay few years ago.

Thanks for viewing, love.
And sorry for hurting your eyes.
It was really fun to do this.
Thank you www.jeban.com for this wonderful activity.