Full Icon: Fluke
From this: 
to this:

Choose an image to work with. Resize and crop it to 100x100. I got my picture of Shane West from here.
Sharpen your image and then duplicate the background layer (the layer you just sharpened).

Create a new layer and paste the following gradient into it. Set this layer to Hard Light at 100%.
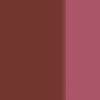
Create a new layer and paste the following gradient into it. Set this layer to Color at 100%. Fool around with the direction of your gradient so that it's to your liking.

Now, make a copy of your background layer (the first layer of your icon) and paste it on a new layer on top of all the others you just created (the gradients, etc.). Select the eraser tool (with a soft brush) and erase the around Shane's body (you're erasing the background, not him). It should look somewhat like my icon.
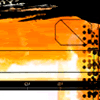
Create a new layer and paste this texture into it (thank you candycrack). Set this layer to Saturation, and proceed by selecting the eraser tool and erasing the parts of the texture that cover Shane's face.

Shane's face is a little too dark now for my liking, so I made a new layer and pasted this gradient onto it. I then erased everything on that layer except for the pink/orange gradient over his body. Set that layer to Linear Dodge at 55%.

Your icon should now look somewhat like mine.
Create a new layer. With the rectangle tool, I simply drew a strip of black at the bottom of my icon. I set this layer to Soft Light at 100%.
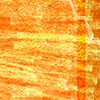
Create a new layer. I put this texture on the new layer and set it to Overlay at 25% (thank you candycrack).

Now it's time to add your brushes. Create a new layer. I'm not going to tell you the exact brushes I used, because this is your icon, so add any brushes that you feel look good and keep this layer on Normal at 100%. This is my icon so far (the brushes I use can be found in my memories).
Now for the text. To get that little red swipe behind your text, you simply create a new image (100x100, transparent background), take your paintbrush and make a few little strips of colour. Then you copy and paste that little patch of lines onto your icon (on a new layer). **My blob brushes can be found in my icon journal's memories.
Now for the actual text part. You usually don't have to create a new layer for this, since it does it automatically for you, but if it doesn't, then be sure to create a new layer for the text. Choose whatever text you'd like to be on your icon and place it anywhere on your graphic. I chose to write 'fluke' in white (Georgia, 8pt, Strong).
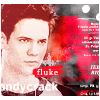
Then I added a white border to my icon.
If you use this tutorial or my icons please credit my icon journal, raadiocens and leave a comment with any feedback.
1+ No direct linking.
2+ Credit in memories/userinfo.
3+ Comment if you take/use anything.
4+ Do not distribute as your own.
5+ Join this community if you plan on coming back.

to this:

Choose an image to work with. Resize and crop it to 100x100. I got my picture of Shane West from here.
Sharpen your image and then duplicate the background layer (the layer you just sharpened).

Create a new layer and paste the following gradient into it. Set this layer to Hard Light at 100%.

Create a new layer and paste the following gradient into it. Set this layer to Color at 100%. Fool around with the direction of your gradient so that it's to your liking.

Now, make a copy of your background layer (the first layer of your icon) and paste it on a new layer on top of all the others you just created (the gradients, etc.). Select the eraser tool (with a soft brush) and erase the around Shane's body (you're erasing the background, not him). It should look somewhat like my icon.

Create a new layer and paste this texture into it (thank you candycrack). Set this layer to Saturation, and proceed by selecting the eraser tool and erasing the parts of the texture that cover Shane's face.

Shane's face is a little too dark now for my liking, so I made a new layer and pasted this gradient onto it. I then erased everything on that layer except for the pink/orange gradient over his body. Set that layer to Linear Dodge at 55%.

Your icon should now look somewhat like mine.
Create a new layer. With the rectangle tool, I simply drew a strip of black at the bottom of my icon. I set this layer to Soft Light at 100%.

Create a new layer. I put this texture on the new layer and set it to Overlay at 25% (thank you candycrack).

Now it's time to add your brushes. Create a new layer. I'm not going to tell you the exact brushes I used, because this is your icon, so add any brushes that you feel look good and keep this layer on Normal at 100%. This is my icon so far (the brushes I use can be found in my memories).
Now for the text. To get that little red swipe behind your text, you simply create a new image (100x100, transparent background), take your paintbrush and make a few little strips of colour. Then you copy and paste that little patch of lines onto your icon (on a new layer). **My blob brushes can be found in my icon journal's memories.
Now for the actual text part. You usually don't have to create a new layer for this, since it does it automatically for you, but if it doesn't, then be sure to create a new layer for the text. Choose whatever text you'd like to be on your icon and place it anywhere on your graphic. I chose to write 'fluke' in white (Georgia, 8pt, Strong).

Then I added a white border to my icon.
If you use this tutorial or my icons please credit my icon journal, raadiocens and leave a comment with any feedback.
1+ No direct linking.
2+ Credit in memories/userinfo.
3+ Comment if you take/use anything.
4+ Do not distribute as your own.
5+ Join this community if you plan on coming back.