Tutorial: Billie Piper in True Love
We're going from: 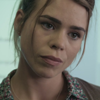
to:
Requested by karinmcr
STEP ONE

>
I created a new Curves layer, clicked on Auto, and to brighten the picture more I added another point:
RGB - Point 1: O 138 I 87
STEP TWO

>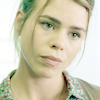
I created a copy merged layer and went to Image > Adjustments > Variations:
Fine ||| x ||| Coarse
Midtones: More Green x1
Fine ||||| x | Coarse
Midtones: Lighter x1
Fine || x |||| Coarse
Midtones: Lighter x1
Saturation: More Saturation x1
Basically I brightened the picture a lot and I gave it a yellow/green-ish tint.
STEP THREE

>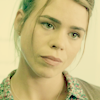
I created a new Fill layer and I picked the color from the Hero palette (███, #f0d878). I set this layer to Multiply, 50% opacity.
STEP FOUR

>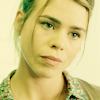
I created a copy merged layer and I set it to Soft Light, 100% opacity, to add some contrast back.
STEP FIVE

>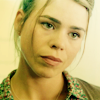
The contrast/lighting was a bit flat, so I picked this texture by lookslikerain:
And I set it to Soft Light, 100% opacity.
STEP SIX

>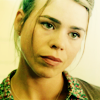
I created a Curves layer and fiddled with all the settings but the RBG ones:
Red - Point 1: O 77 I 128 (I added some cyan - midtones/shadows mostly)
Green - Point 1: O 120 I 148 (I added some magenta - midtones mostly)
Blue - Point 1: O 155 I 130 (I added some blue - midtones/highlights mostly)
The outcome was too washed out and blue-y, and I didn't want to alter the overall yellow/green color scheme, so I set this layer to Soft Light, 73% opacity. This way I didn't change the coloring much, but I improved the contrast.
STEP SEVEN

>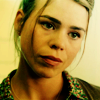
I created another Curves layer and without touching it I set it to Multiply, 100%. Again, this step works with any kind of Adjustment layer and it is the same thing as copying the merged layers and pasting it on top. And again, it's more convenient because it works no matter which base you have below, and you won't have to replace it in case you change your base.
You may notice that sometimes I don't follow my own advice and use a copy merged layer: that's because I probably tried to use Variations or some Filter and it didn't work, so I tried to change its blending mode instead of deleting it and creating an Adjustment layer to do the same. Hope it makes semse!
STEP EIGHT

>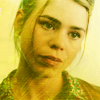
At this point it was a tad too dark and I wanted to add some texture, so I picked this one of mine:
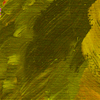
And I set it to Screen, 100% opacity.
This way I brightened the picture, I added some more green/yellow tones and I also gave it a painted like quality.
STEP NINE

>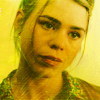
At this point it was too washed out, so I created a copy merged layer and used Variations:
Fine ||| x ||| Coarse
Saturation: More Saturation x1
Midtones: Darker x1
STEP TEN

>
And here comes a layer I don't quite understand myself. xD Here's what I think I did:
01. I turned the previous layer invisible.
02. I created a copy merged layer and I used Variations:
Fine ||||| x | Coarse
Midtones: Lughter x1
Fine || x |||| Coarse
Midtones: More Cyan x1, More Yellow x2, More Green x1, Lighter x1
Saturation: More Saturation x1
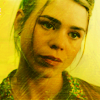
Those settings give you a similar result, not exactly the same result. I don't know what I did, really. It looks like this:
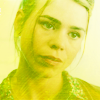
03. At this point I think I went WTF AM I DOING, so I set this layer to Multiply, 71% opacity and I turned the previous layer visible again.
So in the end, I only darkened the icon a little.
STEP ELEVEN

>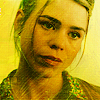
Another tricky step, because I clearly don't know what I'm doing.
01. I added this texture by ??? (let me know if you recognize it!)
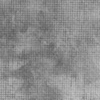
I set it to Soft Light, 100% opacity.
02. I turned the texture layer invisible, I created a copy merged layer and I used Paint Daubs (Size: 1, Contrast: 1) to sharpen it a little. I set this layer to Normal, 66% opacity.
03. Then I turned the texture layer visible and the sharpened layer invisible, I created a copy merged layer, I used Paint Daubs on it and I set it to Normal, 52% opacity.
04. Finally, I turned the previous sharpened layer visible and texture layer invisible again. I didn't delete it, though, and thank god I didn't because it gave me a clue about what I did.
Now why I did all this? I think I couldn't decide between with or without the texture so I went for both. Just an educated guess.
STEP TWELVE

>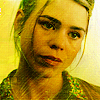
Checking contrast routine: I created a Curves layer and clicked on Auto. I masked the bit covering her forehead because it was a tad too bright.
STEP THIRTEEN

>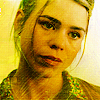
I created another Curves layer and played with the coloring:
Red - Point 1: O 137 I 115 (I added some red - midtones mostly)
Green - Point 1: O 140 I 132 (I added some green - midtones mostly)
Blue - Point 1: O 217 I 184 (I added some blue - highlights mostly)
STEP FOURTEEN

>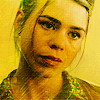
I created a new layer and using the color from the Hero palette I painted over the background:

I set this layer to Multiply, 100% opacity.
STEP FIFTEEN

>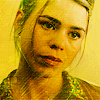
I picked this texture by emonet25:

I set it to Soft Light, 31% opacity, 59% fill.
STEP SIXTEEN

>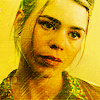
I created a Brightness/Contrast layer to increase the contrast a little:
Brightness: 9
Contrast: 11
For previous versions of PS you can replace it with a Levels layer:
RGB - Input: 37 1.42 250
And a Selective Colors layer:
Blacks: 0 -15 0 -3
STEP SEVENTEEN

>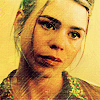
I created a Selective Colors layer to play with the coloring:
Yellows: 0 +7 -34 0
Neutrals: +23 +15 -17 0
Blacks: 0 0 0 +11
Basically, I removed some yellow and added some cyan and magenta.
STEP EIGHTEEN

>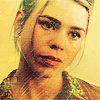
I picked this texture by fprintmoon:
And I set it to Screen, 18% opacity.
STEP NINETEEN

>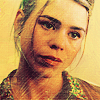
I created a copy merged layer and used Variations to remove a tad of yellow and darken the picture:
Fine ||| x ||| Coarse
Midtones: Darker x1, More Blue x1
I lowered the opacity of this layer to 62%.
STEP TWENTY

>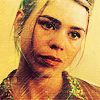
I created a Brightness/Contrast layer to increase the contrast a little:
Brightness: 0
Contrast: 21
For previous versions of PS you can use these settings instead:
Brightness: 0
Contrast: 6
STEP TWENTYONE

>
Checking contrast routine: I created a Curves layer and clicked on Auto.
I lowered the opacity of this layer to 69%.
And done!
DOWNLOAD PSD @BOX.NET
- PS CS4+
- Previous versions

to:

Requested by karinmcr
STEP ONE

>

I created a new Curves layer, clicked on Auto, and to brighten the picture more I added another point:
RGB - Point 1: O 138 I 87
STEP TWO

>

I created a copy merged layer and went to Image > Adjustments > Variations:
Fine ||| x ||| Coarse
Midtones: More Green x1
Fine ||||| x | Coarse
Midtones: Lighter x1
Fine || x |||| Coarse
Midtones: Lighter x1
Saturation: More Saturation x1
Basically I brightened the picture a lot and I gave it a yellow/green-ish tint.
STEP THREE

>

I created a new Fill layer and I picked the color from the Hero palette (███, #f0d878). I set this layer to Multiply, 50% opacity.
STEP FOUR

>

I created a copy merged layer and I set it to Soft Light, 100% opacity, to add some contrast back.
STEP FIVE

>

The contrast/lighting was a bit flat, so I picked this texture by lookslikerain:

And I set it to Soft Light, 100% opacity.
STEP SIX

>

I created a Curves layer and fiddled with all the settings but the RBG ones:
Red - Point 1: O 77 I 128 (I added some cyan - midtones/shadows mostly)
Green - Point 1: O 120 I 148 (I added some magenta - midtones mostly)
Blue - Point 1: O 155 I 130 (I added some blue - midtones/highlights mostly)
The outcome was too washed out and blue-y, and I didn't want to alter the overall yellow/green color scheme, so I set this layer to Soft Light, 73% opacity. This way I didn't change the coloring much, but I improved the contrast.
STEP SEVEN

>

I created another Curves layer and without touching it I set it to Multiply, 100%. Again, this step works with any kind of Adjustment layer and it is the same thing as copying the merged layers and pasting it on top. And again, it's more convenient because it works no matter which base you have below, and you won't have to replace it in case you change your base.
You may notice that sometimes I don't follow my own advice and use a copy merged layer: that's because I probably tried to use Variations or some Filter and it didn't work, so I tried to change its blending mode instead of deleting it and creating an Adjustment layer to do the same. Hope it makes semse!
STEP EIGHT

>

At this point it was a tad too dark and I wanted to add some texture, so I picked this one of mine:

And I set it to Screen, 100% opacity.
This way I brightened the picture, I added some more green/yellow tones and I also gave it a painted like quality.
STEP NINE

>

At this point it was too washed out, so I created a copy merged layer and used Variations:
Fine ||| x ||| Coarse
Saturation: More Saturation x1
Midtones: Darker x1
STEP TEN

>

And here comes a layer I don't quite understand myself. xD Here's what I think I did:
01. I turned the previous layer invisible.
02. I created a copy merged layer and I used Variations:
Fine ||||| x | Coarse
Midtones: Lughter x1
Fine || x |||| Coarse
Midtones: More Cyan x1, More Yellow x2, More Green x1, Lighter x1
Saturation: More Saturation x1
Those settings give you a similar result, not exactly the same result. I don't know what I did, really. It looks like this:

03. At this point I think I went WTF AM I DOING, so I set this layer to Multiply, 71% opacity and I turned the previous layer visible again.
So in the end, I only darkened the icon a little.
STEP ELEVEN

>

Another tricky step, because I clearly don't know what I'm doing.
01. I added this texture by ??? (let me know if you recognize it!)

I set it to Soft Light, 100% opacity.
02. I turned the texture layer invisible, I created a copy merged layer and I used Paint Daubs (Size: 1, Contrast: 1) to sharpen it a little. I set this layer to Normal, 66% opacity.
03. Then I turned the texture layer visible and the sharpened layer invisible, I created a copy merged layer, I used Paint Daubs on it and I set it to Normal, 52% opacity.
04. Finally, I turned the previous sharpened layer visible and texture layer invisible again. I didn't delete it, though, and thank god I didn't because it gave me a clue about what I did.
Now why I did all this? I think I couldn't decide between with or without the texture so I went for both. Just an educated guess.
STEP TWELVE

>

Checking contrast routine: I created a Curves layer and clicked on Auto. I masked the bit covering her forehead because it was a tad too bright.
STEP THIRTEEN

>

I created another Curves layer and played with the coloring:
Red - Point 1: O 137 I 115 (I added some red - midtones mostly)
Green - Point 1: O 140 I 132 (I added some green - midtones mostly)
Blue - Point 1: O 217 I 184 (I added some blue - highlights mostly)
STEP FOURTEEN

>

I created a new layer and using the color from the Hero palette I painted over the background:

I set this layer to Multiply, 100% opacity.
STEP FIFTEEN

>

I picked this texture by emonet25:

I set it to Soft Light, 31% opacity, 59% fill.
STEP SIXTEEN

>

I created a Brightness/Contrast layer to increase the contrast a little:
Brightness: 9
Contrast: 11
For previous versions of PS you can replace it with a Levels layer:
RGB - Input: 37 1.42 250
And a Selective Colors layer:
Blacks: 0 -15 0 -3
STEP SEVENTEEN

>

I created a Selective Colors layer to play with the coloring:
Yellows: 0 +7 -34 0
Neutrals: +23 +15 -17 0
Blacks: 0 0 0 +11
Basically, I removed some yellow and added some cyan and magenta.
STEP EIGHTEEN

>

I picked this texture by fprintmoon:

And I set it to Screen, 18% opacity.
STEP NINETEEN

>

I created a copy merged layer and used Variations to remove a tad of yellow and darken the picture:
Fine ||| x ||| Coarse
Midtones: Darker x1, More Blue x1
I lowered the opacity of this layer to 62%.
STEP TWENTY

>

I created a Brightness/Contrast layer to increase the contrast a little:
Brightness: 0
Contrast: 21
For previous versions of PS you can use these settings instead:
Brightness: 0
Contrast: 6
STEP TWENTYONE

>

Checking contrast routine: I created a Curves layer and clicked on Auto.
I lowered the opacity of this layer to 69%.
And done!
DOWNLOAD PSD @BOX.NET
- PS CS4+
- Previous versions