GIMP Tutorial #014
Going from this:

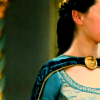
to this:

Requested by lover of narnia and Erucenide on NarniaWeb.
1. Start with a blank 100x100 image. Open your base as a layer. Scale it and crop it so that it’s less than 100 pixels high. Sharpen, etc. if you like.
2. Select your background layer. (The blank one - probably white - that you started with.) Fill it with 0b0b19. Make this layer invisible.
3. Select your base. Duplicate it and set it to ‘Overlay’ at 100% opacity. Merge your layers (Image>Merge Visible Layers>Expanded as necessary.)
4. Go Colours>Colour Balance. Use these settings:
Shadows: -20, 10, 50
Midtones: -40, 18, 32
Highlights: 12, 0, -10
Uncheck ‘Preserve luminosity’.
5. Create a new layer filled with 0b0b19. Set it to ‘Subtract’ at 100%. Merge your layers again.
6. Go Colours>Components>Channel Mixer:
Red: 136, 10, -6
Green: -18, 100, 16
Blue: -10,-26, 115
Uncheck ‘Monochrome’ and ‘Preserve luminosity’.
7. Go Edit>Fade Channel Mixer. (Make sure you do this step immediately after the Channel Mixer. No messing about with your icon in between. As soon as you do anything else, this action will not be usable.) Fade it to about 80%, set to ‘Replace’. (This will change a lot depending on your image, as it tends to make certain skin tones very pink/red.)
8. Make your blue background layer visible and merge your layers once more. (You should now have only one layer.)
9. Now open this texture:

by yours truly. Set it to ‘Multiply’ at 100%.
10. And this texture:

by jordannamorgan. Set it to ‘Screen’ at 30%.
11. Now add your text. I wrote ‘who i am’ in Garamond, size 23, f3d1a2. Move it wherever you want. When you’ve got it close, you can use the arrow keys to put it right on the line between your image and the solid colour.
12. I also wrote ‘hates who i’ve been’ in Garamond, size 12, 0b0b19. Flip it both horizontally and vertically. I set it to ‘Multiply’ at 100%. Move it underneath your other text. Because this layer wasn’t as legible as I wanted, I made it darker by duplicating it and lowering the opacity of the new layer to 30%.
13. As a finishing touch I created a new transparent layer between my textures and my base. I used a round fuzzy brush in ff0000 above Aslan and beside Edmund and set these to ‘Screen’ at 100%.
And that’s it!
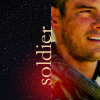
Other examples: